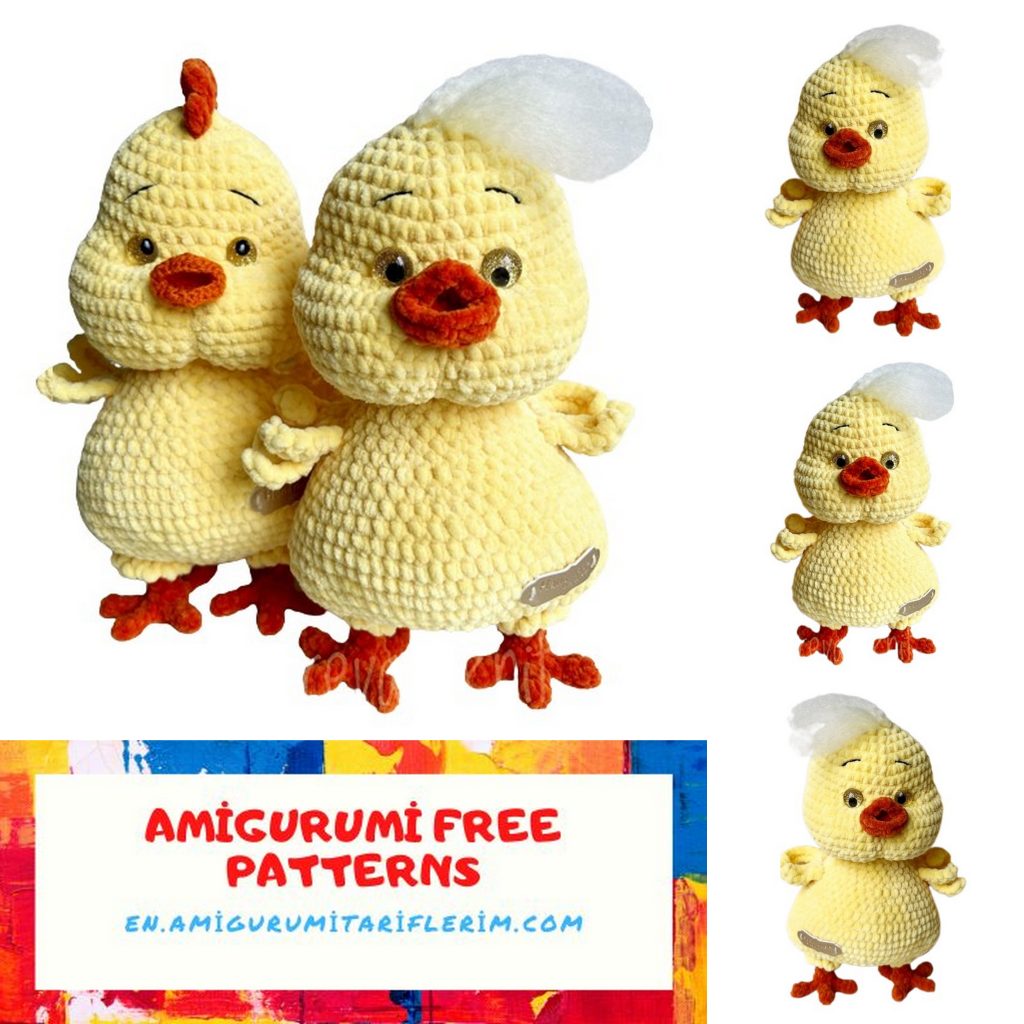
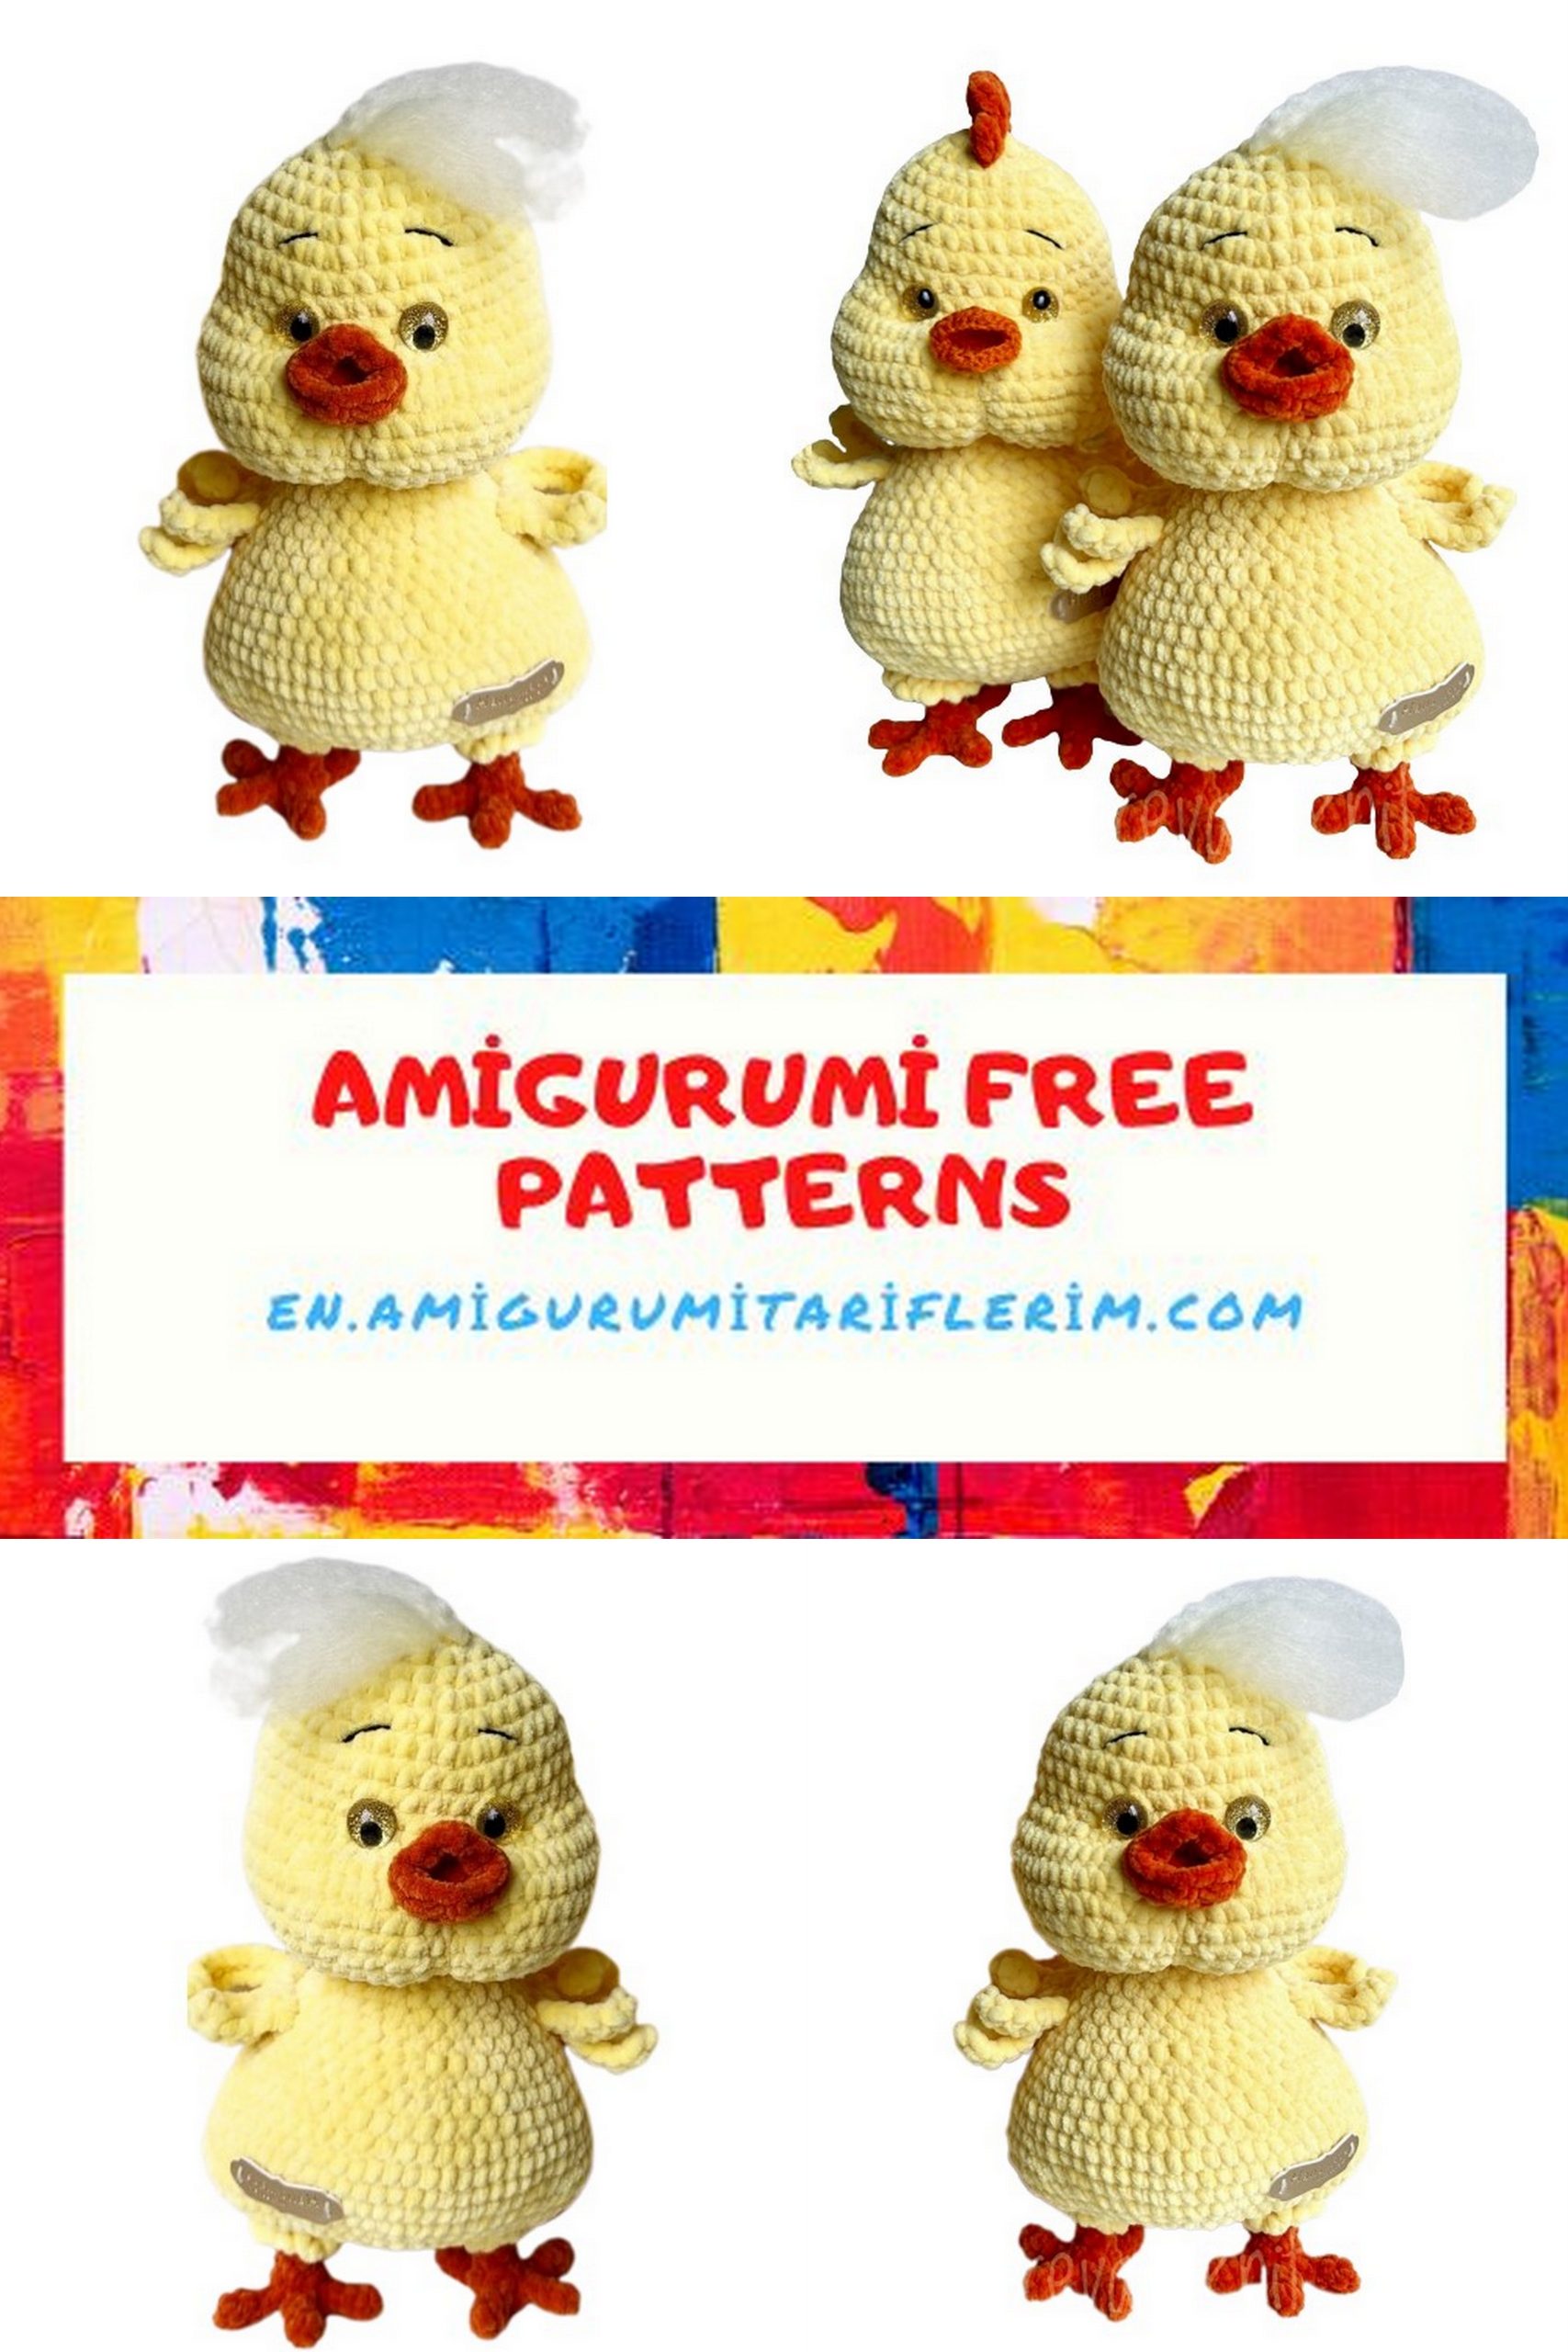
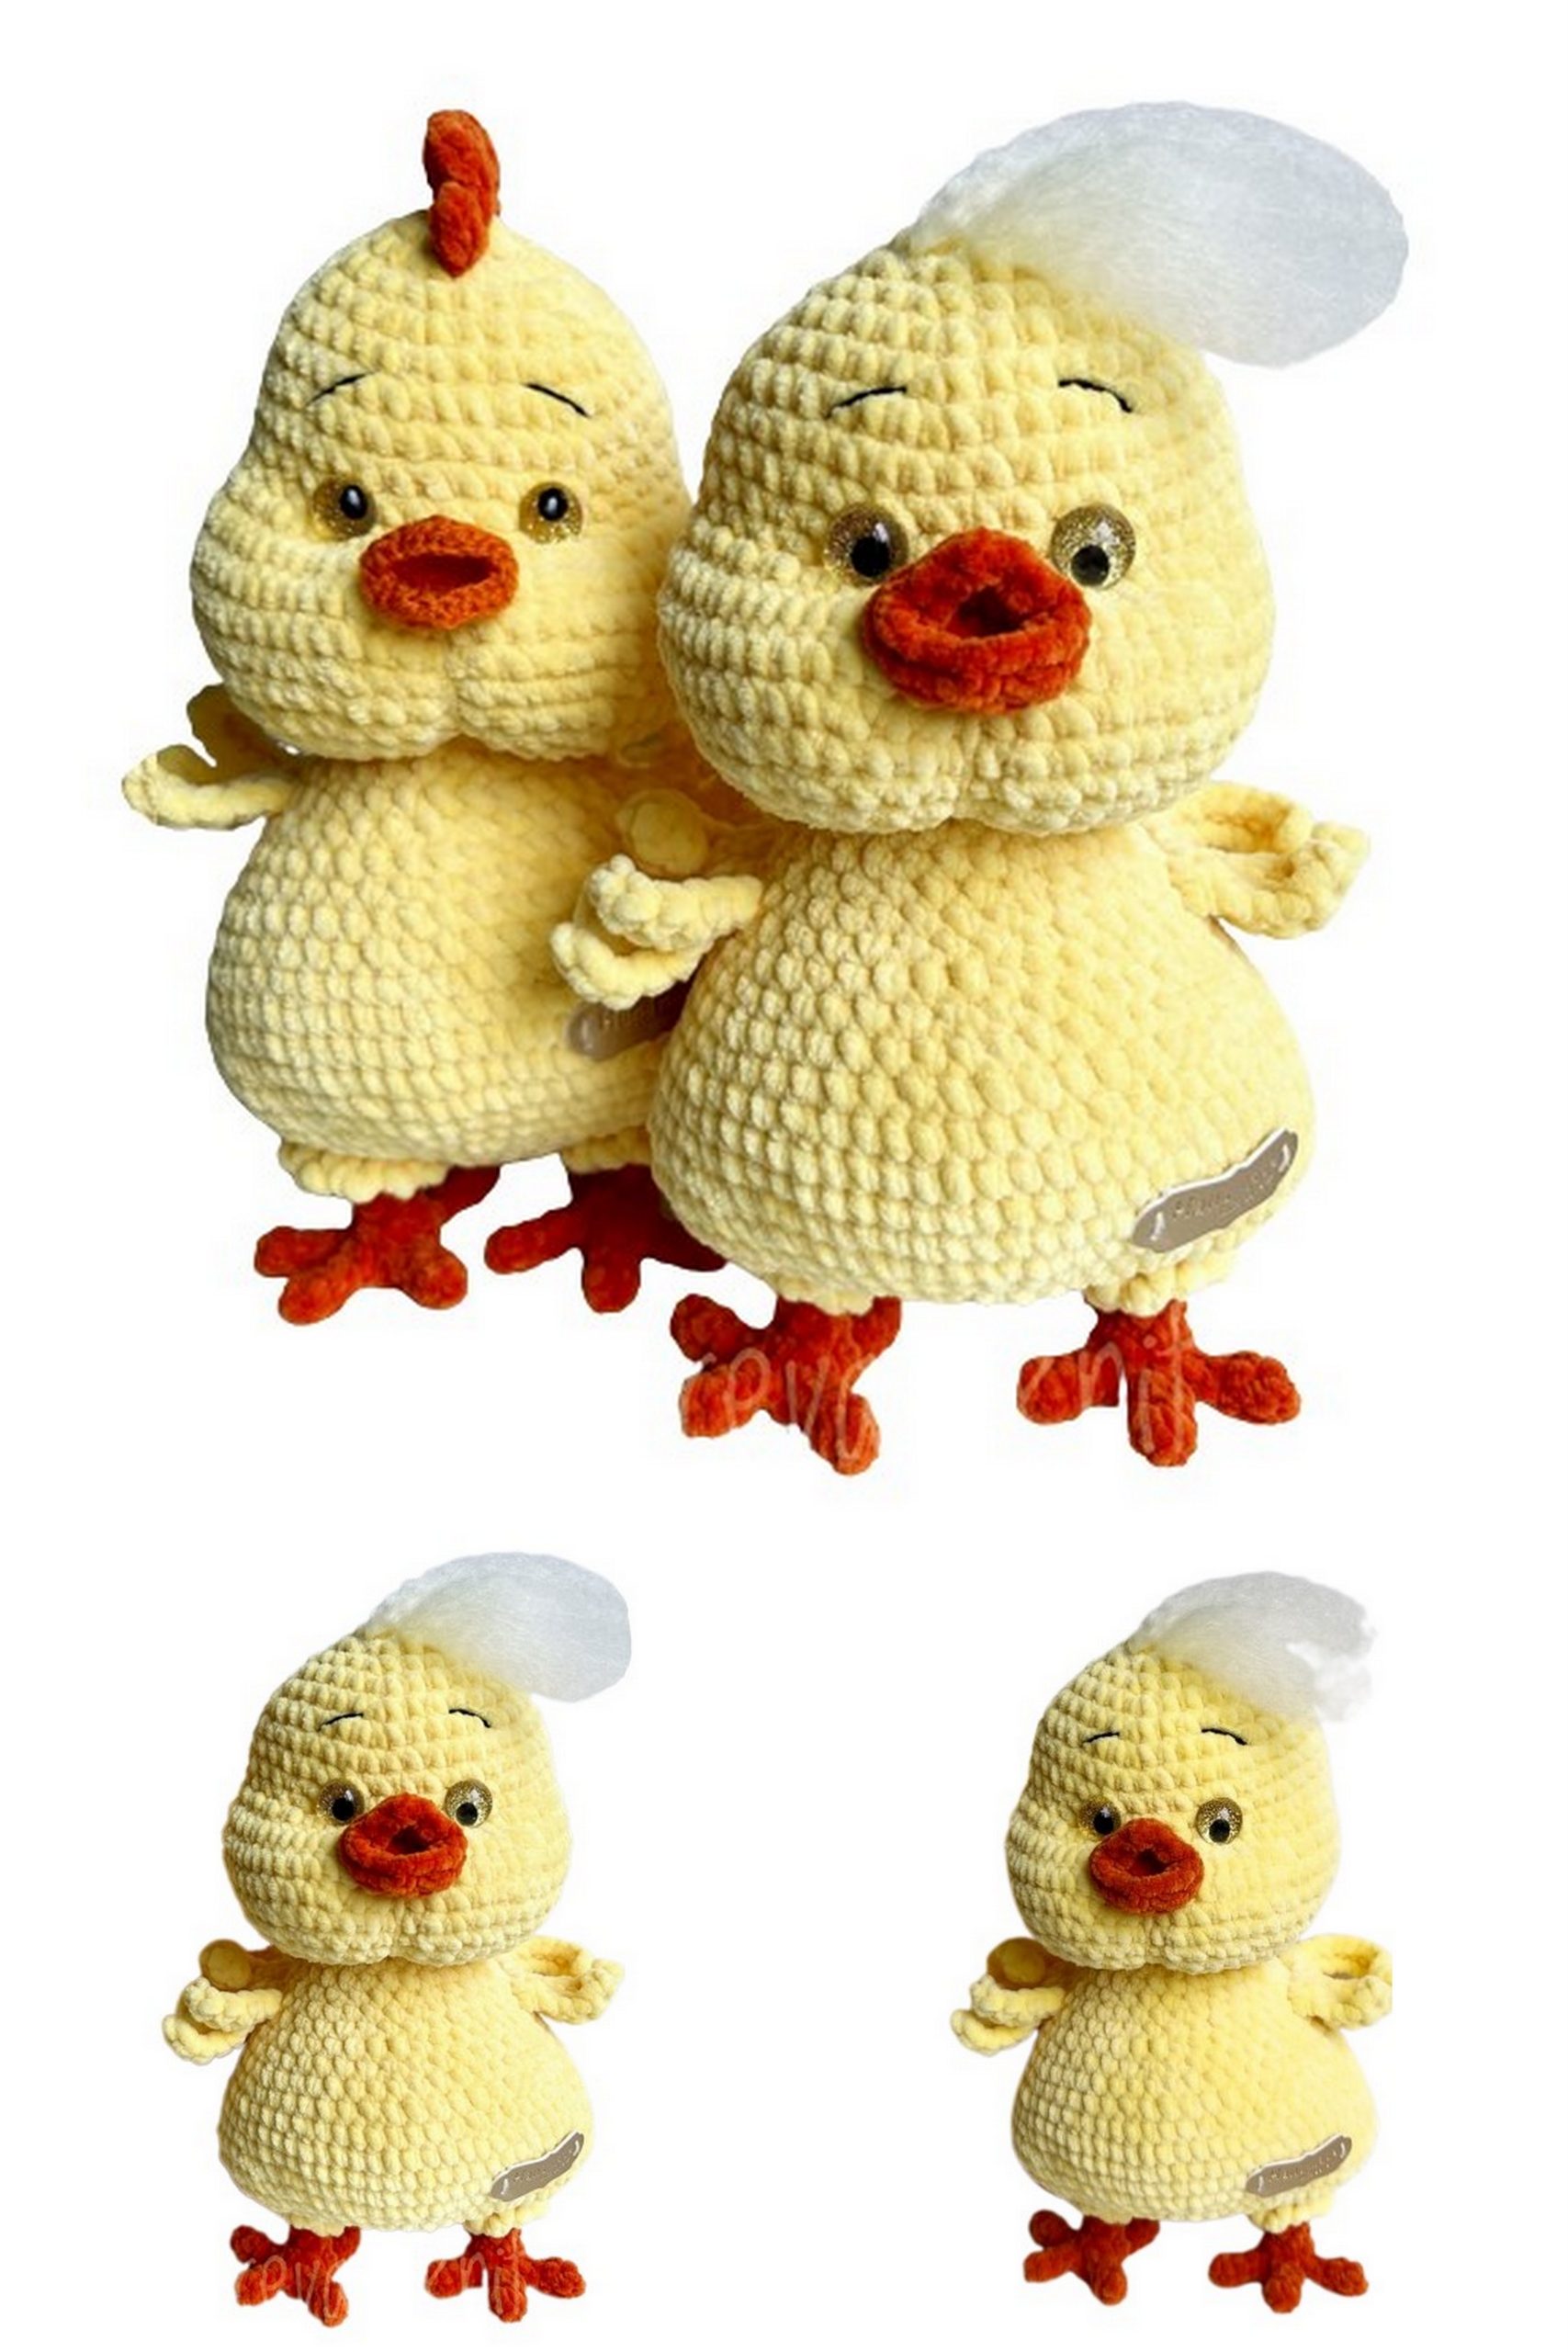
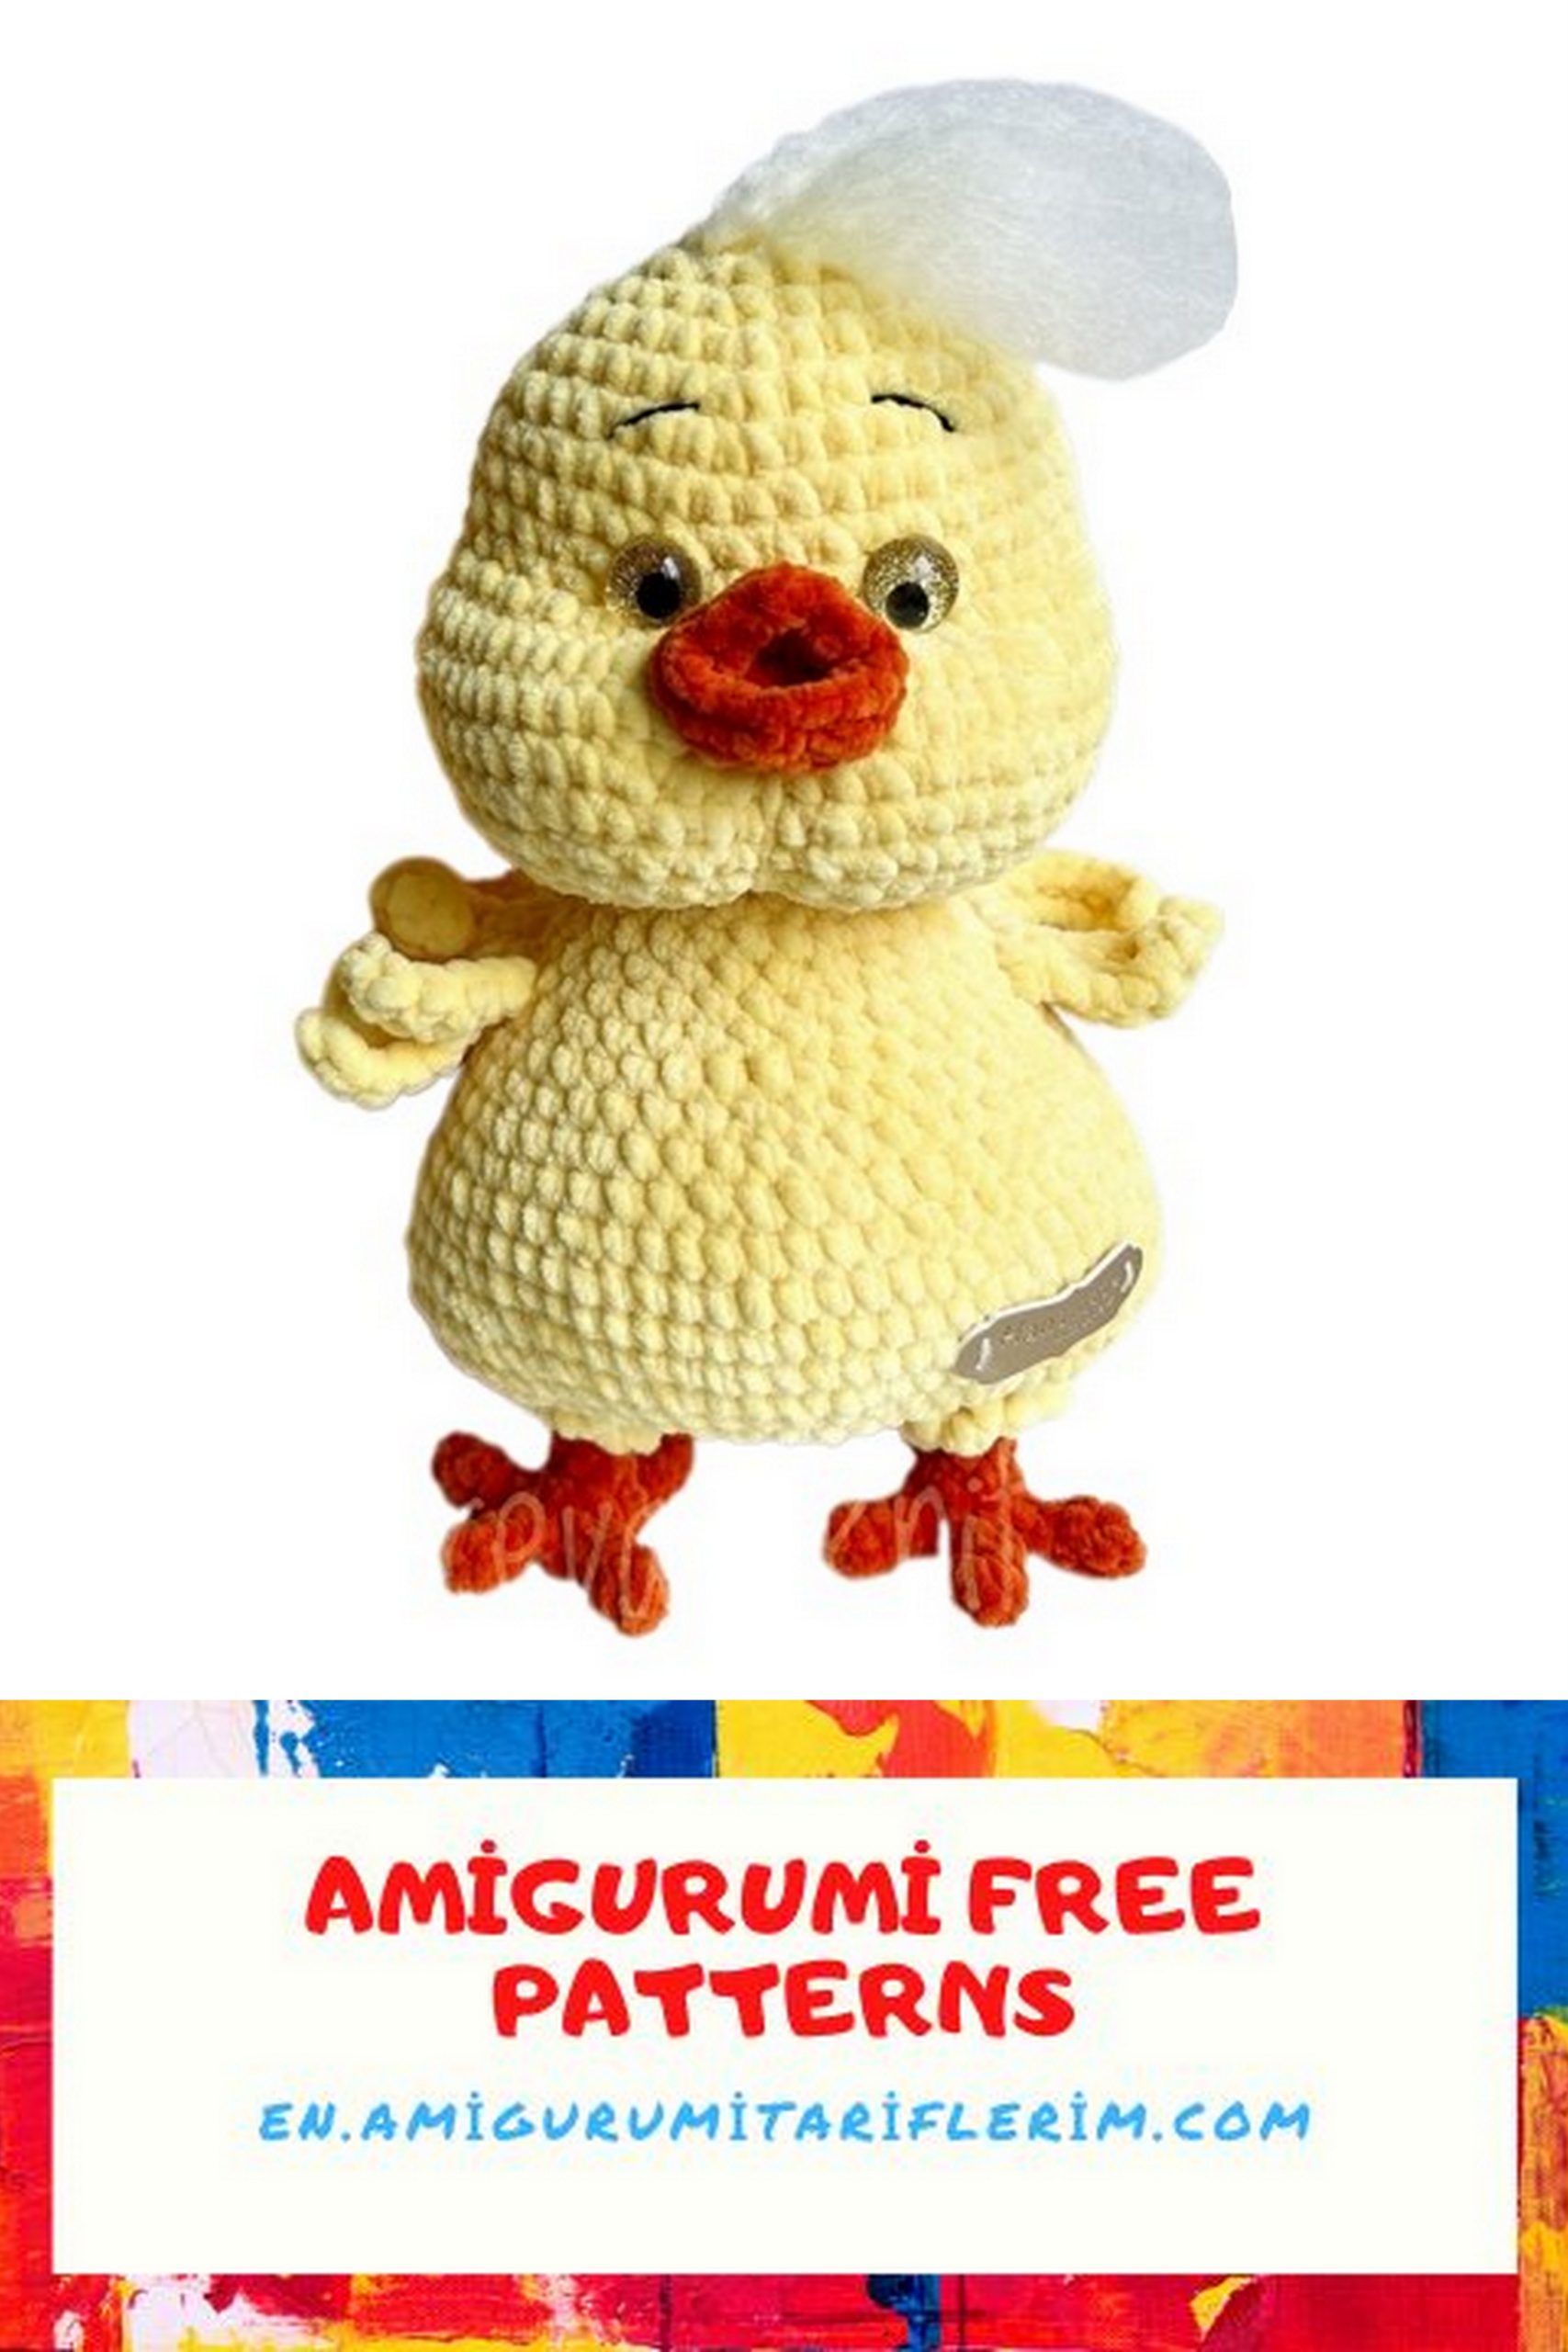
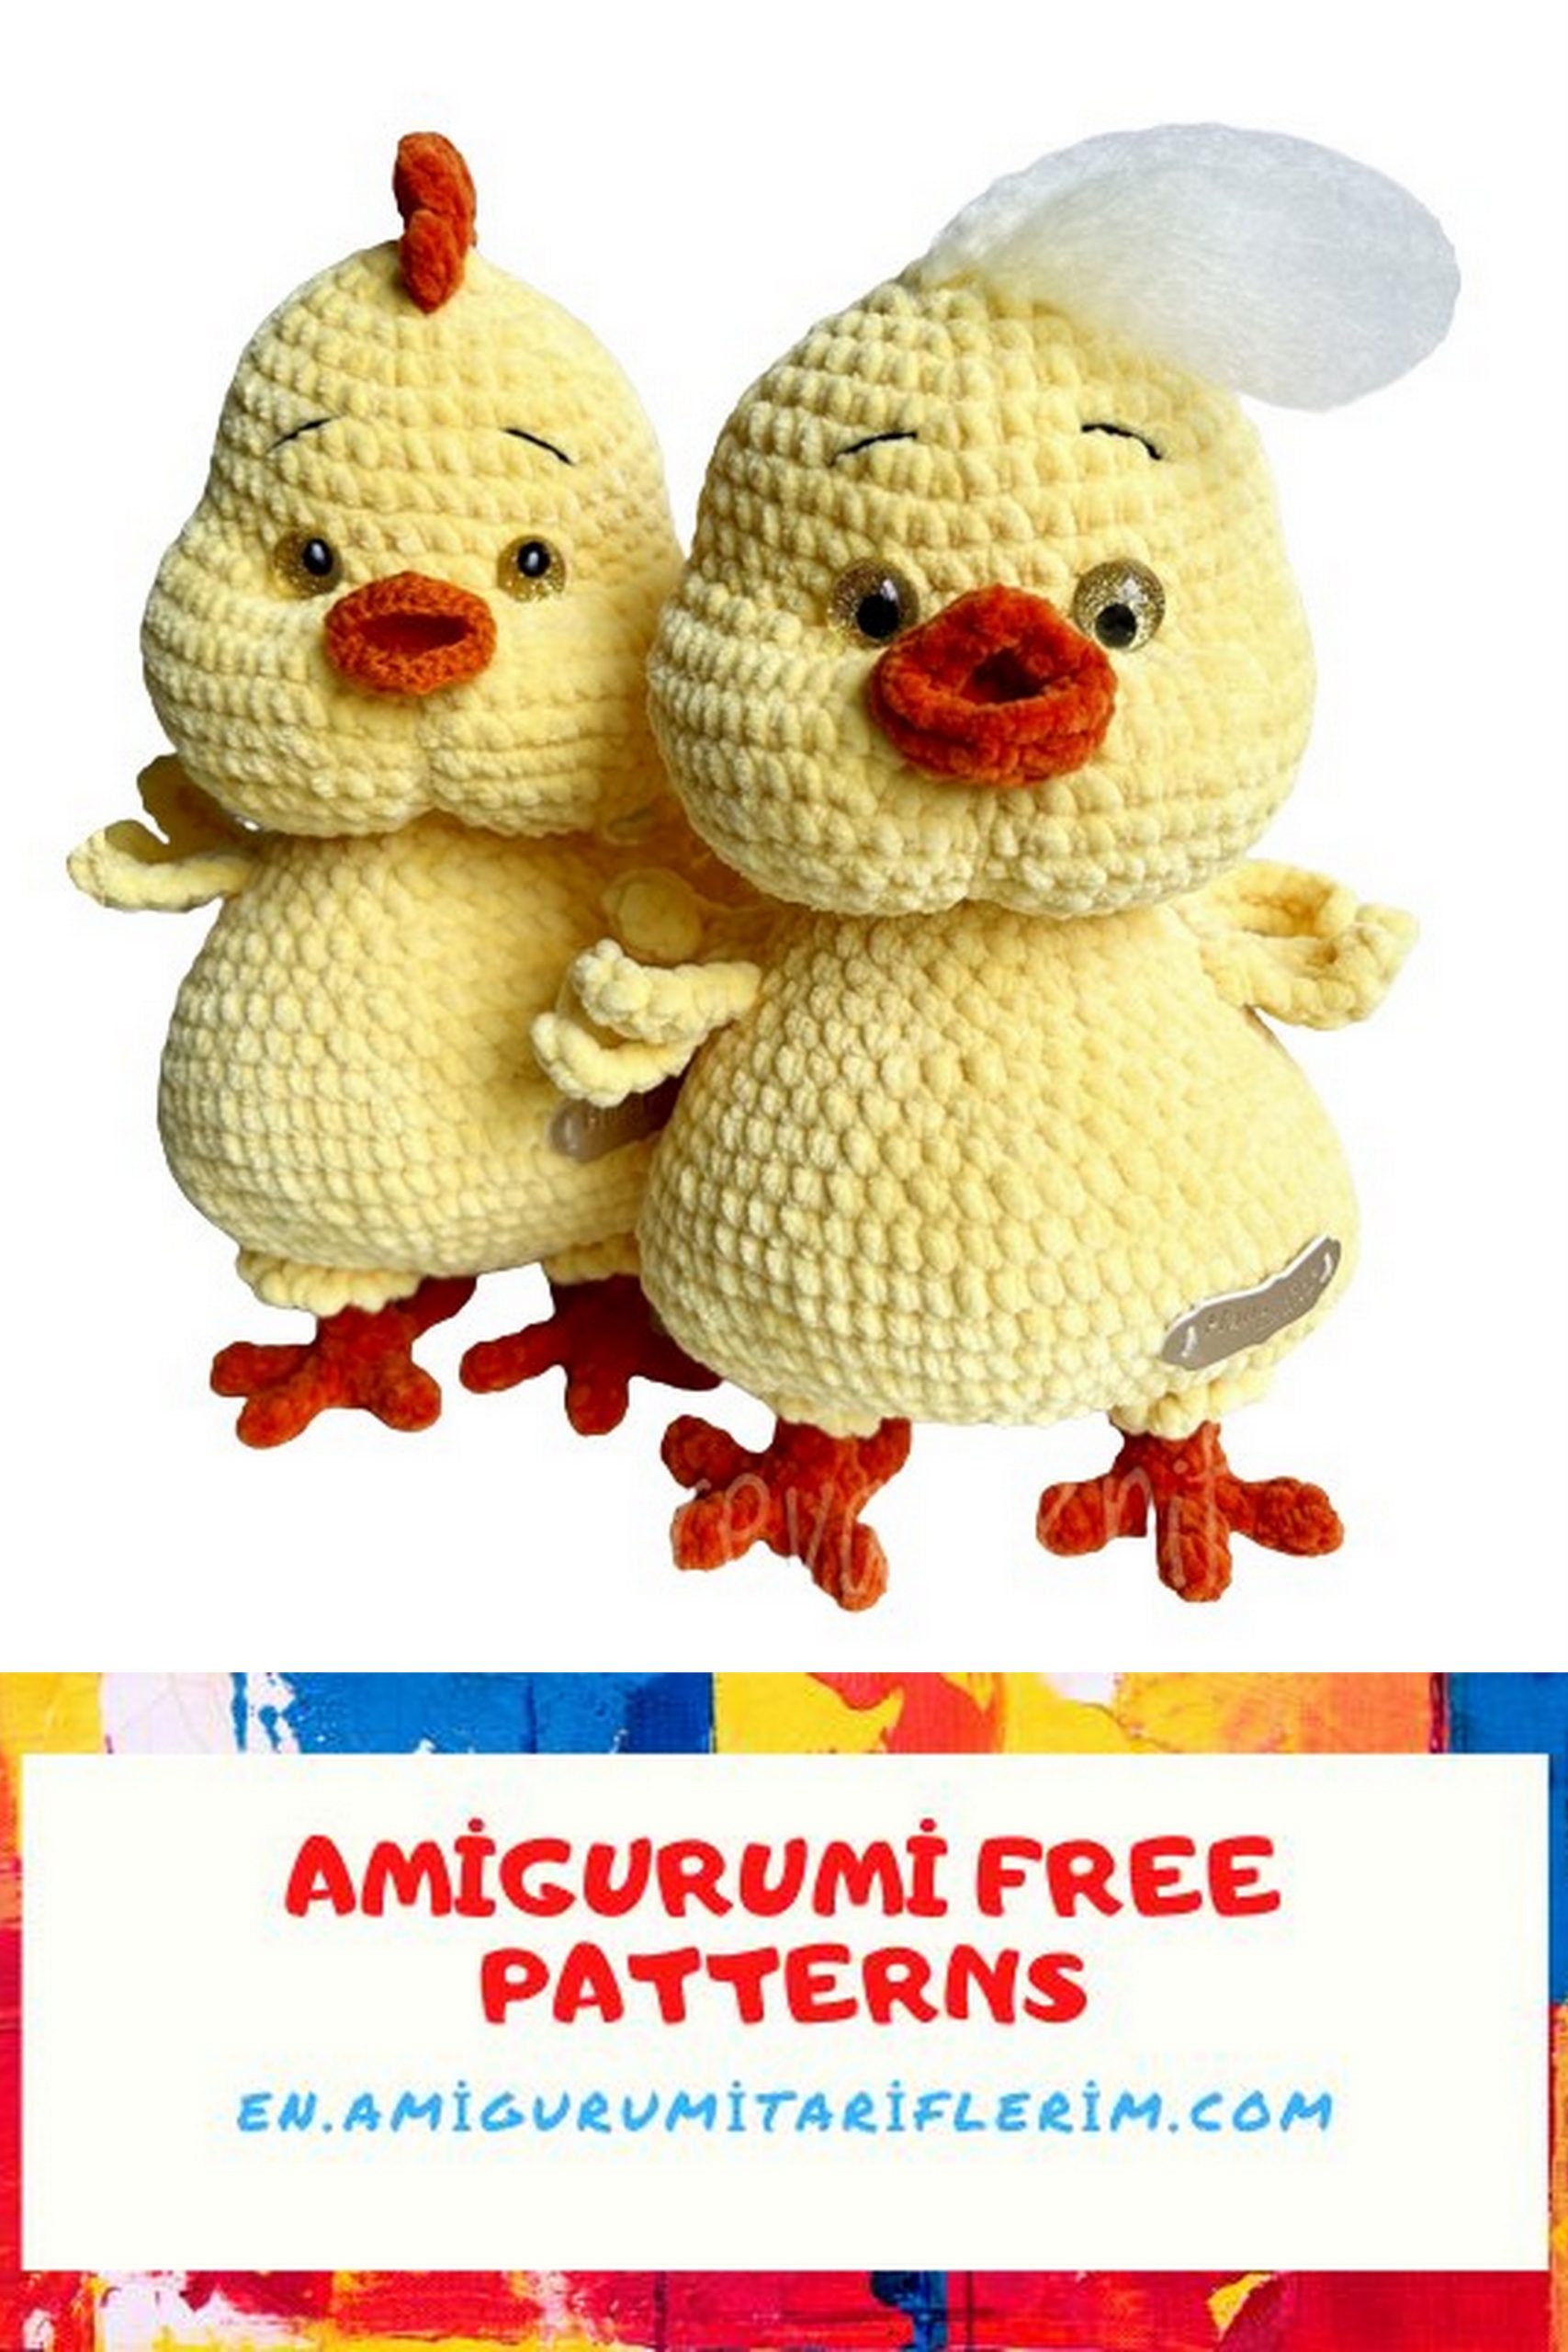
Adorable Chick Amigurumi Free Pattern for Crochet Enthusiasts
Are you a crochet enthusiast looking for your next charming project? Look no further! We’re thrilled to share with you an irresistible Chick Amigurumi Free Pattern that will bring a smile to your face. Whether you’re a seasoned crochet pro or just starting out, this pattern is perfect for all skill levels.
Our step-by-step tutorial will guide you through the process of creating your very own adorable chick. These little amigurumi chicks make fantastic decorations, gifts, or companions for children and adults alike. The best part?
In this pattern, you’ll find detailed instructions, helpful tips, and a list of materials you’ll need to complete your project. It’s a fantastic opportunity to unleash your creativity and add a touch of handmade charm to your life.
So, grab your crochet hooks and yarn, and let’s get started on this delightful Chick Amigurumi adventure. Follow along with our easy-to-understand instructions, and soon you’ll have your very own fluffy chick to cuddle or display proudly. Get ready to embark on a crochet journey filled with cuteness and creativity!
Remember, sharing your creations with friends and fellow crafters is encouraged, so spread the love for crochet and share the joy of these charming amigurumi chicks. Happy crocheting!
Materials needed:
4.5 mm, 3.5 mm, 2.5 – 3 mm crochet hooks (for the beak),
YarnArt dolce yarn, YarnArt dolce baby yarn, markers, sewing needles for joining
parts and for stuffing, black acrylic yarn for eyebrows, safety eyes
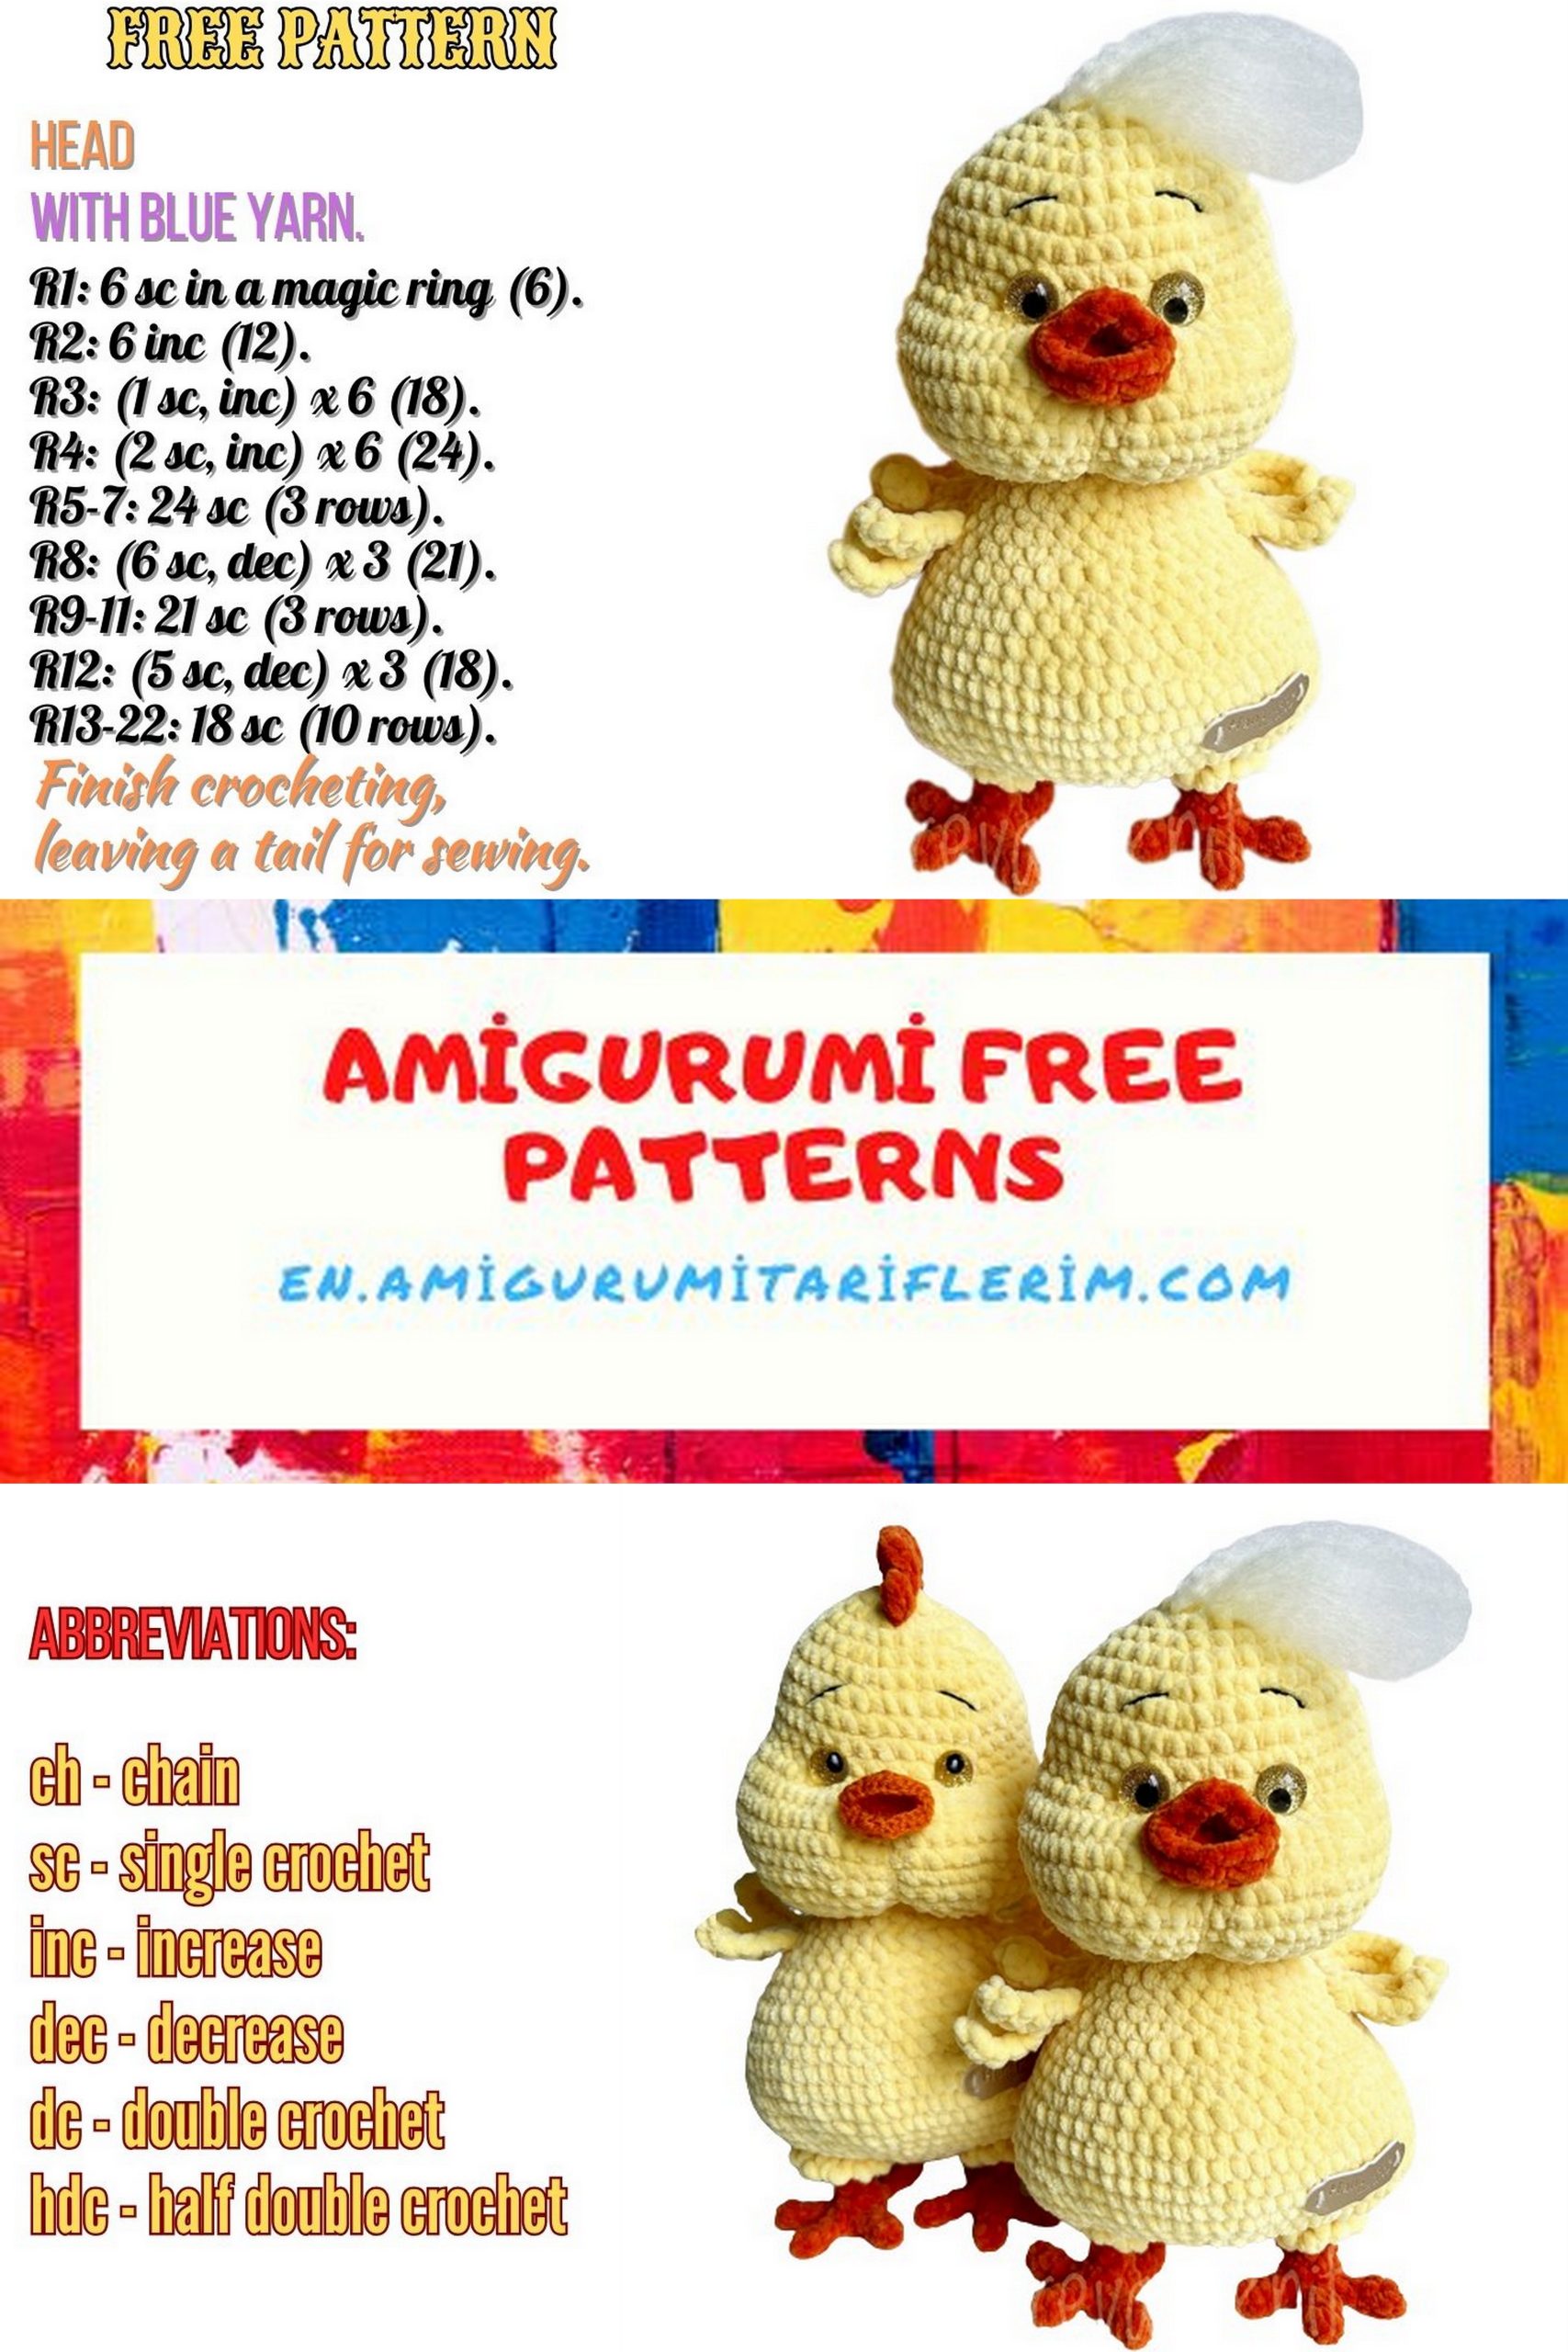
PATTERN
Head:
1 Row: 6 sc in MR (6)
2 Row: inc x 6 (12)
3 Row: (1 sc, inc) x 6 (18)
4 Row: (2 sc, inc) x 6 (24)
5 Row: (3 sc, inc) x 6 (30)
6 Row: (4 sc, inc) x 6 (36)
7 Row: (5 sc, inc) x 6 (42)
8 – 11 Row: No changes (42)
12 Row: 12 sc, inc x 18, 12 sc (60)
13 – 15 Row: No changes (60)
16 Row: (8 sc, dec) x 6 (54)
17 Row: No changes (54)
18 Row: (7 sc, dec) x 6 (48)
19 Row: No changes (48)
20 Row: (6 sc, dec) x 6 (42)
21 Row: (5 sc, dec) x 6 (36)
22 Row: (4 sc, dec) x 6 (30)
23 Row: (3 sc, dec) x 6 (24)
24 Row: 24 ss (24)
Cut the yarn, leaving a tail for sewing.
Wings (left wing):
1 Row: 6 ch, sc in the 2nd loop from the hook, sc in the next 5 loops. Continue with the same yarn.
2 Row: 7 ch, sc in the 2nd loop from the hook, sc in the next 6 loops. Continue with the same yarn.
3 Row: 8 ch, sc in the 2nd loop from the hook, sc in the next 7 loops. Continue with the same yarn.
4 Row: 9 ch, sc in the 2nd loop from the hook, sc in the next 8 loops.
Continue by working sc around the edge of the wing.
(right wing):
Work the same way, starting with the larger wing and working towards the smaller one.
Feet (8 pieces for two feet):
1 Row: 4 sc in MR (4)
2 – 4 Row: No changes (4)
Cut the yarn, leaving a small tail.
Continue crocheting the legs (2 parts):
1 Row: 6 sc in MR (6)
2 Row: inc x 6 (12)
3 Row: After attaching the fingers to the connected part (as shown in the tutorial), continue crocheting.
4 Row: dec x 6 (6)
5 – 8 Row: No changes (6)
9 Row: inc x 6 (12)
10 Row: No changes (12)
Cut the yarn, leaving a small tail for sewing.
Body:
1 Row: 6 sc in MR (6)
2 Row: inc x 6 (12)
3 Row: (1 sc, inc) x 6 (18)
4 Row: (1 sc, inc) x 9 (27)
5 Row: 9 ch, skip 3 sc, sc in the 4th, then sc in the next 8 sc, 9 ch, skip 3 sc, sc in the next, then sc in the next 11 sc to the end of the row (39)
6 Row: 9 sc along the chain, inc, 7 sc, inc, 9 sc along the chain, inc, 10 sc, inc (43)
7 Row: (2 sc, inc) x 3, 2 sc, inc, 2 sc, inc, 2 sc, (inc, 2 sc) x 3, 14 sc (52)
At this point, sew on the legs and make the leg edging (as shown in the tutorial).
8 Row: (3 sc, inc) x 3, (2 sc, inc) x 2, 2 sc, (inc, 2 sc) x 2, (inc, 3 sc) x 3, 7 sc, 5 ch, sc in the 2nd ch from the hook, 4 sc along the edge of the chain, 7 sc along the body to the end of the row (70)
9 Row: 55 sc along the body, 8 sc along the edge of the chain, 7 sc along the body (70)
10 Row: 15 sc, (2 sc, inc) x 3, (inc, 2 sc) x 3, 37 sc (76)
11 Row: (3 sc, dec) x 3, 24 sc, (dec, 3 sc) x 3, 6 sc, dec, 7 sc, dec, 5 sc (68)
12 Row: (2 sc, dec) x 3, 24 sc, (dec, 2 sc) x 3, 20 sc (62)
13 Row: No changes (62)
14 Row: (8 sc, dec) x 6, 2 sc (56)
15 Row: (6 sc, dec) x 7 (49)
16 Row: No changes (49)
17 Row: (5 sc, dec) x 7 (42)
18 Row: No changes (42)
19 Row: (4 sc, dec) x 7 (35)
Next row, work together with the wings (as shown in the tutorial).
20 Row: 2 sc, attach the left wing to the body with 7 sc, 12 sc, attach the right wing with 7 sc, 7 sc to the end of the row (35)
21 Row: (3 sc, dec) x 7 (28)
22 Row: No changes (28)
23 Row: (5 sc, dec) x 4 (24)
Cut the yarn.
Beak (using YarnArt dolce baby yarn and 2.5 – 3 mm crochet hook):
1 Row: 6 ch, 1 sl st, sc in the 2nd loop from the hook, sc in the next 5 sc, sc in the same 6 ch loop (12)
Continue working on one side of the beak:
2 Row: ch 1, turn, dec, 2 sc, dec (4)
3 Row: ch 1, turn, dec x 2 (2)
4 Row: ch 1, turn, dec (1)
Cut the yarn and move to the next side of the beak:
1 Row: Attach the yarn to the 1st sc (do not ch) and crochet 3 sc starting from the next loop, dec (4)
2 Row: ch 1, turn, dec x 2 (2)
3 Row: ch 1, turn, dec (1)
Next, you need to edge the part with slip stitches.

Comb (2 parts):
1 Row: 3 ch, sc in the 2nd loop from the hook, 2 sc. Continue with the same yarn.
2 Row: 4 ch, sc in the 2nd loop from the hook, 3 sc. Continue with the same yarn.
3 Row: 4 ch, sc in the 2nd loop from the hook, 3 sc. Continue with the same yarn.
4 Row: 4 ch, sc in the 2nd loop from the hook, 3 sc.
5 Row: 3 ch, sc in the 2nd loop from the hook, 2 sc.
Cut the yarn and crochet the second part in the same way. Fold them together and sew them.
You can watch the assembly of the parts and the finishing details in the tutorial provided.