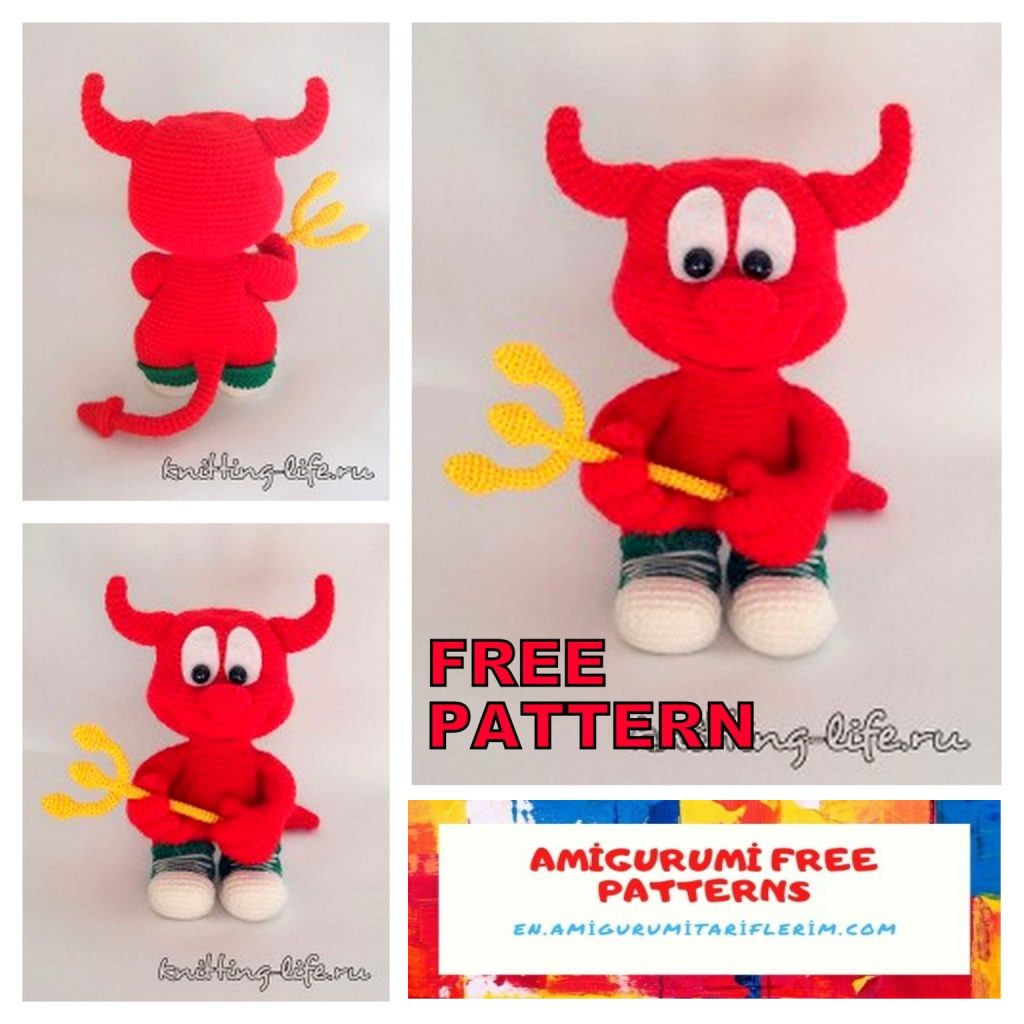
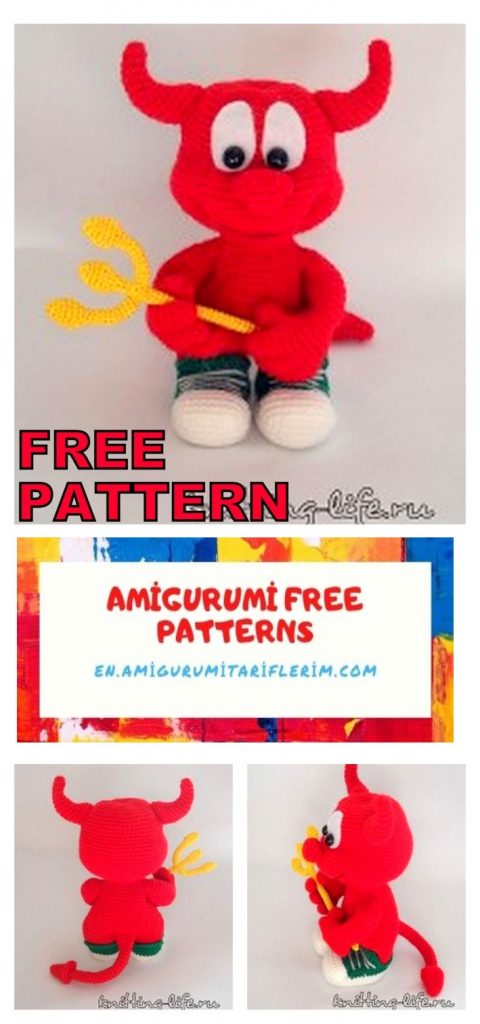
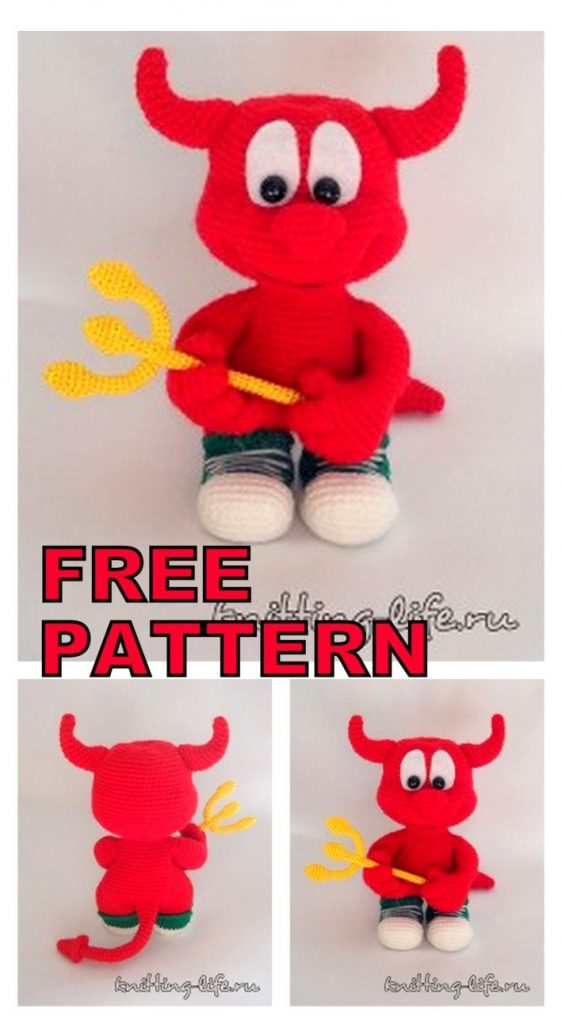
Cute Devil Amigurumi Free Pattern
I continue to share amigurumi free patterns. In this article, cute devil amigurumi free pattern is waiting for you.
Materials:
YarnArt “Baby” yarn (100% acrylic, 150 m / 50 g) – 50 g of red, slightly green and white colors.
“Daisy” Combine them. Kirov (100% cotton 320 m / 75 g) or any other yarn of a similar meter – a little yellow and just a little black
Hook No. 1.75 for acrylic and No. 1.25 for cotton
White felt, transparent adhesive and half eye beads
Wire
Sintepon or other filler
Thick insoles
From the claimed materials the imp is obtained with a 15 cm sprout along with horns.
You can ask any questions on the description on our forum
Abbreviations
ch – chain
sc – single crochet
dec – decrease (2 sc together)
inc – increase (2 sc in one sc of the previous row)
hdc, dc, double-hdc, double-dc – half-column with 1 double crochet, column with 1 double crochet, half-column with 2 double crochets, column with 2 double crochets, respectively
sl-st – slip-stitch
Description of processes
PATTERN
Hands (2 parts)
Yarn of red color, hook No. 1.75
Thumb (2 parts):
1 p.: 6 sc into magic ring
2 p.: (1 sc, inc) x 3 (9)
3-4 r.: Sc (9) thread cut, fasten.
Fingers (6 parts):
1 p.: 6 sc into magic ring
2 p.: (2 sc, inc) x 2 (8)
3-5 r.: Sc (8) cut the thread, fasten it, do not cut the thread on two fingers, continue to knit the palm:
1 p.: 4 sc on the 1st finger, 4 sc on the 2nd finger, 8 sc on the 3rd finger, 4 sc on the 2nd finger, 4 sc on the 1st finger (24)
2 p.: Sc (24)
for the left hand:
3 p.: 4 sc with thumb, 7 sc, dec, 11 sc (23)
Knit the handle amigurumi imp
4 pp.: 5 sc on the thumb, 6 sc, dec, 11 sc (23)
5 p.: Dec, (8 sc, dec) x 2, sc (20), insert the wire frame
6 r.: (3 sc, dec) x 4 (16), a little palm fill with padding polyester
7-16 r .: sc (16), in the process-add the synthetic winterizer to the handle
17 p.: Sc, dec, 6 sc, dec, 5 sc (14)
18 p.: Dec, 5 sc, dec, 5 sc (12), cut the thread, fasten.
We knit the right hand in the same way, but:
3 p.: 11 sc, dec, 7 sc, 4 sc with thumb (23)
4 p.: 11 sc, dec, 6 sc, 5 sc on the thumb (23)
Knitted imp handles
Imp nose
Yarn of red color, hook No. 1.75
We knit the nose of the imp amigurumi
1 r.: 4 ch, starting from the 2nd loop from the hook – 2 sc, 3 sc to the last item, then on the other side of the chain – sc, inc (8)
2 p.: Inc, sc, inc x 3, sc, inc x 2 (14)
3 p.: Sc, inc, sc, (sc, inc) x 3, sc, (sc, inc) x 2 (20)
4 p.: Sc (20)
5 p.: Sc, dec, sc, (sc, dec) x 3, sc, (sc, dec) x 2 (14), cut the thread, leaving a small end for sewing, fill the nose with sintepon.
Horns (2 parts)
Yarn of red color, hook No. 1.75
1 p.: 6 sc into magic ring
2 p.: Sc, 2 inc, sc, dec (7)
Knit imp horns
3 p.: 2 sc, 2 inc, sc, dec (8)
4 p.: 2 sc, 2 inc, 2 sc, dec (9)
5 p.: 3 sc, 2 inc, 2 sc, dec (10)
6 p.: 3 sc, 2 inc, 3 sc, dec (11)
7 p.: 4 sc, 2 inc, 3 sc, dec (12)
8 p.: 4 sc, 2 inc, 4 sc, dec (13)
9 p.: 5 sc, 2 inc, 4 sc, dec (14)
10 p.: 5 sc, 2 inc, 5 sc, dec (15)
11 p.: 6 sc, 2 inc, 5 sc, dec (16)
12 p.: 6 sc, 2 inc, 6 sc, dec (17)
13 p.: 7 sc, 2 inc, 6 sc, dec (18), cut the thread, leaving a small end for sewing, fill the horns with synthetic winterizer.
Imp tail
1 p.: 4 sc into magic ring
2 p.: Inc, sc, inc, sc (6)
3 p.: Sc, inc, 2 sc, inc, sc (8)
4 p.: 2 sc, inc, 3 sc, inc, sc (10)
5 p.: 3 sc, inc, 4 sc, inc, sc (12)
6 p.: 4 sc, inc, 5 sc, inc, sc (14)
7 p.: 5 sc, inc, 6 sc, inc, sc (16)
8 p.: For the back half of the loop 4 sc, 2 dec, 4 sc, 2 dec (12)
9 p.: 3 sc, 3 sc together, 3 sc, 3 sc together (8)
10 p.: For the front half of the loop dec, 2 sc, dec, 2 sc (6)
11 p.: Sc (6)
12 p.: Inc, 5 sc (7)
13-14 p .: sc (7)
15 p.: Inc, 6 sc (8)
16-30 r .: sc (8)
31 p.: Inc, 3 sc, inc, 3 sc (10)
32 p.: Inc, 4 sc, inc, 4 sc (12)
33 p.: Sc (12), cut the thread, fasten. It is not necessary to stuff the tail with a padding polyester.
Legs (2 parts)
White yarn, hook 1.75
1 r.: 9 ch, starting from the 2nd loop from the hook – 7 sc, 3 sc to the last p., Then on the other side of the chain – 6 sc, inc (18)
2 p.: Inc, 6 sc, inc x 3, 6 sc, inc x 2 (24)
3 p.: Sc, inc, 6 sc, inc, 4 sc, inc, 6 sc, inc, 3 sc (28)
4 p.: 2 sc, inc, 6 sc, inc, 2 sc, inc x 2, 2 sc, inc, 6 sc, inc, 2 sc, inc x 2 (36)
5 r .: inc, 12 sc, inc, sc, inc x 2, sc, inc, 12 sc, inc, sc, inc x 2, sc (44), cut the insole according to the shape of the sole
6 p.: Sc for the back half of the loop (44)
Start knitting the leg of the imp
7 p.: Sc (44), cut, fasten and hide the thread.
Attach the green yarn to the 29th column of the 7th row and knit 2 rows of 27 sc (here you can knit in straight and reverse rows, or you can start each row again, then the boot will be more accurate). After the second row, cut the thread and start again from the 8th column of the second row – again 2 rows, but already at 13 sc (this is the back of the boot), while the second row is knitted for the front half of the loop, trim the thread, hide.
Attach the white yarn to the 6th column of the 7th row of the white sole and knit the toe of the boot. Here all rows should be front. In order not to constantly cut the thread, at the end of the row you just need to stretch the last loop, stretch a ball through it, tighten (a knot is obtained) and start a new row with the same thread, skipping the thread along the already connected row. Then we sew this thread in the process of knitting the next row.
To get a rounded toe of the boot, we knit the middle 5 sc, adding 1 sc in each row from the sole to the right and left with ch at the beginning of the row and sl-st at the end.
1 p.: Ch, 5 sc, sl-st (7)
2 p.: Ch, 7 sc, sl-st (9)
3 p.: Ch, 9 sc, sl-st (11)
4 p.: Ch, 11 sc, sl-st (13)
5 p.: Ch, 13 sc, sl-st (15)
6 p.: Ch, 15 sc, sl-st (17), fasten and cut the thread, leaving the end more authentic (with this thread we will then lace the boot)
7 p.: With green yarn for the back half-loop (starting from ch of the 6th row) – ch, sc, dec x 3, 2 sc, dec x 3, sc (10, ch in the next row we skip)
8-16 r.: Ch, rotation, 10 sc (10), here we knit in straight and reverse rows
17 p.: For the front half of the loop – sc, hdc, dc, double-hdc, 2 double-dc, double-hdc, dc, hdc, sc (10), fasten and cut the thread, leaving a small end.
Attach the red thread to the 1st column of the 16th row and, clinging to the left halves of the “tongue” and back loops, knit 3 rows of 23 sc with red yarn, cut the thread, fix it.
Using the left white thread and needle, lace up the boot, put the insole, sew the holes in the corners of the boot with a green thread, fill the part with synthetic winterizer, hide all the threads. Similarly, tie the second boot, but do not cut the red thread, but continue to knit the body.
Body + head
1 p.: 11 sc on the second boot (from which the thread was not cut), 23 sc on the first boot (start from the last column of the third red row), 12 sc on the second boot (46)
2 p.: 5 sc, inc x 5, dec, inc x 5, 11 sc, (inc, sc) x 2, inc, dec, (inc, sc) x 3, 5 sc (60)
3 p.: Sc (60)
We begin to combine the body and legs
4 p.: 43 sc, 6 sc with tail, 11 sc (60)
5 p.: Dec, 28 sc, dec, 11 sc, 6 sc tail, 11 sc (58)
6 p.: Sc (58)
7 p.: Dec, 3 sc, (dec, 3 sc) x 4, dec, 2 sc, dec, 27 sc (51)
8 p.: Sc (51)
9 p.: (15 sc, dec) x 3 (48)
10 p.: Sc (48)
11 p.: (6 sc, dec) x 6 (42)
Bind the imp body
12-13 p .: sc (42)
14 p.: (5 sc, dec) x 6 (36)
15-16 r .: sc (36)
17 p.: 6 sc with his left hand, 12 sc, 6 sc with his right hand, 12 sc (36)
18 p.: On the left hand: 2 sc, dec, 2 sc; 12 sc in front, on the right hand: 2 sc, dec, 2 sc; 12 sc on the back (34)
19 p.: Dec, sc, dec, 12 sc, dec, sc, dec, 12 sc (30), fill the part with synthetic winterizer, fasten the wire frame of the hands
20 p.: (3 sc, dec) x 6 (24)
21-22 r .: sc (24)
23 p.: (Sc, inc) x 12 (36)
24 p.: (2 sc, inc) x 12 (48)
25 p.: (7 sc, inc) x 6 (54)
26 p.: (8 sc, inc) x 6 (60)
27 p.: (9 sc, inc) x 6 (66)
28 p.: (10 sc, inc) x 6 (72)
Finish knitting the head and body of the imp
29-36 p.: Sc (72)
37 p.: 5 sc, (sc, dec) x 12, 31 sc (60)
38 p.: (8 sc, dec) x 6 (54)
39-45 p.: Sc (54)
46 p.: (7 sc, dec) x 6 (48)
47 p.: (6 sc, dec) x 6 (42)
48 p.: (5 sc, dec) x 6 (36)
49 p.: (4 sc, dec) x 6 (30)
50 p.: (3 sc, dec) x 6 (24), do not fill your head too tightly so that you can make weights
51 p.: (2 sc, dec) x 6 (18)
52 p.: (Sc, dec) x 6 (12)
53 p.: Dec x 6 (6), cut the thread. Make make-ups for a smile right away: insert a needle with a thread into the crown and withdraw in the place of the left “dimple” (between the 30th and 31st rows, first make dimples with your fingers, determining the most successful places), stepping back one column to the side, insert the needle into the “dimple” and withdraw in the crown, tighten. Repeat again for the right “dimple”, then again make one stitch for the left and right “dimples”, pull everything to the crown, fix the thread and hide the tip.
Sew on the nose by making two hooks – “nostrils” (following the example of hooks for a smile). Sew horns (focus on the photo of the finished toy).
For the eyes, cut ovals from felt (first cut out of paper and determine the desired size), glue to the head, sew / glue the eyes, embroider a smile with a black thread with one stitch.
Trident
Cotton is yellow, hook No. 1,25
Middle detail:
1 p.: 6 sc into magic ring
2 p.: (2 sc, inc) x 2 (8)
3 p.: (3 sc, inc) x 2 (10)
4 p.: (4 sc, inc) x 2 (12)
5 p.: (5 sc, inc) x 2 (14)
6 p.: (3 sc, 2 dec) x 2 (10)
7 p.: (2 sc, 3 sc together) x 2 (6)
Knit a trident of an imp
8 p. and further: sc (6), knit to the desired trident length, I have 10 cm, cut the thread, insert the wire into the part, pull the hole, hide the thread.
Sidewalls (2 parts):
1 p.: 6 sc into magic ring
2 p.: (2 sc, inc) x 2 (8)
3 p.: (3 sc, inc) x 2 (10)
4 p.: (4 sc, inc) x 2 (12)
5 p.: (5 sc, inc) x 2 (14)
6 p.: (3 sc, 2 dec) x 2 (10)
7 p.: (2 sc, 3 sc together) x 2 (6)
8-17 p.: Sc (6), cut the thread, leaving a small end for sewing, insert the wire inside the part, drag it through the middle part of the trident and insert it into another sidewall, sew the sidewalls to the middle part.
Hand over the little trident and you’re done! Now you can admire your work!