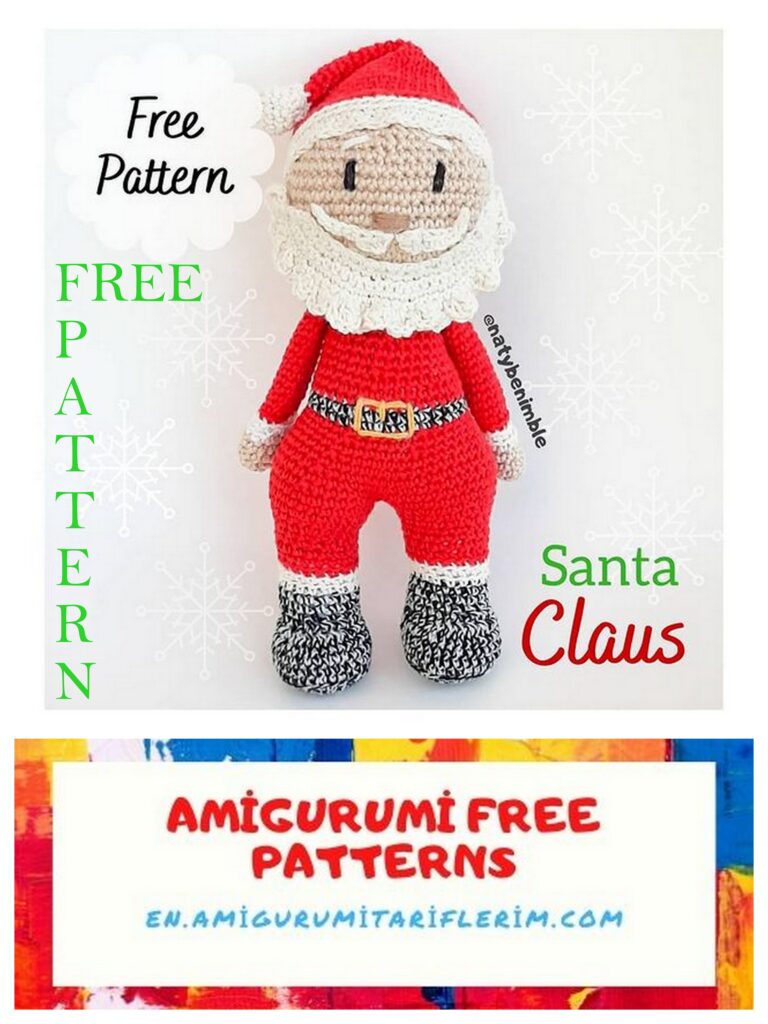
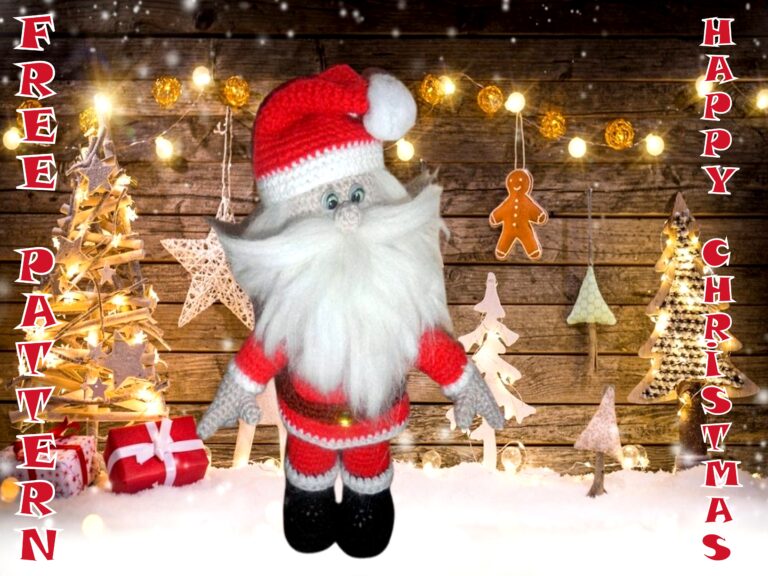
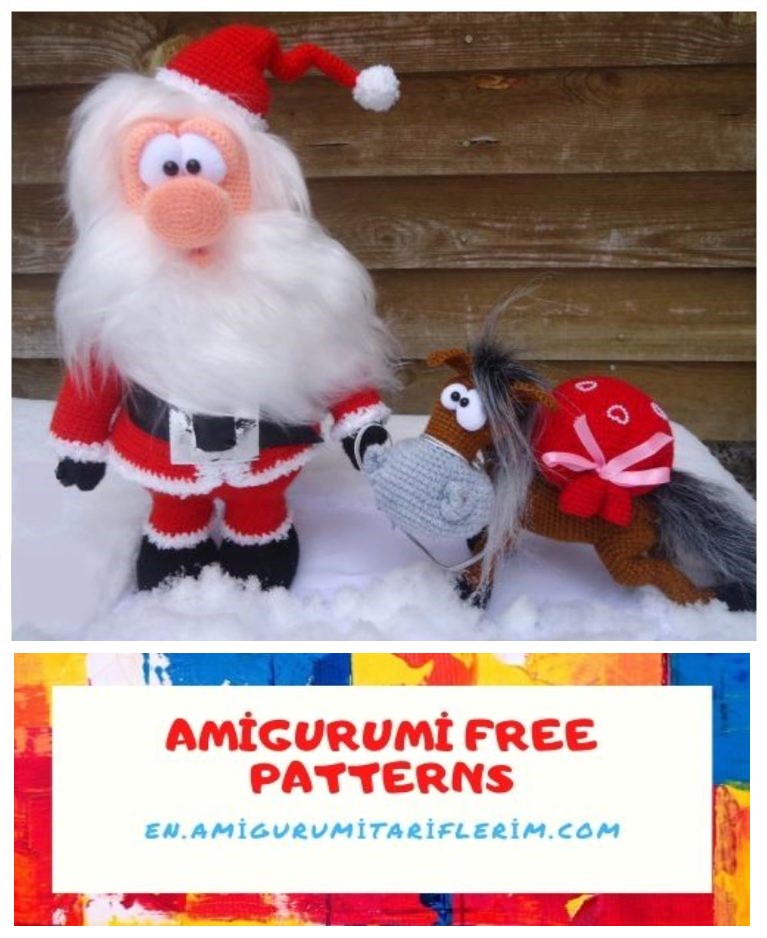
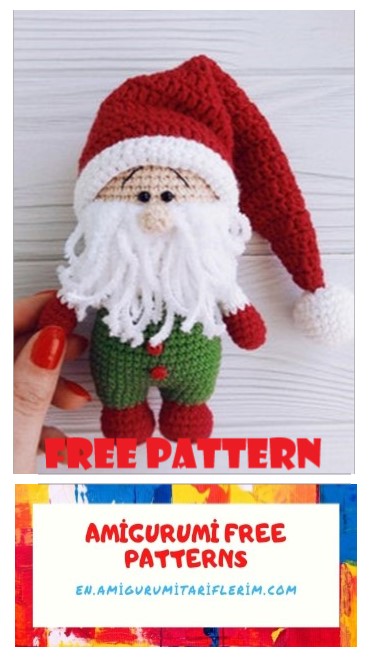
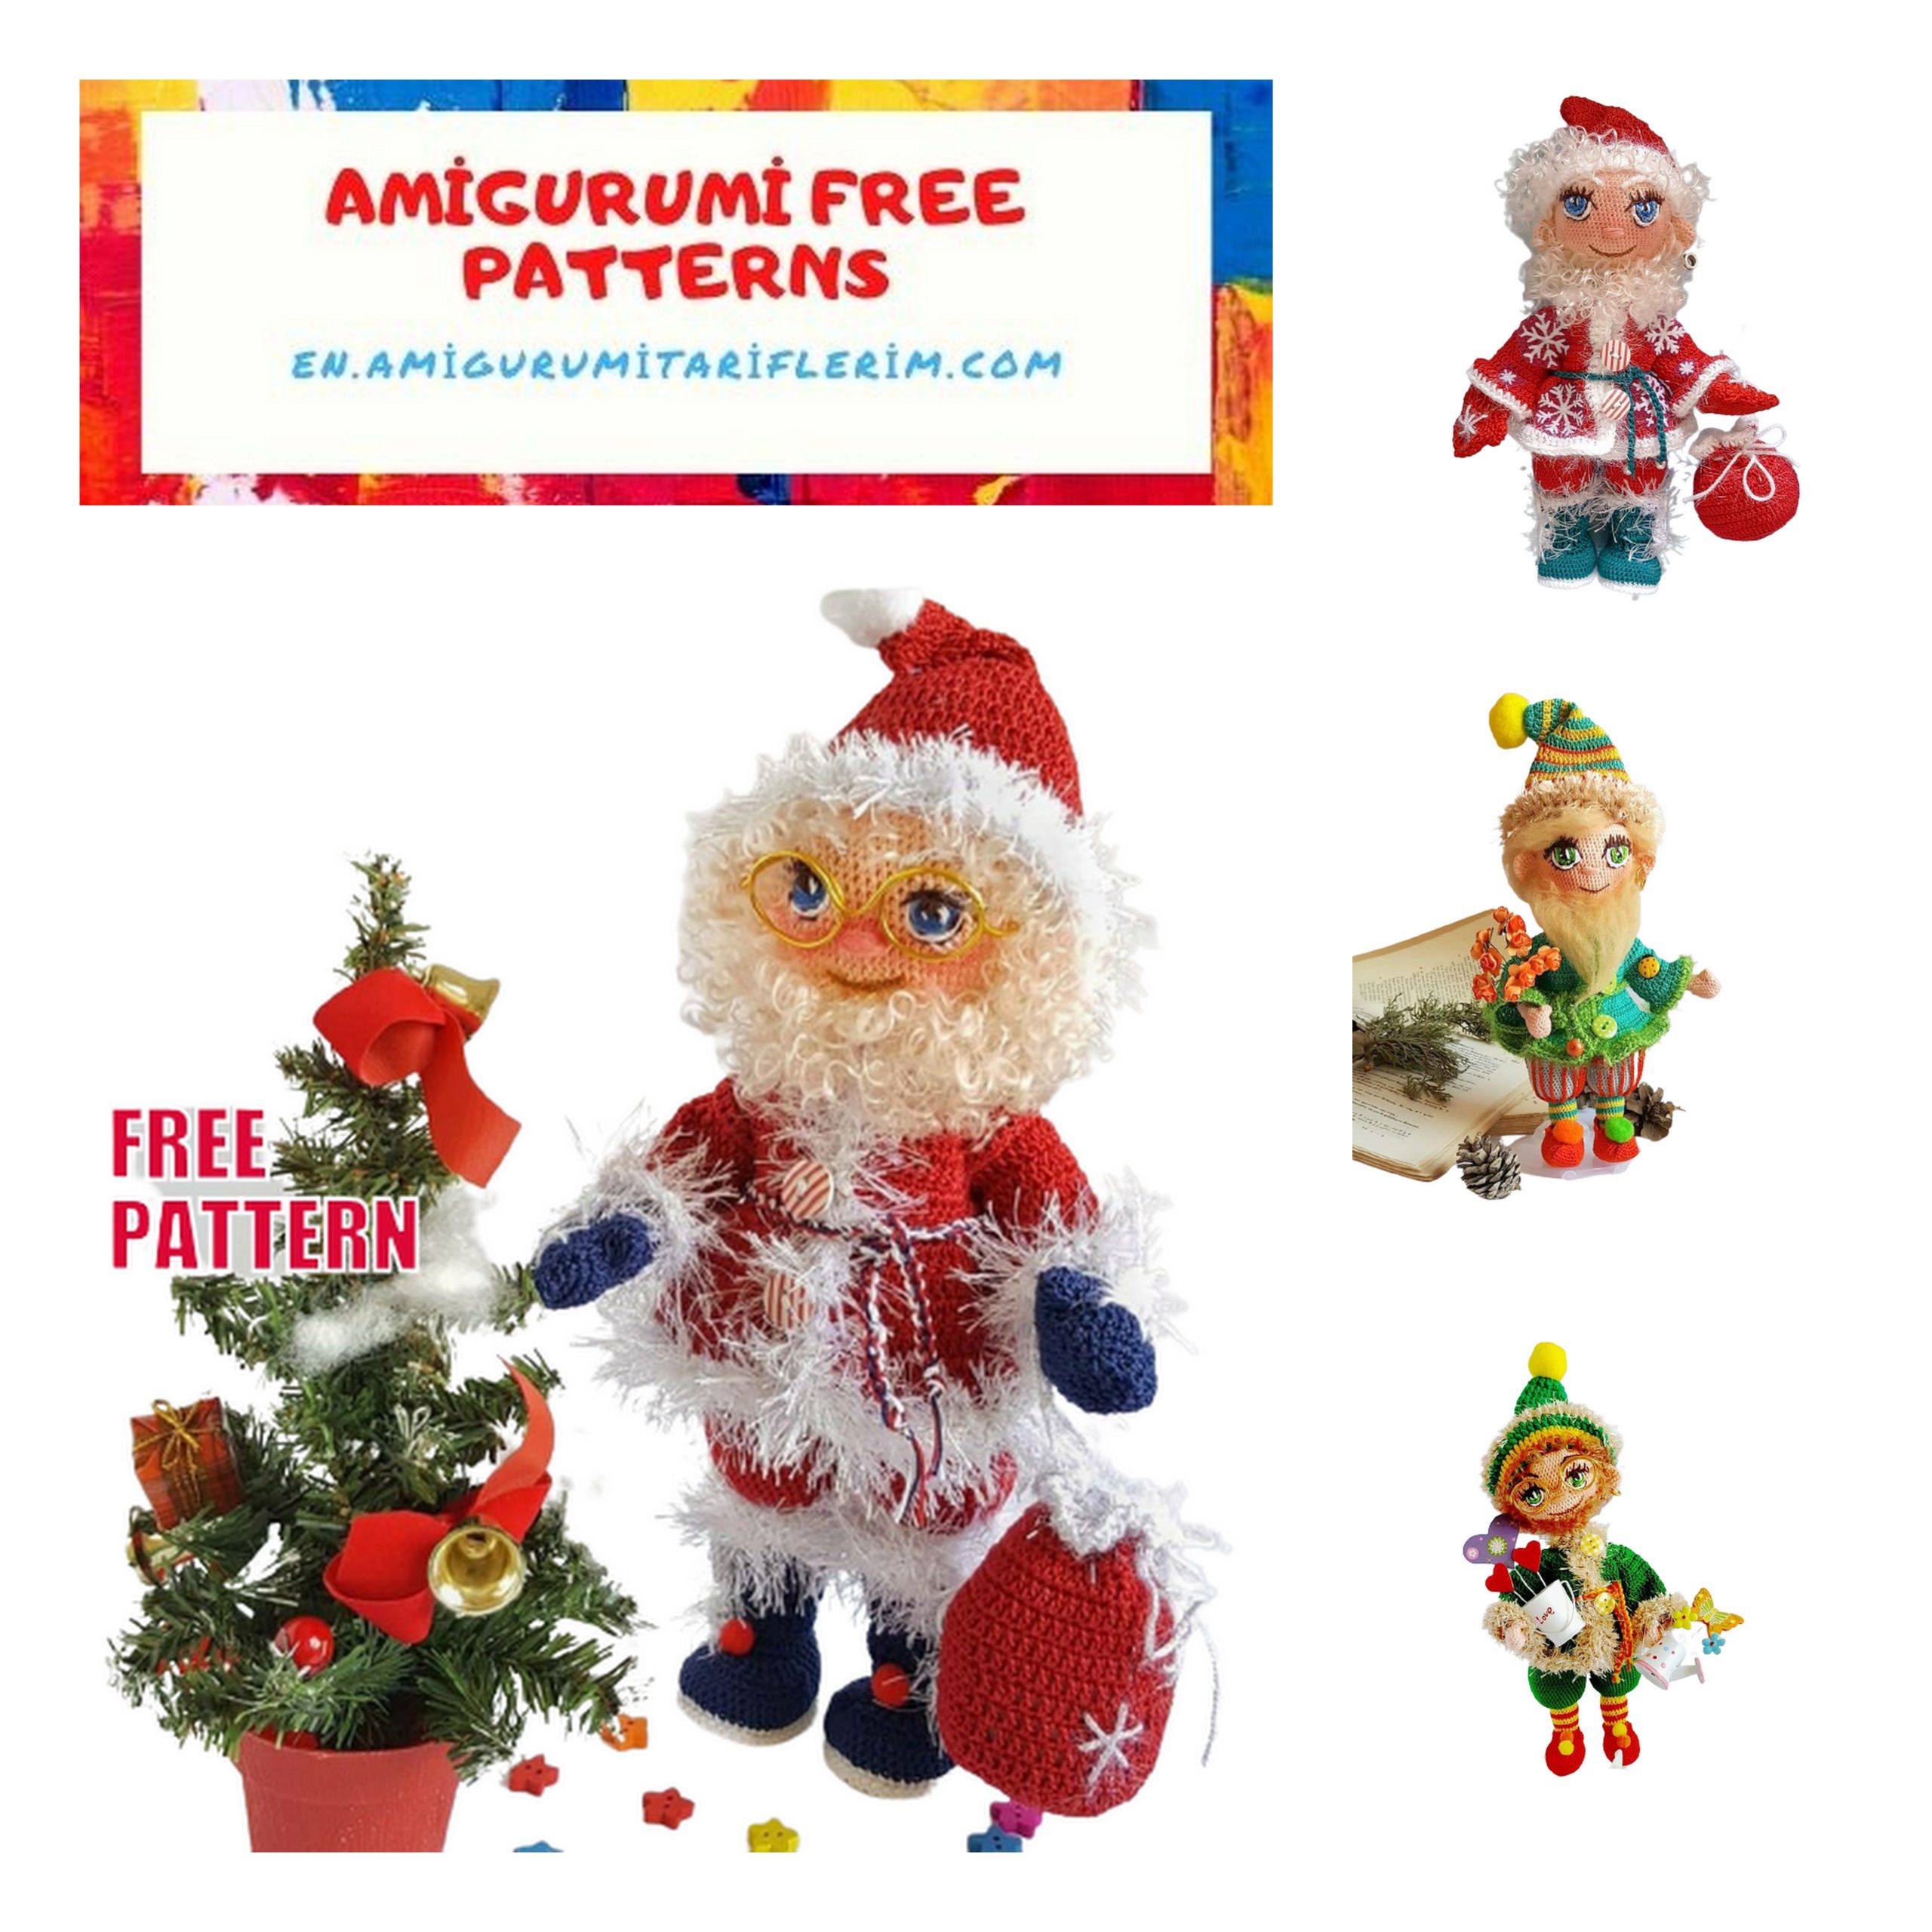
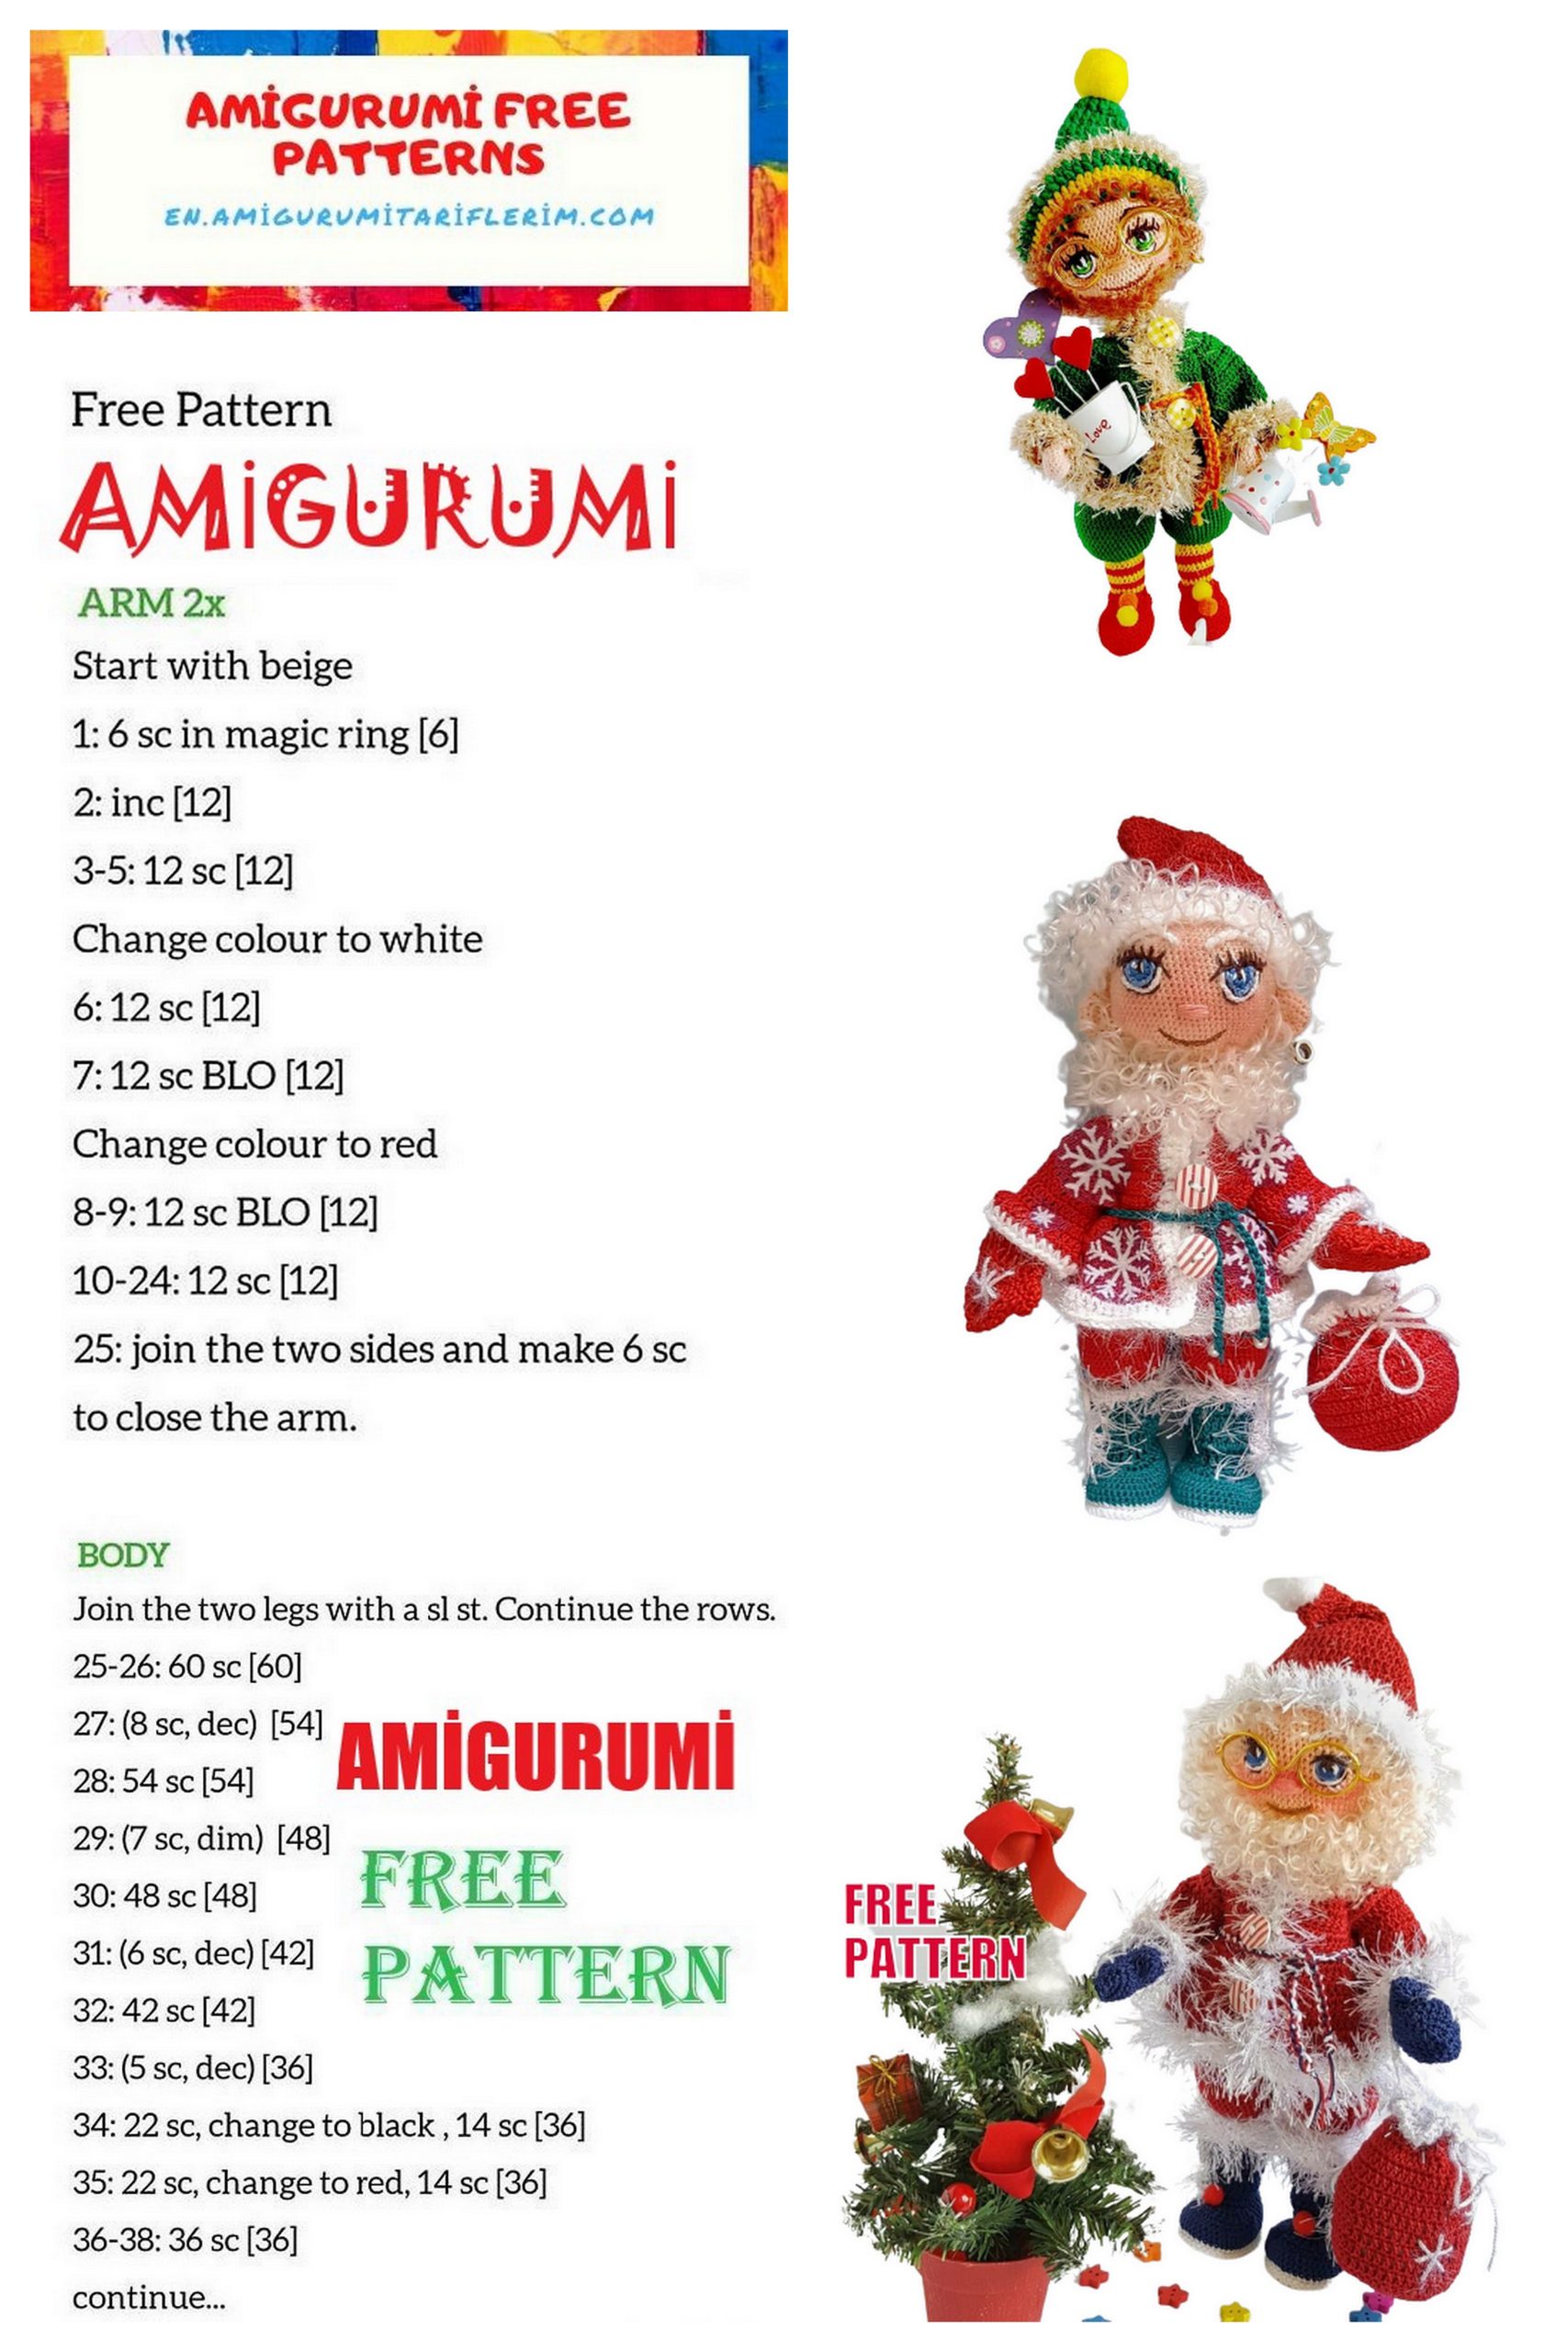
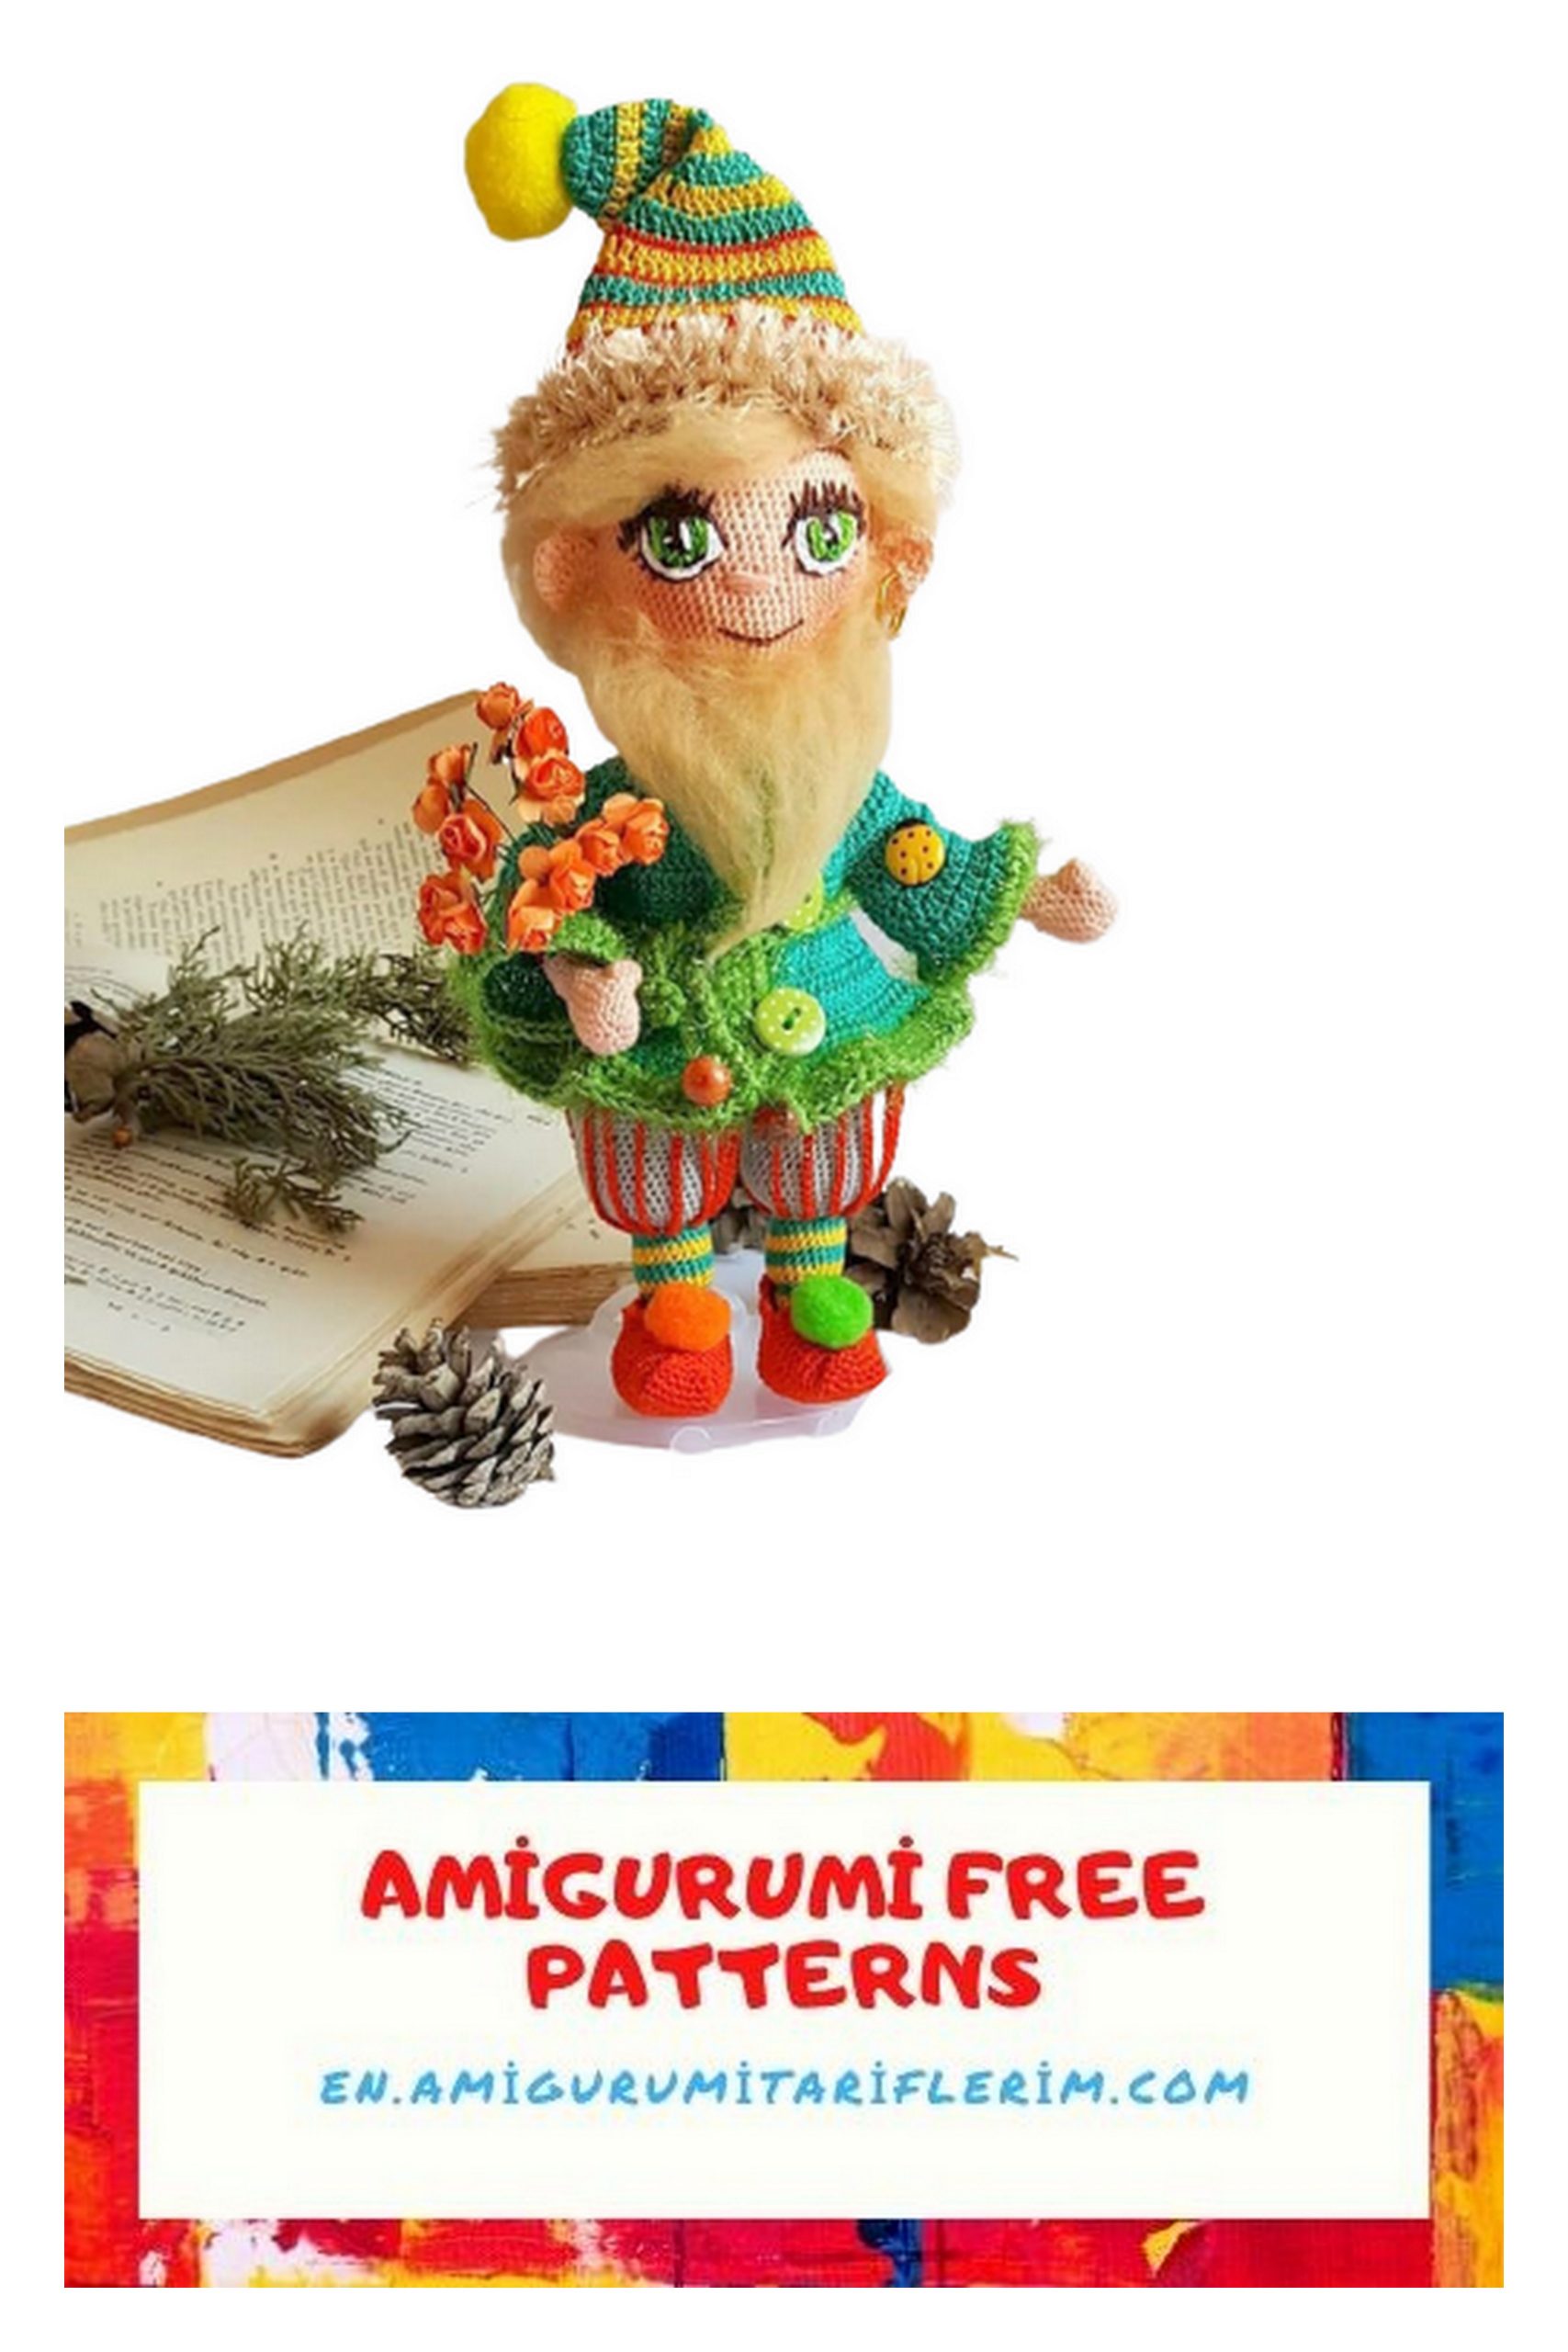
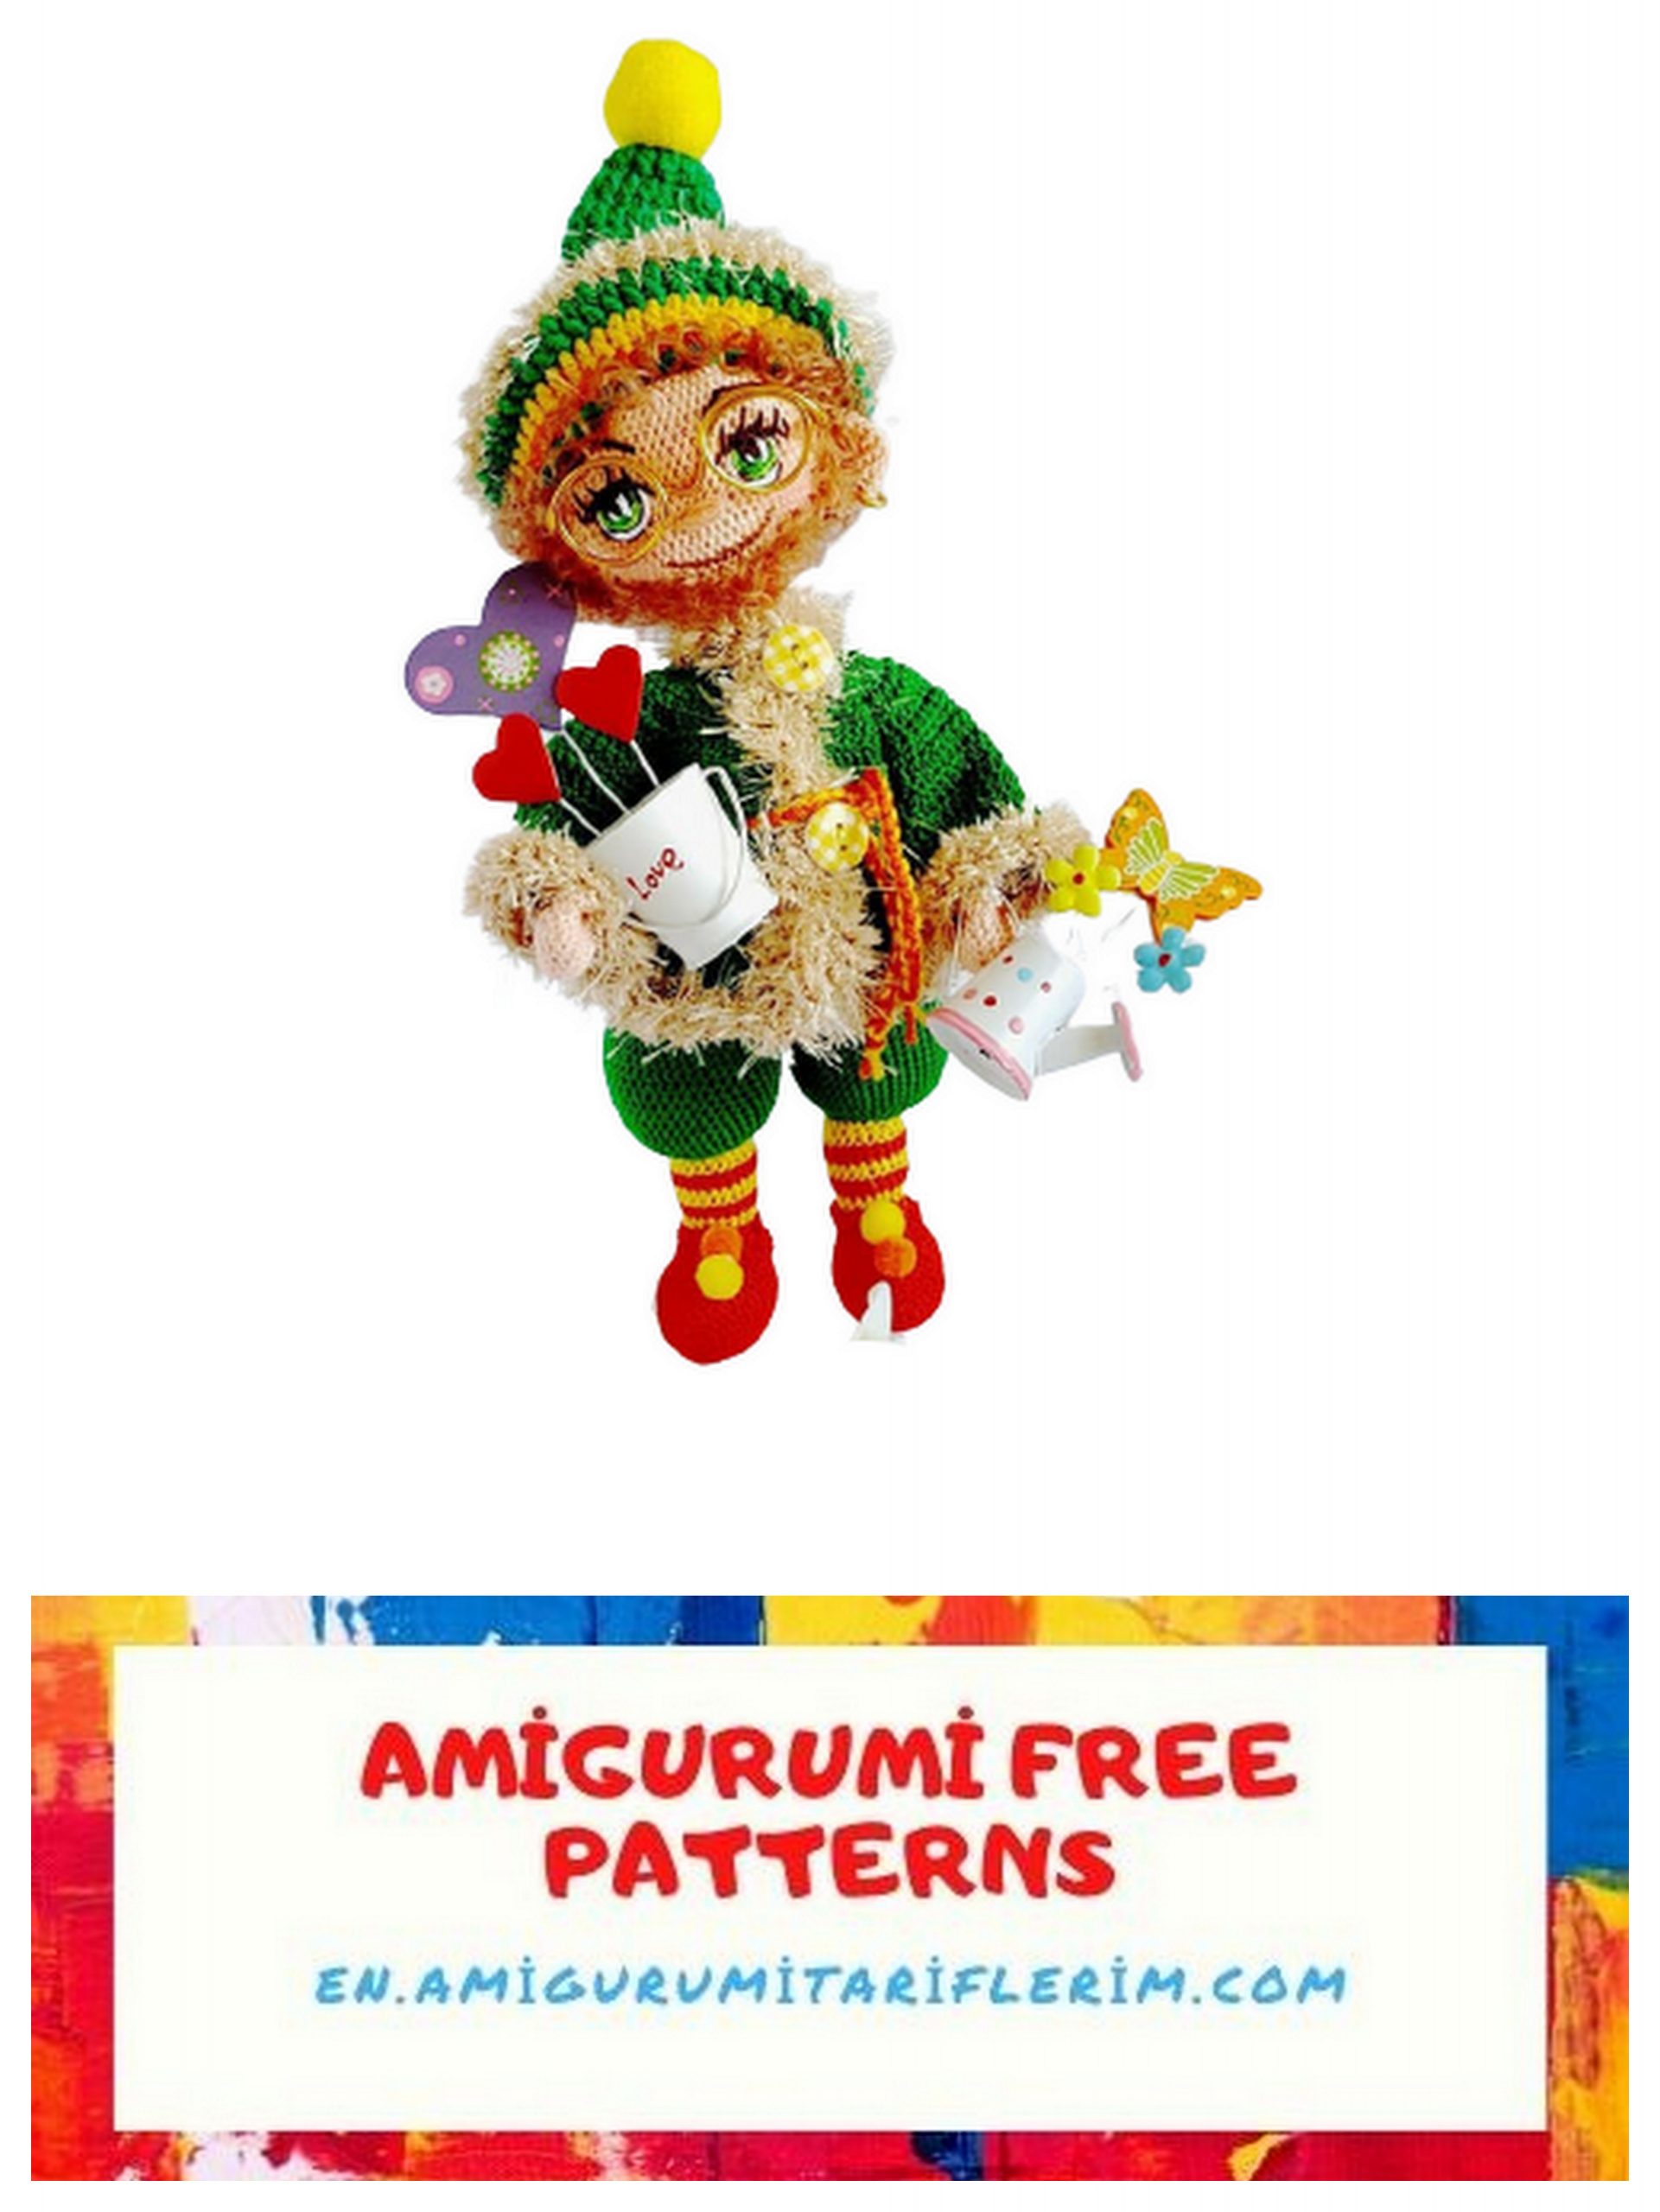
Santa Claus and Christmas Gnome Amigurumi Free Pattern
I continue to share amigurumi free patterns. In this article, santa claus and gnome amigurumi free pattern is waiting for you.
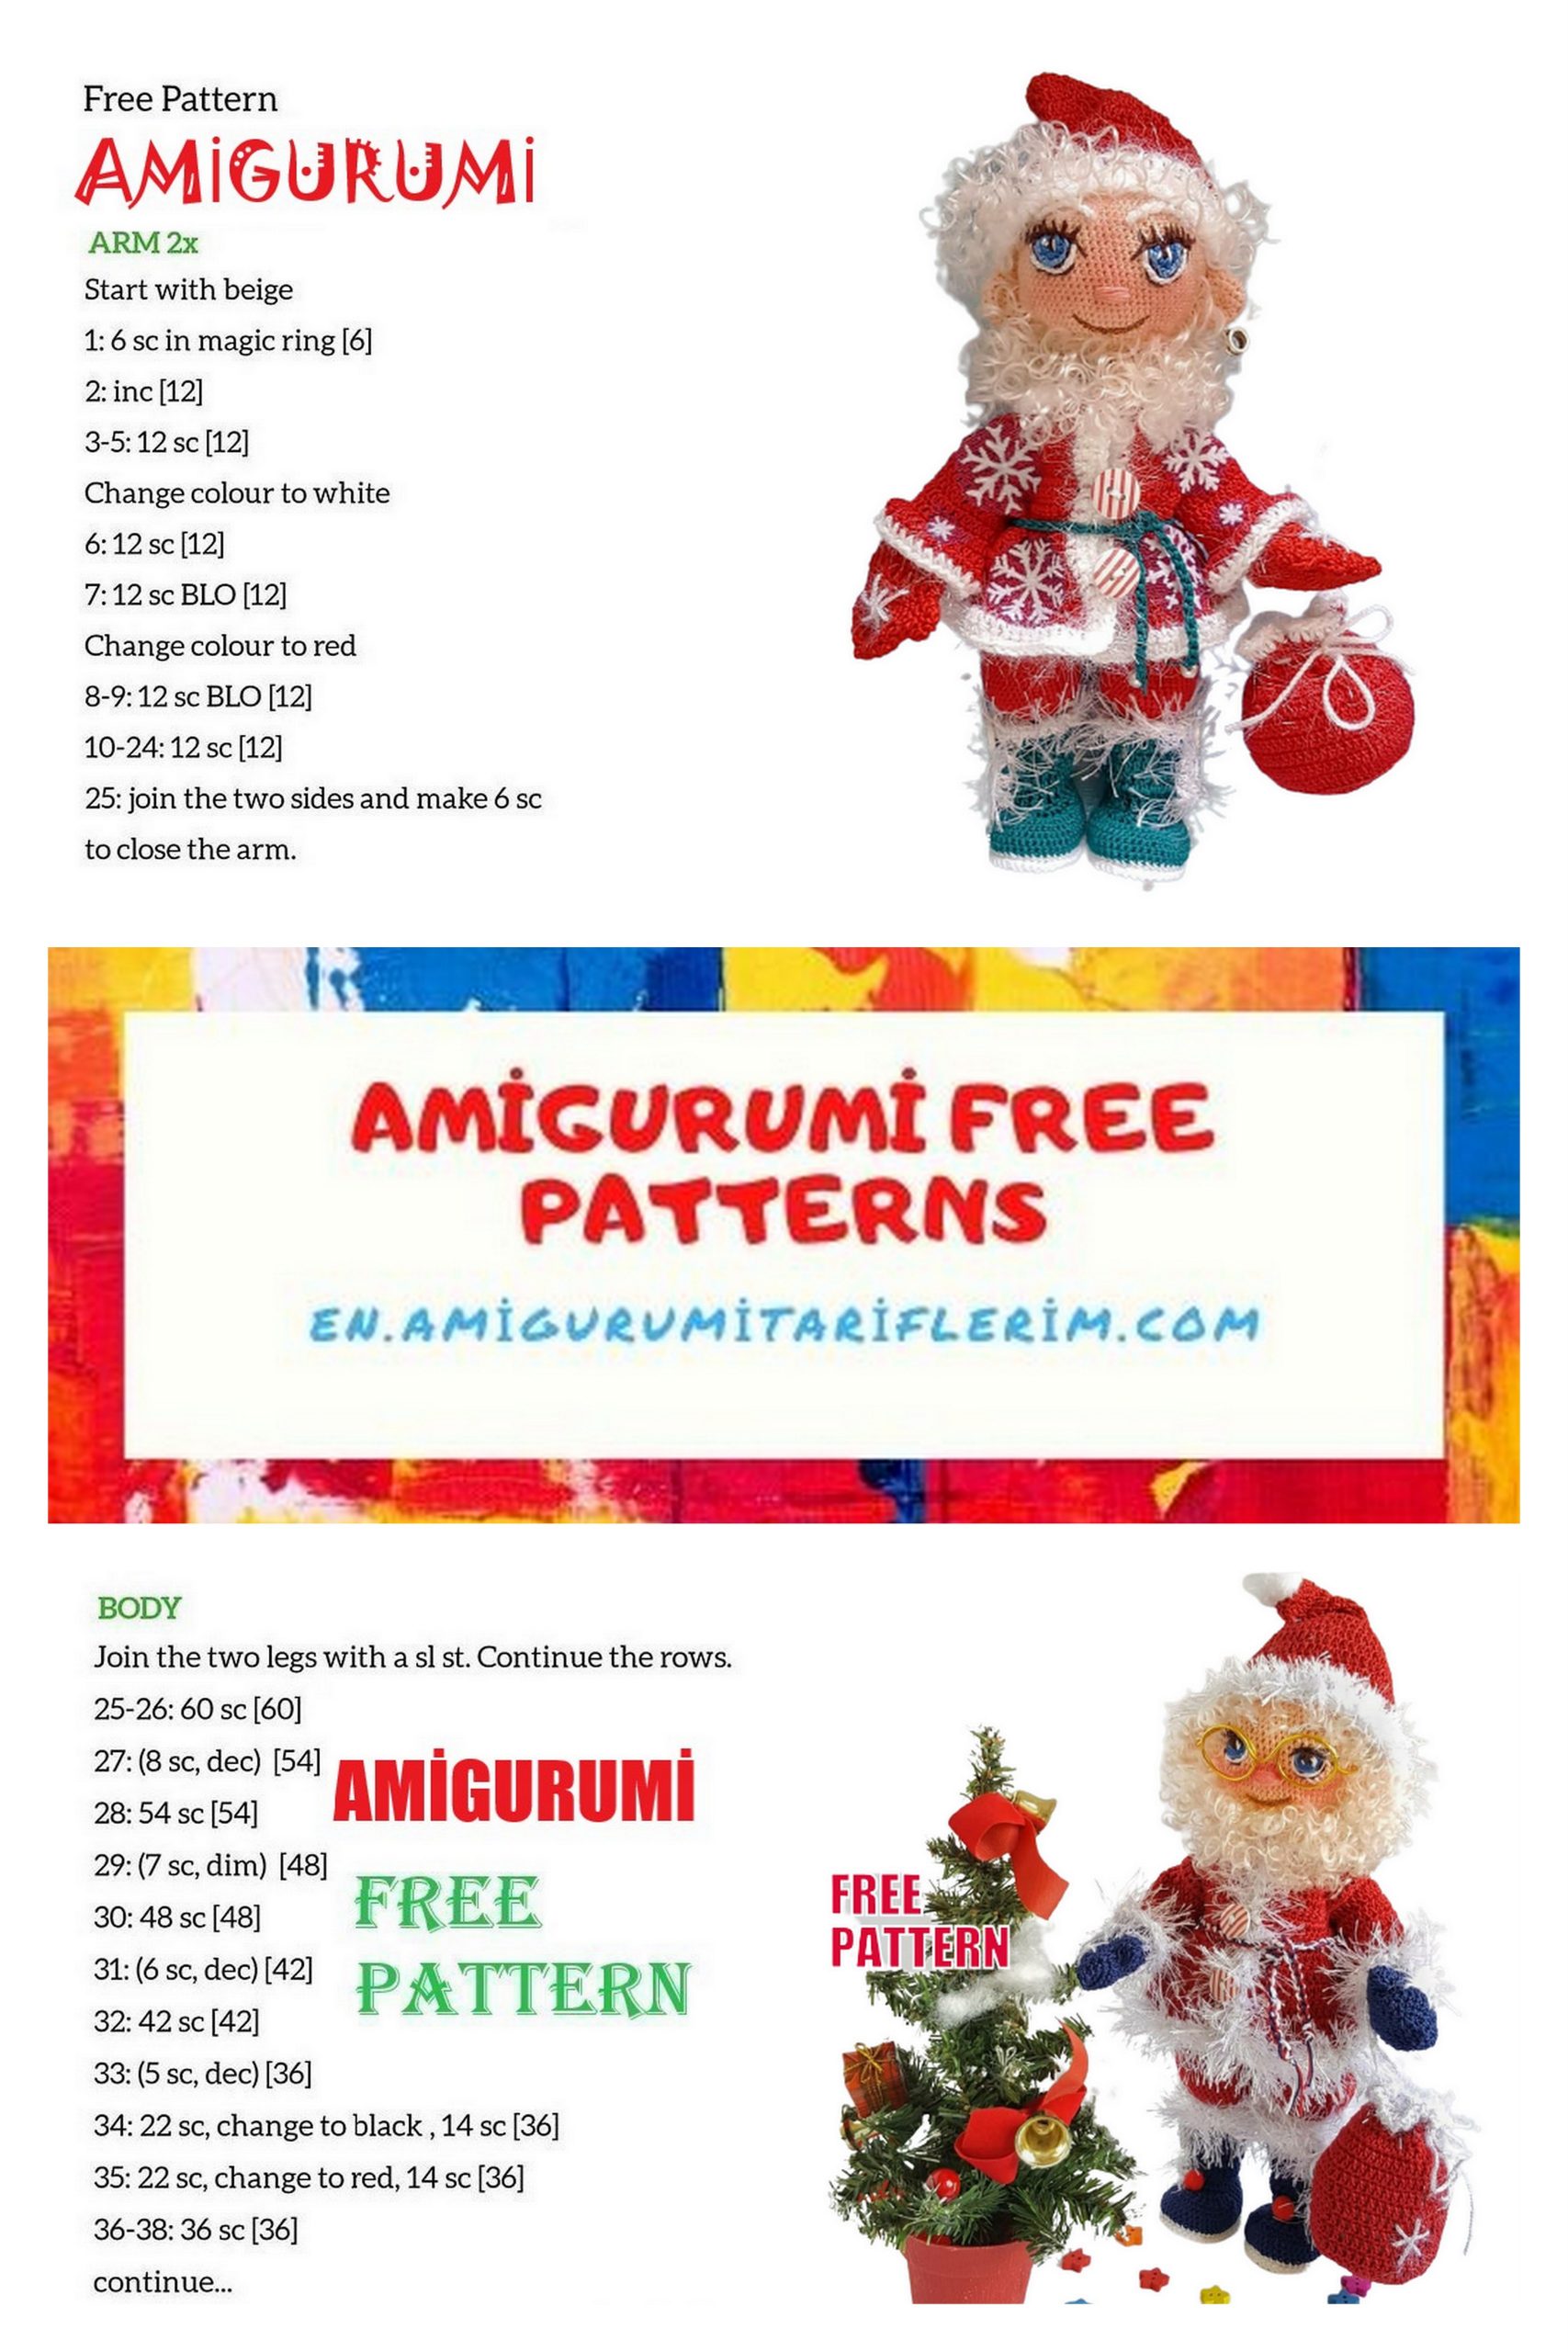
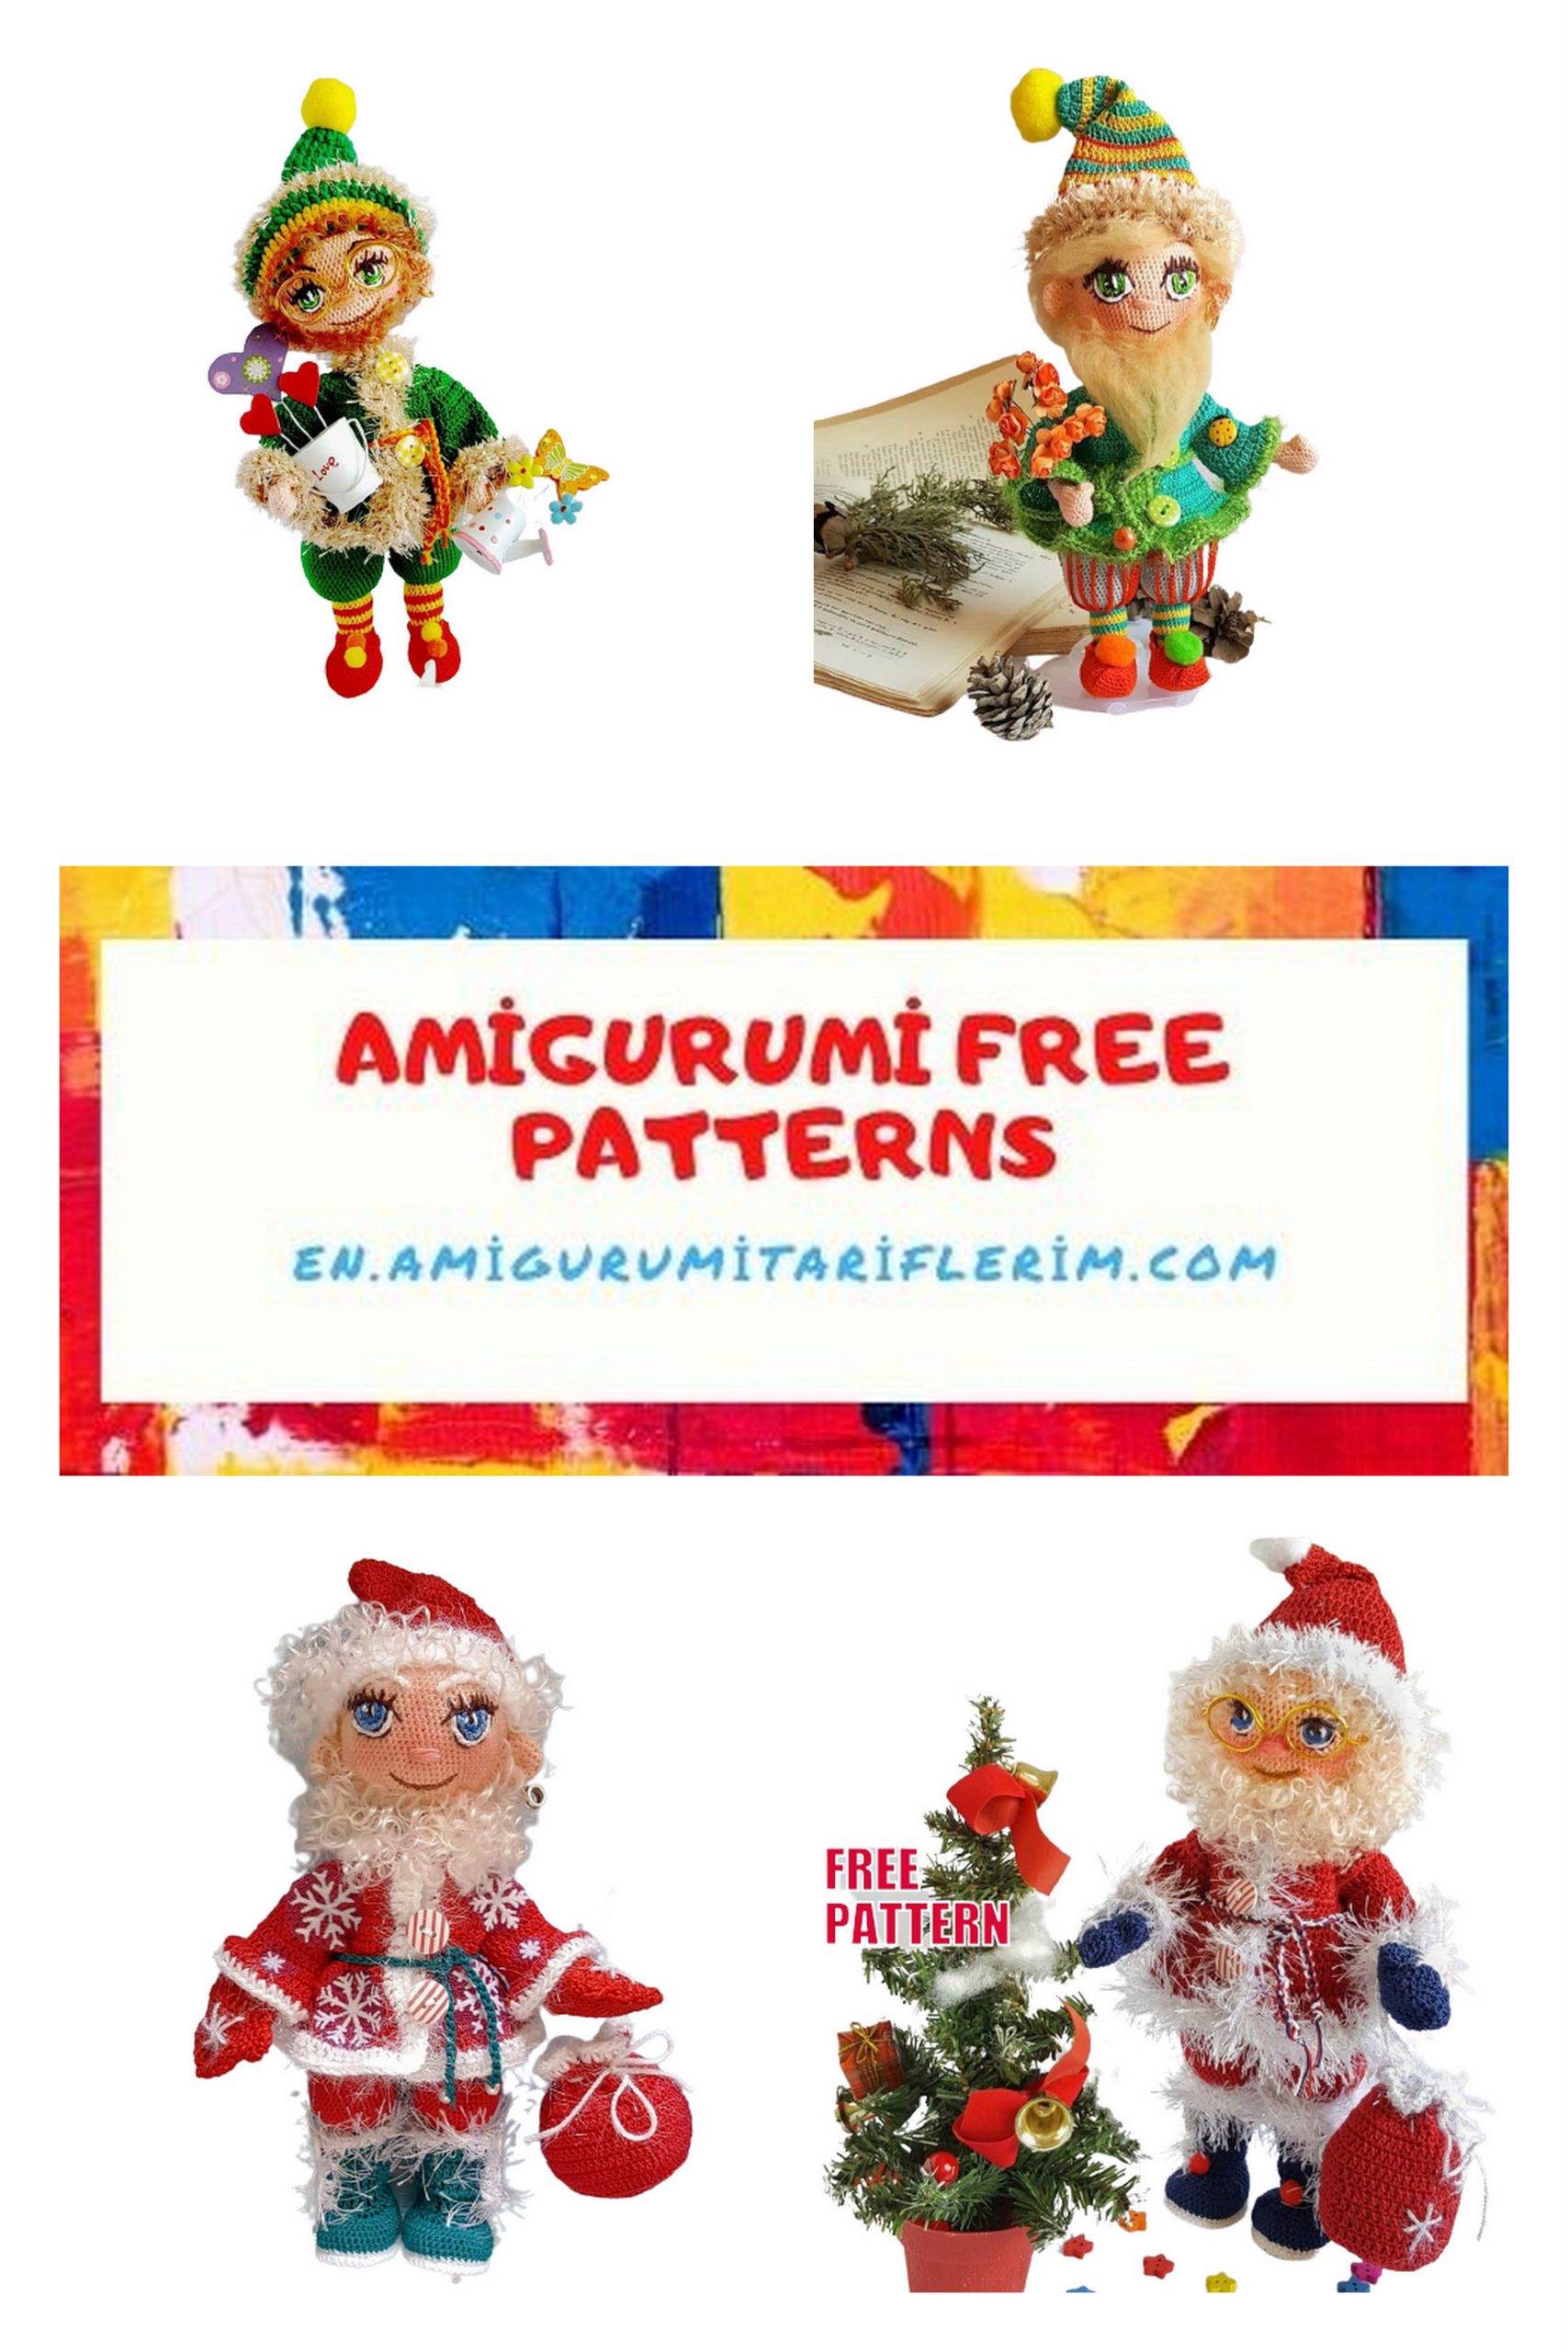
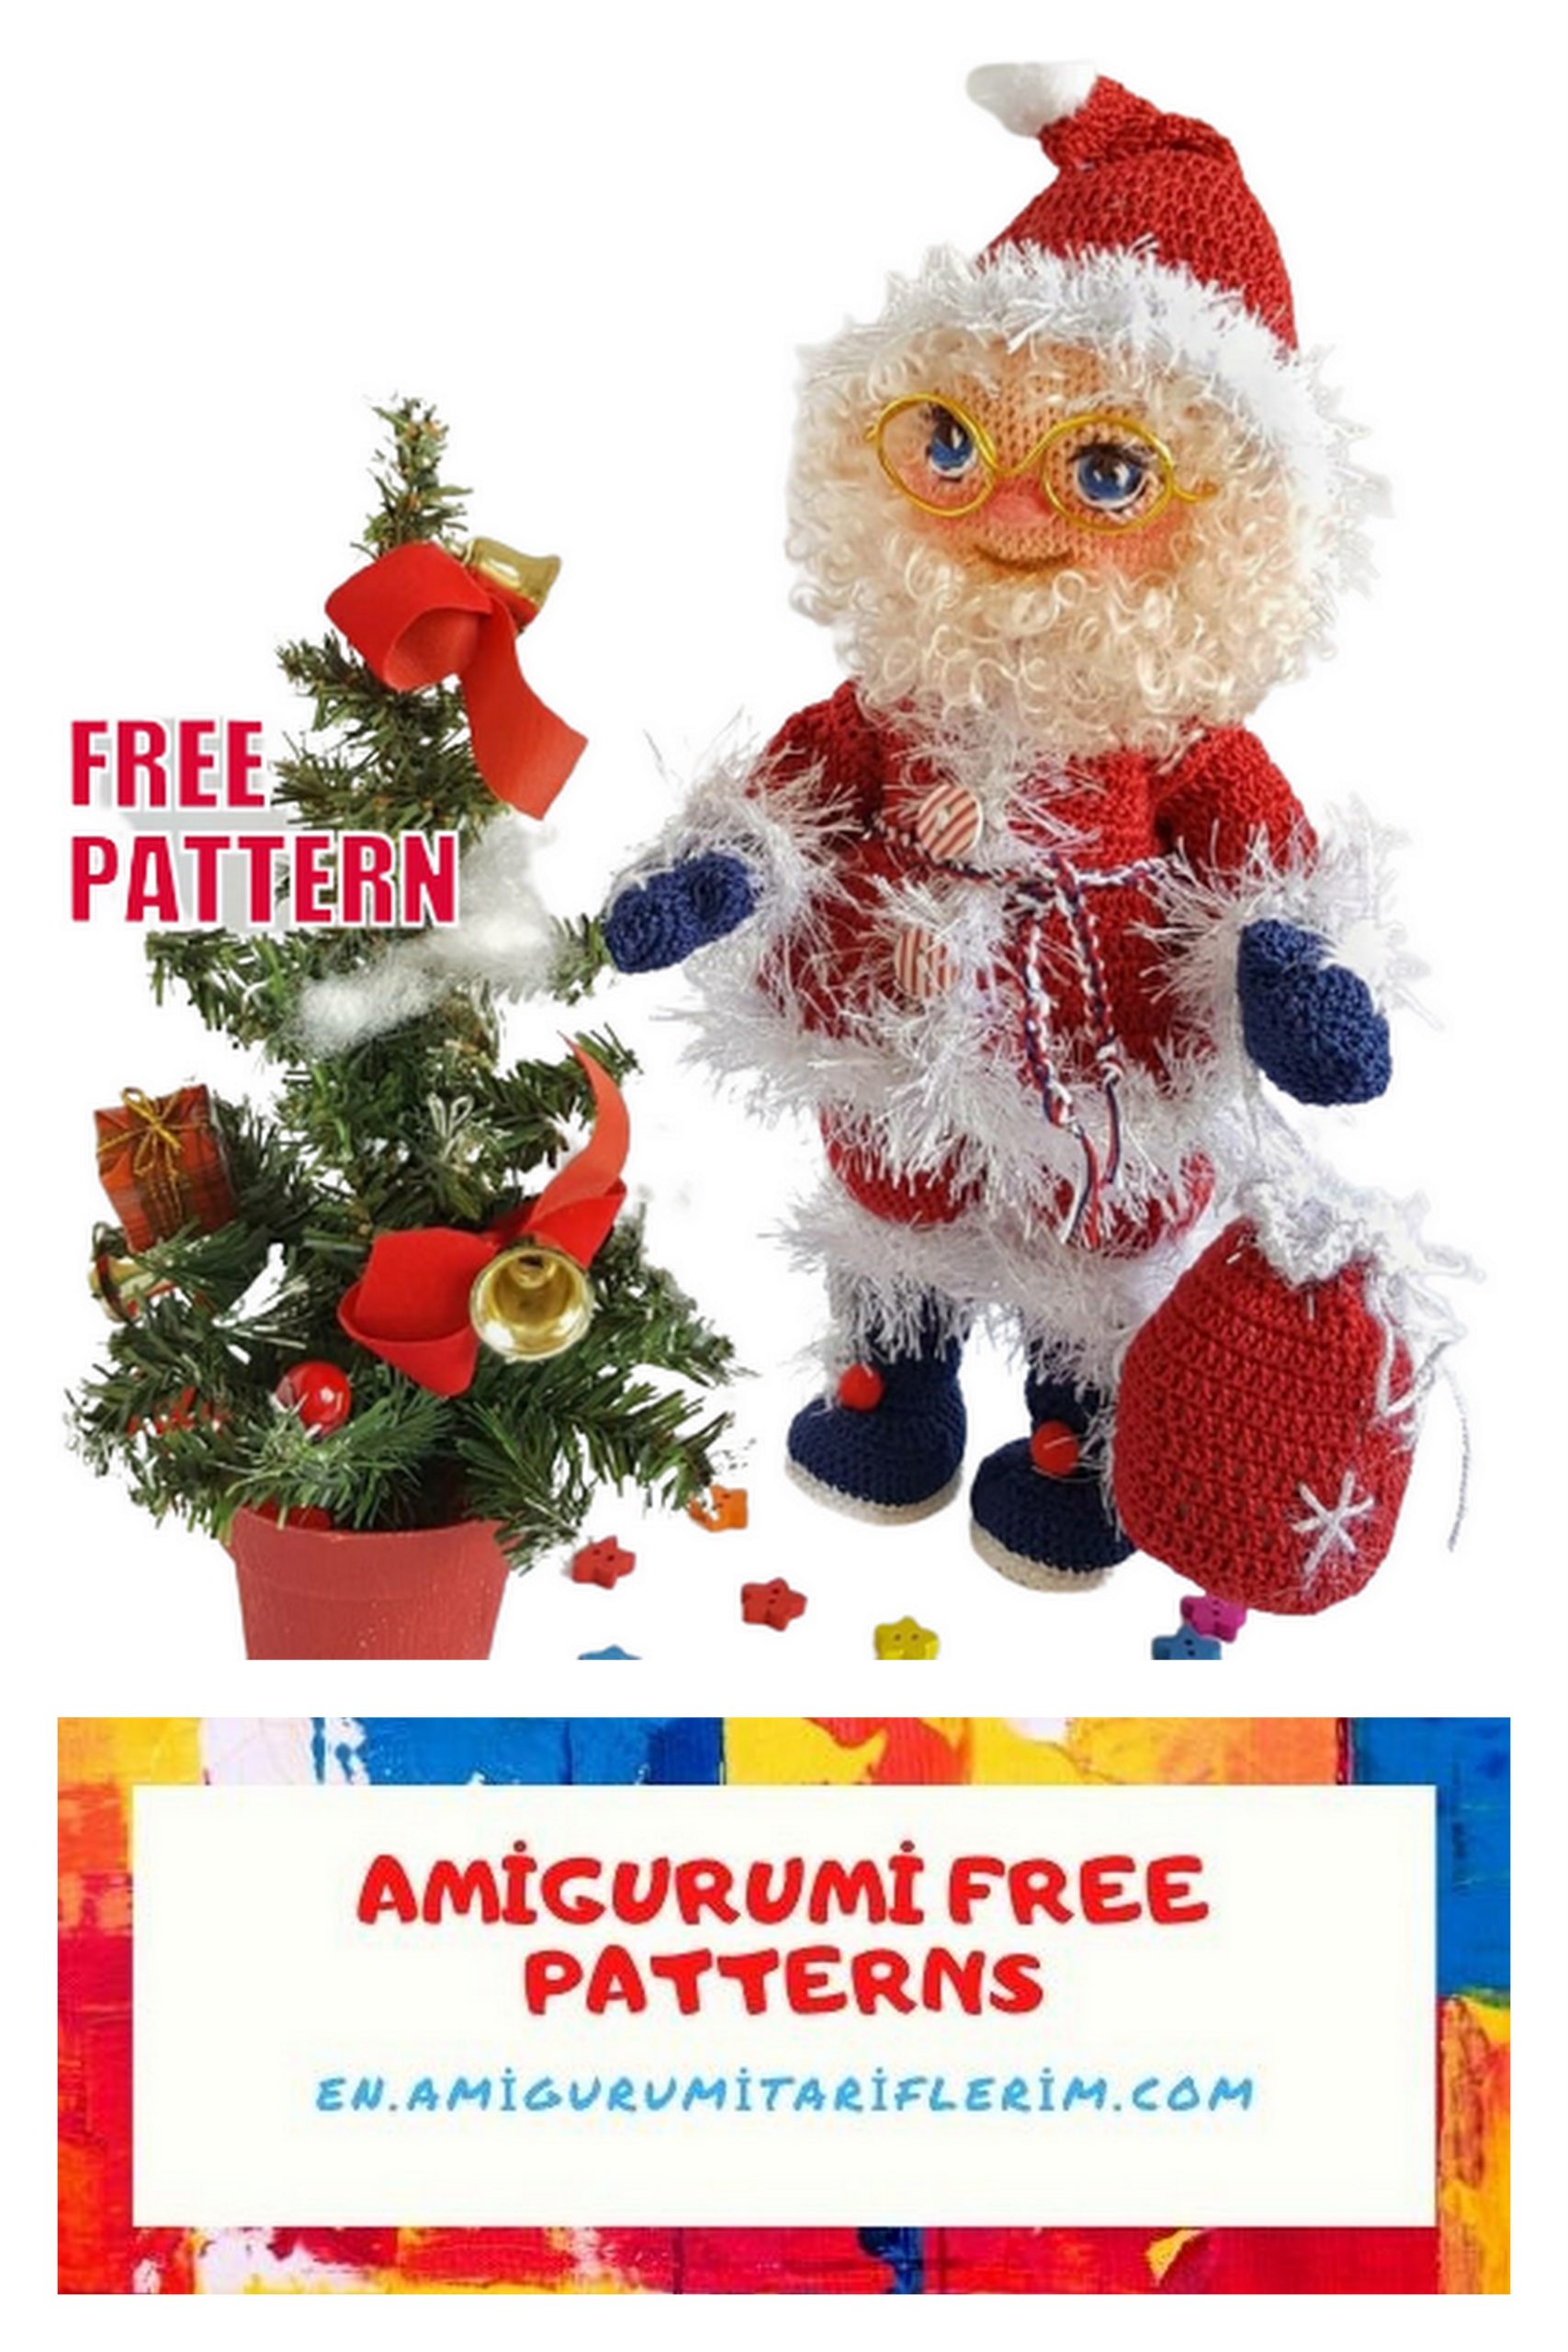
Santa Claus, Merry
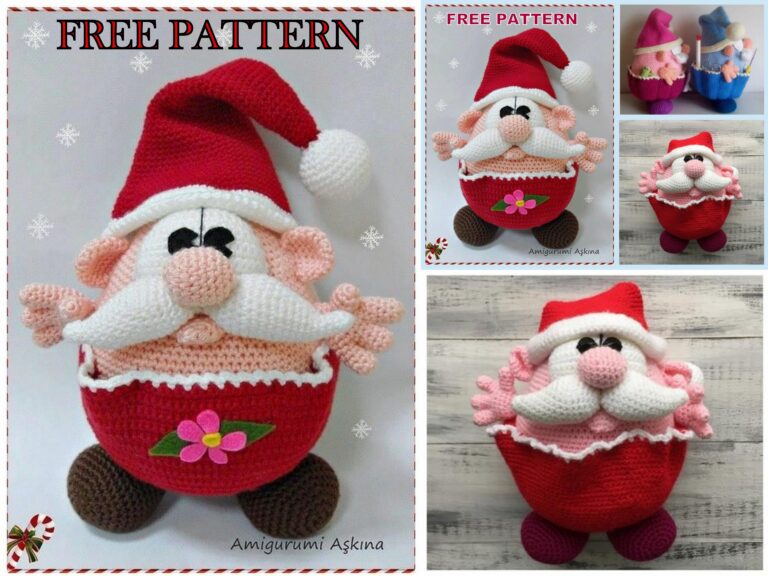
Gnome and the Cheerful Chef
3 dolls one description!
The master class is based on the Santa Claus doll. Added to description
design options for the Jolly Gnome and Jolly Cook dolls.
What the master class includes:
The whole process of knitting a doll is shown step by step with a photo.
M / c above the average level of difficulty, does not include training in techniques
knitting, crochet skills are required.
how to tie a doll body
how to knit a set of clothes: a jacket, boots for Santa and
shoes for the Cook and the Gnome, hats for Santa and the Gnome,
a chef’s hat, mittens for Santa, a scoop and a chef’s shawl
how to make eyes
…
how to sew on hair and beard tresses, how to sew on hair and
Gnome’s beard
The master class provides options for knitting the doll’s body and
inside out. I knitted on the wrong side, it’s more convenient for me.
Recommendation: For the doll’s clothes and body, take the same type of yarn,
because the calculation for knitting the doll’s body and clothes is made for yarn
the same footage. The body is crocheted 1.0, crocheted clothes 1.25.
If your yarn is different in thickness, then try on clothes and
adjust the knitting yourself.
Snowflakes cut from winter tulle are used for decoration
collection.
Introduction:
My instagram My group in FB My group in contact
Important information!
All rights to this master class are reserved. The master class is
paid and is intended for personal use only.
Resale of metal products and distribution is prohibited! Knit for yourself, for
your loved ones, for your buyers, sell your dolls!
Please respect copyrights!
Olga Pinsky
Cotton yarn (Pekhorka openwork or Alize miss) 280m / 50g.
For finishing the yarn of your choice: weed Alize Dekofour, Adelina
Diamond or Alize soft
Hook number 1.0 for doll body, hook 1.25 for clothes
Tresses such as a rope or wool and a felting needle
Buttons for a jacket and boots, white beads, pom-poms
Iris or floss thread for eye embroidery, sewing needle,
markers for drawing on fabric (optional)
Copper wire for the frame with a diameter of 2.0 or 2.5 (you can
in isolation) about 60 -70cm. Desirable chenille wire with
fluff, but not necessarily 25cm and aluminum wire
diameter 1.5cm length about 25cm for pens
Adhesive or gel like UXU or Crystal for textiles
Filling: holofiber or synthetic fluff
Some thin felt, plastic, or cardboard for the insoles
ABBREVİATİONS:
sc – single crochet,
DC – double crochet,
HDC – half double crochet,
sl-st – slip stitch,
loop – lifting loop, if at the end of the row
ch – chain,
inc – increase, knit from 1 loop 2,
dec – decrease, knit 2 loops together
Hook 1.0. We knit with flesh-colored yarn.
The handles may not seem symmetrical, but when we connect to the body and
insert the frame everything will fall into place. Description for knitting on the wrong side.
If you knit on the front side, then everything is the same, only the handles
swap places (first you get right, then left).
PATTERN

Left handle:
1st row – knit in flesh color 6 sc in an amigurumi ring
2nd row – 1inc * 6 (12), marker
3rd row – (1sc, 1inc) * 6 (18)
4 – 6 row (3 rows) – 18sc (18)
7th row – put a marker, in 1sc knit 5DC, 17sc (23)
8 row – 5DC knit with one vertex, 17sc (18)
9th row – 2sc, (1dec, 2sc) * 4 (14)
10 row – 1sc, (1dec, 2sc) * 3, 1sc (11)
11-12 rows – 11sc (11)
13th row – 1sc, (1inc, 2sc) * 3, 1sc (14)
14th row – 13sc, 1inc (15)
15th row – 1inc, 14sc (16), knit another 10sc
to the middle of the back of the hand, marker
Change the color to green for the sweater.
16-17 rows – 16sc (16)
18th row – 1inc, 7sc, 1inc, 7sc (18)
19-20 rows (2 rows) – 18sc (18)
Arms:
21 row – 3sc, 1dec, 13sc (17)
22 row – 2sc, 1dec, 2sc, 1dec, 7sc, 2inc HDC (elbow) (17)
23rd row – 2sc, 1inc, 2sc, 1inc, 7sc, 2dec (17)
24th row – 17sc (17)
25th row – 3sc, 1inc, 13sc (18)
26-28 rows (3 rows) – 18sc (18)
29th row – 9sc, 1inc, 8sc (19)
30th row – 19sc (19)
31 row – 1inc, 18sc (20)
32 row – 10sc, 1inc, 9sc (21)
33 row – 21sc (21), knit another 10sc to the middle of the armpit, thread
fasten and trim.

Right handle:
1-20 row – like the left handle
21 row – 13sc, 1dec, 3sc (17) 2 alignment loops
22nd row – 2inc HDC (elbow), 7sc, 1dec, 2sc, 1dec, 2sc (17)
23rd row – 2dec, 7sc, 1inc, 2sc, 1inc, 2sc (17)
24th row – 17sc (17)
25th row – 13sc, 1inc, 3sc (18),
26-28 rows (3 rows) – 18sc (18)
29th row – 8sc, 1inc, 9sc (19)
30th row – 19sc (19)
31 row – 18sc, 1inc (20)
32 row – 9sc, 1inc, 10sc (21),
33 row – 21sc, knit another 14sc until the middle
armpits, fasten and cut the thread.
Hands (continued):
Hook 1.0. Cast on a chain of 8 air loops with green yarn,
knit in the 2nd loop from the hook:
1 row – 1inc, 5sc, 4sc in 1 loop, 5sc, 1inc (18)
2nd row – 2inc, 6sc, 3inc, 6sc, 1inc (24)
3rd row – (1inc, 1sc) * 2, 1inc, 5sc, (1inc, 1sc) * 2, 1inc, 6sc, 1inc, 1sc,
1inc (32)
4th row – (1sc, 1inc) * 3, 8sc, (1inc, 1sc) * 3, 1inc, 8sc, 1inc, 1sc, 1inc (41)
Cut the felt insole to fit the foot, glue it later.
5 row – -41sc for the front half loop (if knitting on the wrong side) or for
back half loop (if knitting on the front side)
6,7,8 rows – 41sc, (at the end of the 8th row, make 4 alignment loops so
so that the beginning of the row is in the middle of the back of the foot), marker.
Glue the insole to the inside of the foot.
Important! The description indicates knitting on the wrong side, if you knit on the front
side, then accordingly change “for the front p / p” (9th row) to “for
back p / p “and” behind the back p / p “(10, 11 rows) to” behind the front p / p ”
(half loop).
9 row – 7sc, 13 decDC for the front p / p, 8sc (28)
10 row – 7sc, 7dec for back half loop, 7sc (21)
11 row – 5sc, 5dec for the back half loop, 6sc (16)
12 row – 1dec, 12sc, 1dec (14)
You can start changing the thread from row 15 if it is difficult.
13 row –- Changing the thread to white 2sc, 1inc, 8sc, 1inc, 2sc (16)
14 row – 16sc (16)
15 row – Change the thread to green 1sc, 1inc, 12sc, 1inc, 1sc (18)
Legs:
Legs (continued):
16th row – 3sc, 1inc, 10, 1inc, 3sc (20)
17th row – changing the thread to white 2sc, 1inc, 14sc, 1inc, 2sc (22)
18th row – 1inc, 10sc, 1inc, 10sc (24)
19, 20 row (2 rows) – change the thread to green 24sc (24)
21, 22 row – change the thread to white 24sc (24)
23rd row – changing the thread to green 24sc (24)
24th row – (1dec, 4sc) * 4 (20)
We begin to knit the pant leg with red yarn.
25th row – 9sc, 2inc, 9sc (22)
26th row – 22sc (22)
27 row – (1sc, 1inc) * 11 (33)
28th row – 33sc (33)
29th row – (2sc, 1inc) * 11 (44)
30-35 row (6 rows) – 44sc (44)
36th row – 10sc, 1dec, 20sc, 1dec, 10sc (42)
37 row – 42sc (42), knit 31-32sc more (to the middle of the inner
parts of the leg), fasten and cut the thread.
This will be the right leg (if you knit on the wrong side) and the left leg (if you knit
on the face).
Let’s tie the left leg. We finish knitting in the middle of the inner
parts of the leg, i.e. 37 row – 42sc (42), knit another 10sc, the thread is not
cut off.
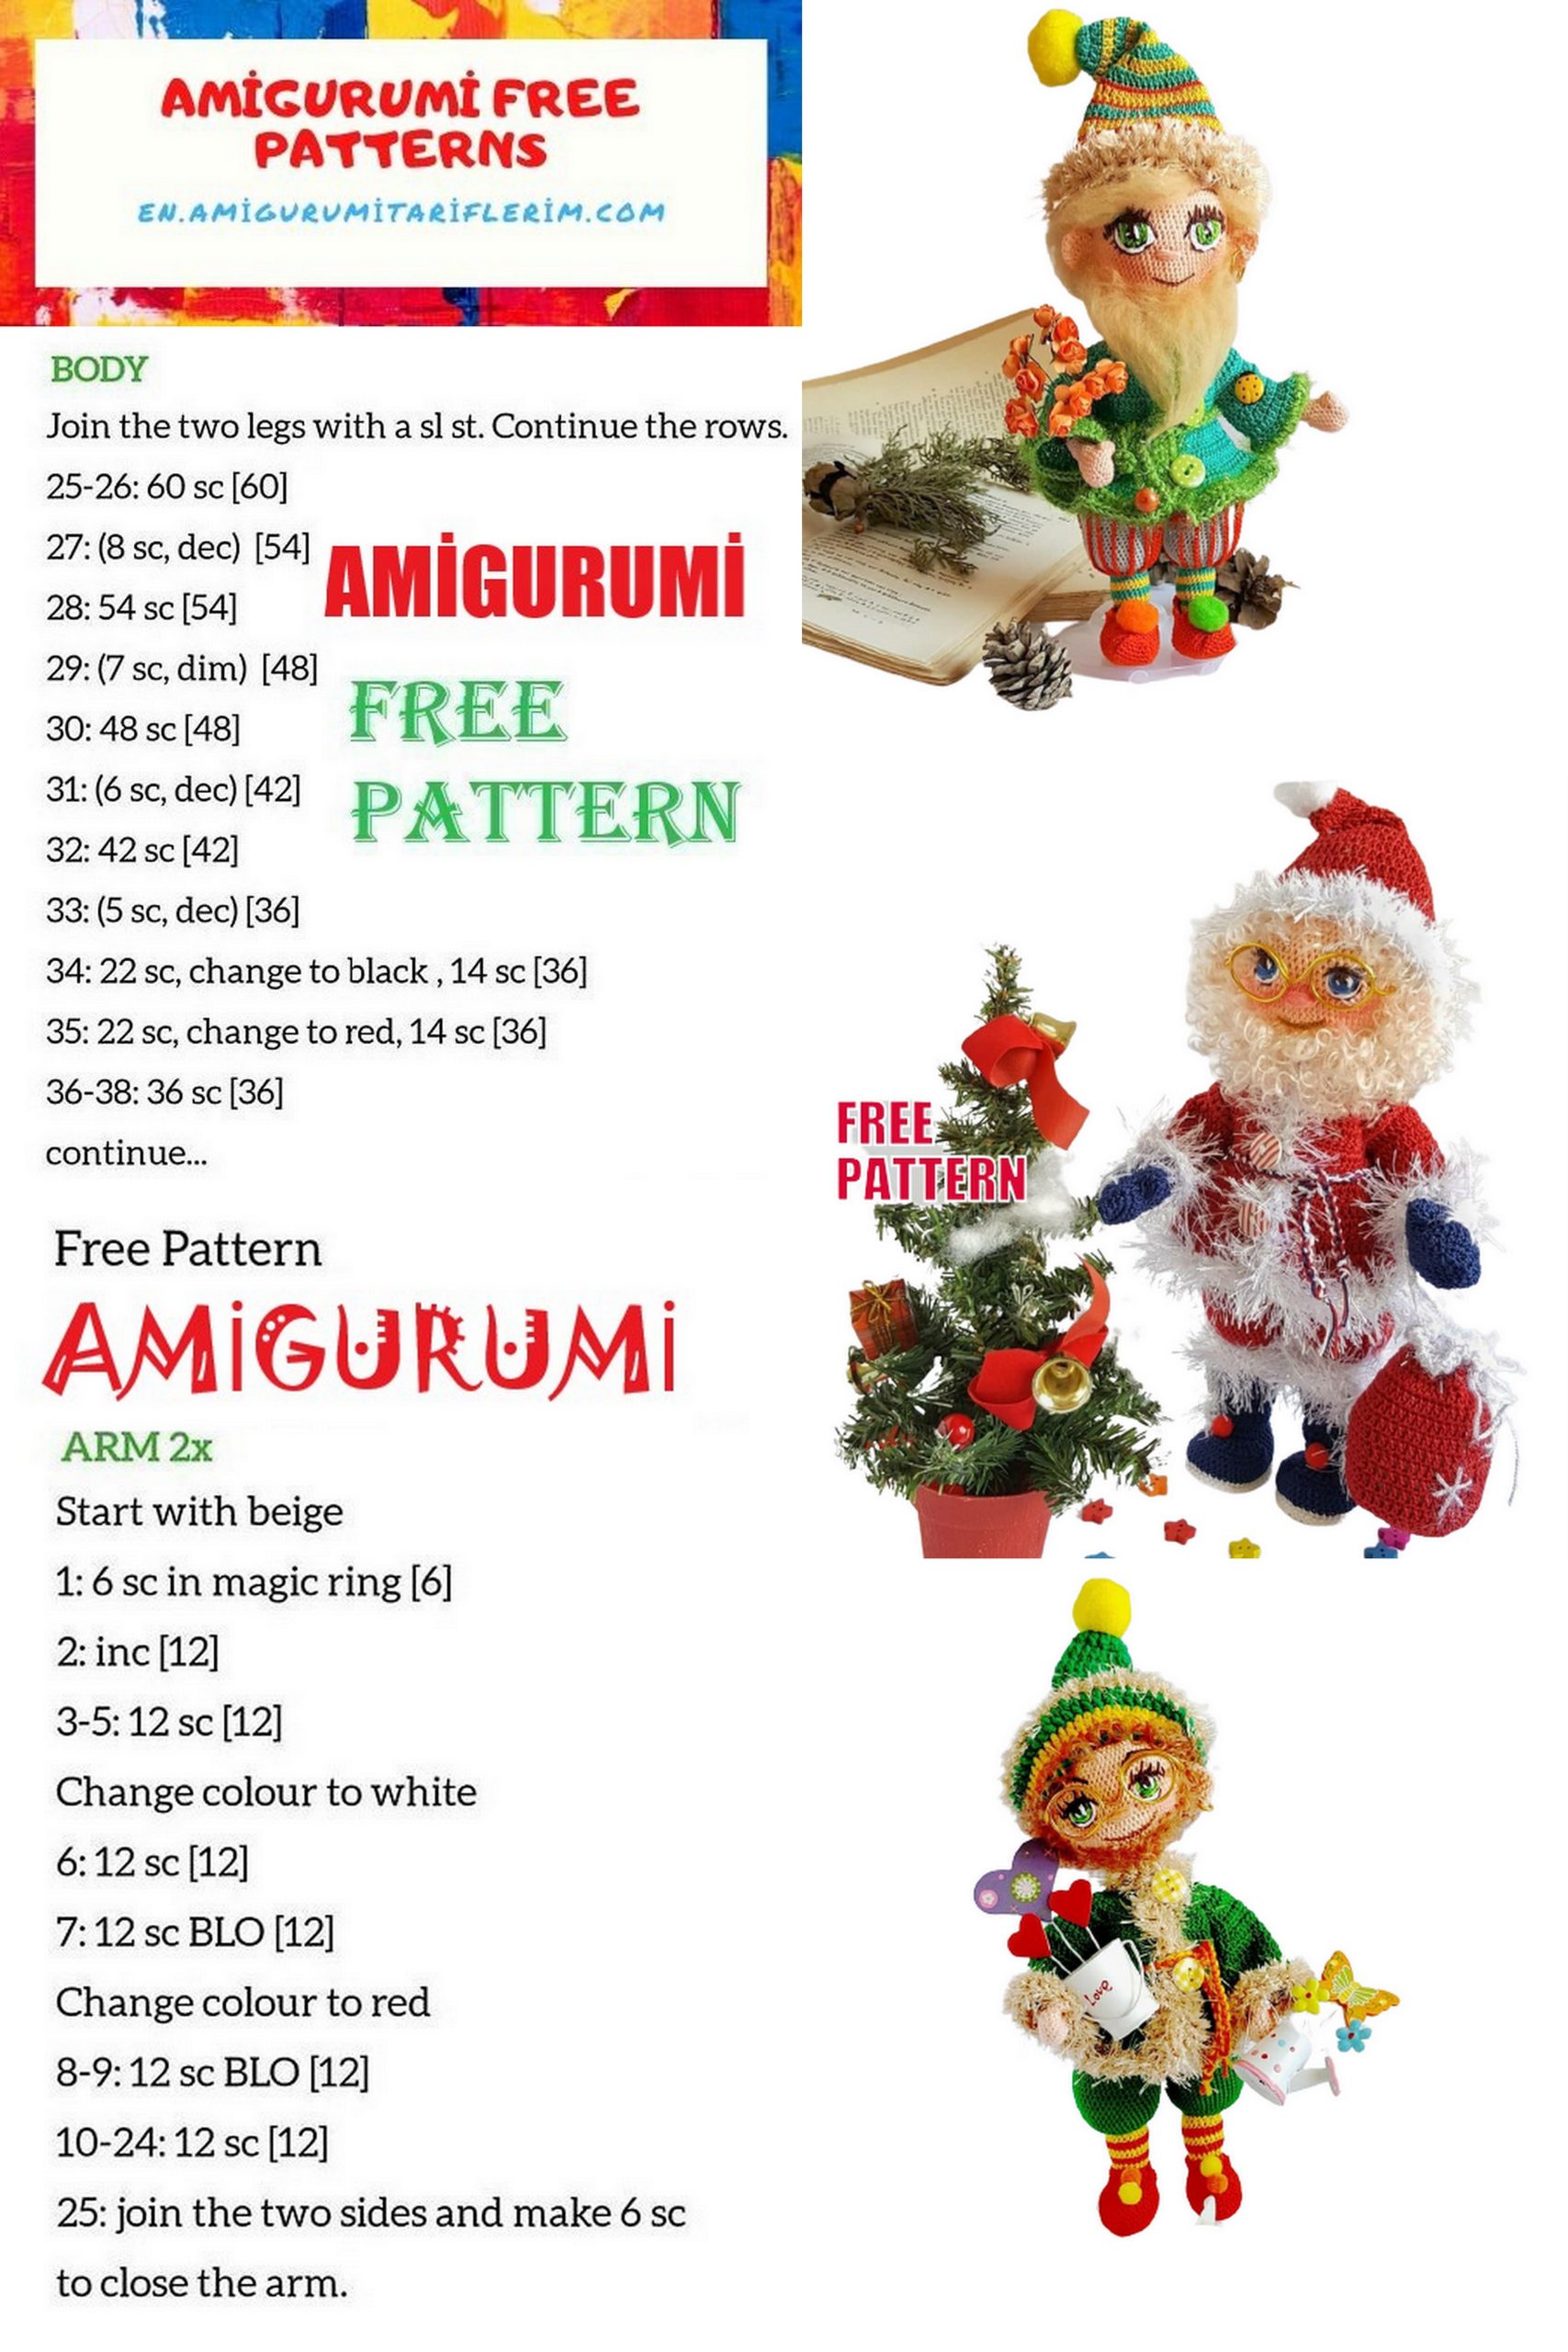
Author
Legs (continued):
It’s time to insert the frame. Take a wire and cut 2 sections
30-35 cm long. Bend the wire at the ends (where the feet are),
as shown in the photo, wrap with electrical tape.
Insert into each leg. Start stuffing the legs first in the foot.
Do not rush, add synthetic fluff in small portions using
tweezers, while squeezing with your fingers, as if distributing
filler inside. So gradually fill the legs themselves, wide
do not fill part of the legs with filler so that the synthetic fluff does not climb
under to
A
sniffer.
second doll
Body:
We begin to connect the legs and knit the body. We continue to knit with color
panties.
38 row – dial 2 from the middle of the inner thigh of the left leg
air loops (ch), then along the right leg (go to the side
priests) 42sc, 2sc (along a chain of 2ch), 42sc on the left leg
(88) Here we put a marker. This is for knitting on the wrong side.
If you knit on the face, everything is the same, only from the right leg to the left.
39 row – 13sc, 1inc, 60sc, 1inc, 13sc (90), 1 more sc from the next row,
marker
40-41 rows (2 rows) – 90sc (90)
42 row – 20sc, 1dec, 46sc, 1dec, 20sc (88)
Connect the wires of both legs, you can twist them a little and wind
electrical tape. I start adding filler to the body when I tie it above
waist.
Body (continued):
43rd row – 15sc, 1dec, 54sc, 1dec, 15sc (86)
44th row – 14, 1dec, 54bn, 1dec, 14sc (84)
45 row – 84sc (84), 1 alignment loop
46 row – 10, 1dec, (19sc, 1dec) * 3, 9sc (80)
47th row – 80sc (80)
48th row – 9sc, 1dec, (18sc, 1dec) * 3, 9sc (76)
49th row – 76sc (76)
50th row – 9sc, 1dec, (17sc, 1dec) * 3, 8sc (72))
51 row – 72sc (72)
52 row – 17sc, 1dec, 34sc, 1dec, 17sc (70)
53 row – 7sc, 1dec, (16sc, 1dec) * 3, 7sc (66), 1 alignment loop
54th row – (20sc, 1dec) * 3 (63)
Change the color of the yarn to the color of the sweater.
55 row – (19sc, 1dec) * 3 (60), 1 alignment loop
56 row – 15sc, 1dec, 26sc, 1dec, 15sc (58)
57 row – 11sc, 1dec, (14sc, 1dec) * 2, 11sc, 1dec (54)
58-62 rows (5 rows) – 54sc (54), marker in the middle of the back, with
make alignment loops if necessary
Body (continued):
63 row – 12sc, 1inc, 28sc, 1inc, 12sc (56)
64-70 rows (7 rows) – 56sc (56)
The height of the doll depends on the number of these rows, you can knit more
or less by 2-4 rows.
I do not like long dolls, I like cartoon more and
slight disproportion in the figure of the character. Do not forget,
that the shoulders, neck, head will also be added to the height of the doll, so I
leaving only 70 rows before tying hands.
Now add some padding to the legs and body. We fill tightly
in small portions, seal.
Important: check that the marker is exactly in the middle of the backrest. When
if necessary, knit 1-2 offset loops.
We begin to knit our hands.
71 row – 12sc on the back, 3sc knit together with 3sc right
knobs, 26sc, 3sc together with 3sc left knob, 12sc (56)
72 row – 12sc, 18sc on the right handle, 26sc, 18sc on the left
handle, 12sc (86)
73 row – 11sc, 1dec, 16sc, 1dec, 11sc, 1dec, 11sc, 1dec, 16sc, 1dec,
10sc, 1dec (together 1sc from this row and 1sc from next row) (80), marker
74th row – 10sc, 1dec, 14sc, 1dec, 11sc, 1dec, 10sc, 1dec, 14sc, 1dec, 11sc (75)
Body (continued):
At this stage, you need to insert the wire into your hands. I take aluminum
wire and chenille wire with fibers (if you don’t have one, then
nothing wrong). Cut one and the other wire along the length of the arms along with
shoulders and bend on the palms (try on), fold together, bend on
place of your palms and wrap with electrical tape for strength, as shown in Photo. I cut about 25cm.
Insert the wire first into one handle, then into the other, falling between body wires. Wrap the body wire with electrical tape to its full height neck.
If there is no fuzzy wire, then add synthetic fluff to the handles throughout
the length is a little, while kneading the handles.
Body (continued):
75th row – 75sc (75)
76th row – 9sc, 1dec, 12sc, 1dec, 22sc, 1dec, 12sc, 1dec, 10sc, 1dec (70)
77th row – 4sc, (1dec, 8sc) * 6, 1dec, 4sc (63)
78 row (5sc, 1dec) * 9 (54), stuff the body tightly, a little filler
add to the hands, form the hangers.
79 row – (4sc, 1dec) * 9 (45)
80th row – (3sc, 1dec) * 9 (36)
81 row – (2sc, 1dec) * 9 (27)
82 row – (1sc, 1dec) * 9 (18)
We knit the neck. Before changing color to flesh, tie a collar and put on
neck. Change the color to flesh after about 87-88 series.
83-90 rows (8 rows) – 18sc (18), you can make your neck longer.
Collar for sweater:
Bend the wire in a loop and wrap
electrical tape.
We knit the collar in the color of the sweater. I knitted in a round and put it on my neck
before knitting the head and before changing the color to flesh. You can simply link
strip along the height of the neck with a width of 30sc and then sew the edges on the doll.
Hook 1.25. We collect a chain of 30 ch (try on the girth of the neck
dolls, if necessary, increase or decrease the number of loops).
1st row – we close the chain in a circle, 2 pp, 30DC, sl-st, 2 pp
At the end of each row we make a connecting post (sl-st) and 2 loops
lifting (pp), we knit round.
2-6 row – 2DC persons, 2DC from (30)
Fasten, thread, leave the sewing tip and sew the collar to
sweater with a few stitches.
Sweater collar (continued):
Head:
We continue to knit the head after the neck. We bend the wire with a loop and
wrap with electrical tape.
1st row – (2sc, 1inc) * 6 (24)
2nd row – (3sc, 1inc) * 6 (30)
3rd row – 2sc, 1inc, (4sc, 1inc) * 5, 2sc (36)
4th row – (5sc, 1inc) * 6 (42)
5th row -3sc, 1inc, (6sc, 1inc) * 5, 3sc (48)
6th row – (7sc, 1inc) * 6 (54)
7th row – 4sc, 1inc, (8sc, 1inc) * 5, 4sc (60)
8th row – (9sc, 1inc) * 6 (66)
9th row – 5sc, 1inc, (10sc, 1inc) * 5, 5sc (72)
10th row – (11sc, 1inc) * 6 (78)
11th row – 6sc, 1inc, (12sc, 1inc) * 5, 6sc (84)
12 – 28 rows (17 rows) – 84sc (84)
At this stage, we will make the eyes (see the section “Eye Shaping”). After
after the eyes are ready, we continue to knit further.
We have tied 28 rows of the head, we begin to make the eyes.
For eyes, you can use 4-5 ply floss or iris. I
I use iris.
1) Count 6 rows from top to bottom. On this row, define the center
face, pin up photo 1.
Then count 6-7 sc left and right and pin the pins. Here
there will be pupils.
2) Insert the needle and thread from the back, leaving the tip on the wrong side
about 8cm, no knots yet. Take the thread itself about 80cm, do not
cut the threads before the end of the process, then we will be the same thread
make the contour and eyelashes of the eyes.
We make the pupils with black or dark brown thread, as shown in
photo: first a cross, then a square (2sc * 2sc). Required
do both eyes in parallel.
3) From the inside, we introduce a needle with a green thread and make a fix photo4,
leaving a small loop of photo 5. Crochet this loop 1.25
we make a chain of 11ch (try on the place) photo 6., the end of the thread with
Pull up the wrong side so that it is not weak.
Eye shaping:
We put aside the hook, take the needle in our hands, insert it into the last loop
chains, tighten the thread. We introduce the needle into the upper right corner of the pupil and
output to the lower corner of the pupil. The result is an iris – a pigtail photo 8.
5) Fix the pigtail iris. To do this, grab the iris pigtail as
with a loop, insert the needle at the same point back inside and bring it to the left
lower corner of the pupil photo 9.
Look at the pictures and do the same with the second eye.
6) Insert the needle with a light green thread into the upper left corner of the eye,
we fix photo 10. Pull the thread, leaving a loop of photo 11.
Eye shaping (continued):
We take the hook, make 4-5ch (according to the height of the iris), put the hook aside,
take the needle in our hands, insert it into the last loop of the chain, tighten the thread.
We insert the needle into the lower left corner of the eye, we bring it to the upper right corner
photo 13. Making another pigtail.
7) We pass to the second eye, repeat all actions.
We will make stitches on a dark green iris, as if wrapping it with thread
light green photo 14.
Also make the pigtails white, fasten them and embroider the highlights on
pupils photo 15, 16.
8) We take a needle with a brown thread, with which the pupils were embroidered,
we enter into the upper right corner and sew the lower eyelid with a seam “back
needle “along the contour not to the end of photos 17, 18, 19.
Eye shaping (continued):
9) Next, we stitch with a seam “back needle” along the contour between the iris and
whites of the eyes photo 20. The eyes themselves are ready photo 21.
10) Next, we make the upper eyelid according to photo 23-26.
11) I show eyelashes from the photo of other eyes, but here it is only important
principle of photo 27-27.
Eye shaping (continued):
The eyes are ready, we don’t make eyebrows yet.
Now we select all the strings from the seamy side, tie the knots,
cut off the ends. Try to keep the threads from pulling the head fabric.
We tie the head.
29th row – 6sc, 1dec, (12sc, 1dec) * 5, 6sc (78)
30th row – (11sc, 1dec) * 6 (72)
31 row – 5sc, 1dec (10sc, 1dec) * 5, 5sc (66)
32 row – (9sc, 1dec) * 6 (60)
33rd row – 4sc, 1dec, (8sc, 1dec) * 5, 4sc (54)
34th row – (7sc, 1dec) * 6 (48)
We begin to stuff our head evenly.
35 row – 3sc, 1dec, (6sc, 1dec) * 5, 3sc (42)
36th row – (5sc, 1 dec) * 6 (36)
37 row – 2sc, 1dec, (4sc, 1inc) * 6, 2sc (30)
38 row – (3sc, 1dec) * 6 (24)
Fill your head tightly.
39 row – (2sc, 1dec) * 6 (18))
40th row – (1sc, 1dec) * 6 (12), add filler one last time.
41 row –6dec (6)
Pull off the hole, fasten and cut the thread.
Hook 1.0. Dial 6sc in the amigurumi ring
1st row – inc * 6 (12)
2nd row – 12sc (12)
3rd row – (1inc, 1sc) * 6 (18)
4-6 rows (3 rows) – 18sc (18)
7th row – (1dec, 1sc) * 6 (12)
Fasten the thread and leave the tip for sewing. Double ears,
therefore, they must be sewn on the open edge before sewing.
Head (continued):
Santa Ears:
We outline the places for sewing the ears, pin and sew, as
shown in the photo. To prevent the ears from dangling, we grab them from behind
stitch, stepping back about 1sc from the sewing line ..
Ears for the Gnome:
Ears for Santa (continued):
1st row – we take the hook 1.25, 6sc in the amigurumi ring (6)
2nd row – 6inc (12), 1pp, turn
3rd row – 6sc, turn without lifting loop
4th row – knit from the 2nd loop (skip 1sc) 5sc
5th row – knit from the 2nd loop (skip 1sc) 4sc
6th row – knit from the 2nd loop (skip 1sc) 3sc
7th row – skip 1sc, 1dec, 1loop (do not turn any more), knit
along the contour of the ear 11sc (12)
We also knit the second ear, sew on.
Jacket:
If we knit a doll from a pekhorka openwork (280/50) crochet 1.0, then clothes
crochet 1.25 from the same red yarn.
If we knit a doll from a successful (220/50) crochet hook 1.25, then clothes and
crochet shoes 1.5 (successful pekhorka 220 / 50g), i.e. hook on
the size is larger than the knitted body. Then we will make a belt.
We collect a chain of 26ch + 1 lifting loop We begin to knit from the second
hook loops. The increase goes as if along the raglan of the sleeves in 4 points.
In the 1st row, loops are indicated in red, which form lines raglan.
1st row – 4sc, 1inc, 1sc, 1inc, 1sc, 1inc, 1sc, 1inc, 4sc, 1inc, 1sc, 1inc, 1sc, 1inc, 1sc, 1inc, 4sc (34) 2 lifting loops (pp) turn
2nd row – 34DC (34) 2pp
3rd row – 5DC, 1inc, 1DC, 1inc, 3DC, 1inc, 1DC,
1inc, 6DC, 1inc, 1DC, 1inc, 3DC, 1inc, 1DC,
1inc, 5DC (make DC increments) (42) 1pp
twenty
Jacket (continued):
Note that in rows 4 and 5 we knit sc, not DC.
4th row – 6sc, 1inc, 1sc, 1inc, 5sc, 1inc, 1sc, 1inc, 8sc, 1inc, 1sc,
1inc, 5sc, 1inc, 1sc, 1inc, 6sc (50) 1pp
5th row – 7sc, 1inc, 1sc, 1inc, 7sc, 1inc, 1sc, 1inc, 10sc, 1inc, 1sc,
1inc, 7sc, 1inc, 1sc, 1inc, 7sc (58) 2pp
6th row –8DC, 1inc, 1DC, 1inc, 9DC, 1inc, 1DC, 1inc, 12DC, 1inc, 1DC
1inc, 9DC, 1inc, 1DC, 1inc, 8DC (increase is done by DC) (66) 2pp
7th row – 9DC, 1inc, 1DC, 1inc, 11DC, 1inc, 1DC, 1inc, 14DC, 1inc,
1DC, 1inc, 11DC, 1inc, 1DC, 1inc, 9DC (74) 2pp
8th row – 10DC, 1inc, 1DC, 1inc, 13DC, 1inc, 1DC, 1inc, 16DC,
1inc, 1DC, 1inc, 13DC, 1inc, 1DC, 1inc, 10DC (82) 2pp
Try on a jacket, in row 9 you can knit DC or sc to adjust the size.
9th row – 11sc, 1inc, 1sc, 1inc, 15sc, 1inc, 1sc, 1inc, 18sc, 1inc, 1sc,
1inc, 15sc, 1inc, 1sc, 1inc, 11sc (90) 1pp
10th row – 12sc, 1inc, 1sc, we collect a chain of 3 air loops,
skip 19sc, 1sc, 1inc, 20sc, 1inc, 1sc, dial a chain of 3
air loops, skip 19sc, 1sc, 1inc, 12sc (62) 2pp
Further, we make all the increments DC, in the text I simply indicate pr.
distribution is prohibited
Jacket (continued):
11th row – 62DC (62) 2pp
12th row – 13DC, 1inc, 5DC, 1inc, 22DC, 1inc, 5DC, 1inc, 13DC (66)
13th row – 14DC, 1inc, 5DC, 1inc, 24DC, 1inc, 5DC, 1inc, 14DC (70) 2pp
14th row – 70DC (70) 2pp
15th row – 15DC, 1inc, 5DC, 1inc, 26DC, 1inc, 5DC, 1inc, 15DC (74) ch
16th row – 16DC, 1inc, 5DC, 1inc, 28DC, 1inc, 5DC, 1inc, 16DC (78) ch
17th row – 78DC (78)
Next, knit the sleeves in a circle. Photo of knitting the left sleeve, see below.
1st row – On the left sleeve, we start the set along the bottom of the armhole from backs to the shelf: in the gap between the sleeves and the bottom of the armhole, we make a fastener and 1 air loop, 3sc along
the bottom of the armhole, 1sc (in between between the rim of the sleeve and the bottom of the armhole), 19sc along the rim sleeves, 1sc in the gap between the sleeves and the bottom armholes (where the fastening and 1ch were made), connecting post, 2 lifting loops (24)
Next, knit the sleeve in a circle, at the end of each row connecting column (sl-st) and 2 lifting loops (pp).
2-4 rows (3 rows) – 24DC (24), 1sl-st 2pp
5th row – 7DC, 1inc, 7DC, 1inc, 7DC, 1inc (27), 1sl-st, 2pp
6th row – 8DC, 1inc, 8DC, 1inc, 8DC, 1inc (30), 1sl-st, 2pp
Spread
prohibited
Jacket (continued):
7th row – 30DC (30), 1sl-st
On the right sleeve, we start the set from the bottom of the armhole up along the edge of the sleeve from the back:
1st row – 1sc (in the interval between the cuff of the sleeve and the bottom of the armhole), 1ch, 19sc along the edge of the sleeve up, 1sc (in the interval between the sleeves and bottom of the armhole), 3sc at the bottom of the armhole, 1sc in the gap between the ridge of the sleeve and the bottom of the armhole (where the fastening was done and 1ch), connecting post, 2 lifting loops (24)
2-7 rows – as for the left sleeve.
We start tying with white yarn. I have Adelia yarn diamond, you can yarn like grass or Alize soft:
1st row – We start on the left side of the right shelf from the neck about 19sc (if you tie in 1 row, then from 1 sc make 6 air loops for the first loop, after 7sc again 6ch, after 7sc 6ch more), 3sc into corner, 72sc down, 3sc into corner, 19sc on the left shelf, 1 lifting loop, turn.
Jacket (continued):
We turn knitting and make the 2nd row of strapping:
2nd row – 19sc, 2sc in 1 loop, 1sc, 2sc in 1 loop, 76sc in hem, 2sc in
1 loop, 1sc, 2sc in 1 loop, 4sc, 6ch for eyelet, 7sc, 6ch for
loops, 7sc, 6ch for 1sc loops. Number of loops exactly may not coincide with my calculation, it’s okay, I give an approximate picture of the strapping.
We knit a collar:
The 1st and last posts of the gate are already occupied when we tied shelves, so we don’t count them.
1st row – 1inc, 22sc, 1inc, (26) 1pp, turn,
2 row -1inc, (5sc, 1inc) * 3 (30), 1pp, turn
3rd row – 1inc, 28sc, 1inc (32), fasten and cut the thread.
Tie the sleeves at the bottom sc.
Match buttons by color and size and sew on. Hide all the strings with a needle. The jacket is ready!
Now we will knit the belt with a pigtail of air loops with yarn in 2 additions.
Try on the length of the pigtail in place. The ends of the belt can be worn
white beads and tie knots.
Hat for Santa and Gnome:
For Santa, we begin to knit with red yarn, hook 1.25:
1 row – 6sc in the amigurumi ring
2nd row – 1inc * 6 (12)
We knit all DC loops in a circular manner, make DC increments, at the end of each
row to make a connecting post (sl-st) and 2 lifting loops (pp).
Try on a hat on your head while knitting.
3rd row – (3DC, 1inc) * 3 (15)
4th row – 15DC (15)
5th row – (4DC, 1inc) * 3 (18)
6th row – 18DC (18)
7th row – (5DC, 1inc) * 3 (21)
8th row – (6DC, 1inc) * 3 (24)
9th row – (3DC, 1inc) * 6 (30)
10th row – (4DC, 1inc) * 6 (36)
11th row – (5DC, 1inc) * 6 (42)
12th row – (5DC, 1inc) * 7 (49)
13th row – 49DC (49)
14th row – (6DC.1inc) * 7 (56)
15th row – (6DC, 1inc) * 8 (64)
16-19 rows – 64DC
For the Gnome, we knit a hat with stripes, the trimming is with grass yarn.
Chef Hat:
Cast on a chain of 68 chain stitches and close into a ring.
1st row – 68sc (68) 2pp
2-4 rows (3 rows) – 68DC (68)
5th row – 68inc DC (136) 2pp
6-8 rows (3 rows) – 136DC (136) 2pp
9th row – (5DC, 1dec) *, 3DC (117) 2pp
10th row – 117DC (117) 2pp
11th row – 3DC, (4DC, 1dec) * 19 (98) 2pp
12th row – (3DC, 1dec) * 19, 3DC (79) 2pp
13th row – 3DC (2DC, 1dec) (60) 2pp
14th row – (8sc, 1dec) * 6 (54)
15th row – (7sc, 1dec) * 6 (48)
16th row – (6sc, 1dec) * 6 (42)
17th row – (5sc, 1dec) * 6 (36)
18th row – (4sc, 1dec) * 6 (30)
19 row – (3sc, 1dec) * 6 (24)
20 row – (2sc, 1dec) * 6 (18)
21 row – (1sc, 1dec) * 6 (12)
Pull the loops, fasten the thread and cut. Tie a red hat on the bottom thread 1sl-st, 1ch.
Tie the bottom of the hat with white yarn with single crochets (2sc, 1 skip loop) to the end of the row, knit 2 more rows all sc.
You can grip the top of the hat a little with a thread and a needle so that there was a negligence effect, sew on a white pompom.
Hat for Santa (continued):
Cook for the Cook:
We collect a chain of 60 air loops and close it in a ring.
1 row -60sc (60)
2nd row – (8sc, 1dec) * 6 (54)
3 row -54sc (54)
4th row – (7sc, 1dec) * 6 (48)
5th row – 48sc (48)
6th row – (6sc, 1dec) * 6 (42)
7sc – 42sc (42)
8th row – (5sc, 1dec) * 6 (36)
9th row – 36sc
You understand the principle, we make decreases through the row to the end, when it remains 6sc – Pull and secure the thread. Make wire frame to size cups with a long handle. Sew the cup to the frame. The handle can tie or grease with glue and wrap with yarn.
We knit a scarf for the Chef in red. We collect the chain 75ch.
1st row – 75sc
Then in each row at the end we do not knit 5 loops and turn the knitting. So we knit until 5sc remains, close, fasten the thread and cut it off.
For hair and beard, we use hair-tresses of the plait type. You can buy them at Aliexpress or at the Crafts Fair. You can use just yarn-dissolution.
Ties are sold with a length of about 30cm.
For hair and beard, cut a piece about 8-9cm long. Divide the weft very carefully into thin strands.
Do not rush, do it very carefully so that the hair does not loosen up, but is separated by strands, as shown in the photo. First, draw a line of hair growth with a simple pencil over the forehead and along the temporo-occipital part.
Sew the hair with a regular needle and sewing thread in the color of tres.
We begin to sew at a point behind the right ear, going down along the drawn line:
1) We fasten the thread and bring it to the starting point behind the right ear.
2) Then we stick the needle back into the same point, and draw the tip side by side through 2 columns along the drawn line. A loop is formed at the starting point. We insert a lock of hair into it and tighten the thread with a needle. The strand should seem to slip inside.
Hair and beard (tresses):
Hair and beard (continued):
3) With these stitches we sew the hair down along the drawn line, then along the 13th row from the neck, then up along the temporal part behind the left ear.
4) After that, sew the strands over the forehead along the drawn line to the point from which you began to sew 1 row of hair. 1st row is ready.
Step up to the crown of the 3rd row of loops and sew on the 2nd row of hair.
5) Next, we outline the beard line with a simple pencil (about 6-7 rows from the neck) and sew locks along it in 2-3 rows, depending on how splendid the beard you want. I have a beard sewn into 3 rows. Here, between the rows in height there are 2 rows.
Hair and beard:
After the hair and beard are completely sewn on, put on
a hat on a doll. Put on the hat so that the sewing line is not visible
hair so that the eyebrows are visible.
Sew the hat to the head with white thread, which was used to sew
hair. Straighten your hair and beard and trim a little.
Hair and beard for the Gnome (wool):
Immediately I stipulate that a photo description of hair and beard using the felting method I
I quote as an addition to the main master class. I do not pretend at all
on the correctness of actions, just showing my version.
The description uses wool for felting, bought at Aliexpress.
Hair and beard for the Gnome (continued):
1) Carefully divide the piece of wool by thickness, as in photo 1.
2) Tear off a small piece of wool from the other end, shape beard, attach it to your face where you drew the beard line pencil, as in photo 2 and 3.
3) Now try on, bend the beard over the face and bottom with a felting needle back and forth along the entire beard line, as picture 4.
4) You should get it like in photo 3, only the beard is already rolled (fixed). If it’s a little thin, add some more wool and weld a little on top. Then just straighten with your hands so that the seam not visible (pull up the coat slightly, very lightly)
5) In step 1, we divided the wool roll by thickness.
We take this layer and apply it from above from the forehead to the back of the head, try on how
in photos 5 and 6 along the width of the forehead and determined by the length.
Next, the hair length that we have chosen is very careful trying
“tear” from the main piece of wool.
Hair and beard for the Gnome (continued):
It’s not very easy, but you need to leave the torn edge, and not cut off with scissors.
Now, along the line of the forehead and temporal part drawn with a pencil, we begin to roll with a needle for felting in reciprocating movements, as in photos 7 and 8.
6) You should get as in photo 9. Next, you need to divide the thickness
the entire layer of hair and lift the top layer to weld the bottom layer along
nape lines, as in photo 10.
The bottom layer can be thin, not scary. Then omit
top layer to bottom.
Pull the hair back a little at the ends to keep the length
about the same. Smooth your hair and put on a beanie.
Now decide on the length of your hair. I made a ponytail behind. Tip
beards can be slightly moistened and curled with a wedge with your finger. Insert
earring in the ear. The gnome turned out to be fashionable.
Mittens for Santa:
Hook 1.25, cast on 22 air loops, close the knitting in a circle.
Then we knit in a circular fashion.
1-5 rows (5 rows) – 22sc (22)
6 row – 11sc, increase from 1 loop 5DC, 10sc (26)
7th row – 26sc (26)
8th row – 11sc, 5DC decrease in 1 loop, 10sc (22)
9-11 rows (3 rows) – 22sc (22)
12th row – (9sc, 1dec) * 2 (20)
13 row – (8sc, 1dec) * 2 (18)
14th row – 9dec (9)
15th row – 4dec, tighten, fasten the thread, cut.
We tie the top of the mittens with white yarn, starting with the back
sides (opposite the finger). At the end of the row we make a connecting
a column and a chain of 6 air loops. We attach the chain to the back
parts of the sleeve strapping, we fix and cut the thread.
Boots for Santa:
We knit the boots in the color of Santa’s sweater. Hook 1.25, try to knit
tight. We begin to knit with white yarn (yarn of the same type as on
boots, i.e. I have an openwork pekhorka). We dial the 8ch chain, start with
2nd loop from the hook.
1st row – 1inc, 5sc, 4inc in 1 loop, 5sc, 1inc (18)
2nd row – 2inc, 6sc, 3inc, 6sc, 1inc (24)
3rd row – (1inc, 1sc) * 2, 1inc, 5sc, (1inc, 1sc) * 2, 1inc, 6sc, 1inc, 1sc, 1inc (32)
4th row – (1sc, 1inc) * 3, 8sc, (1inc, 1sc) * 3, 1inc, 8sc, 1inc, 1sc, 1inc (41)
5th row – (1sc, 1inc) * 3, 12sc, (1inc, 1sc) * 3, 1inc, 16sc (48)
Cut the fleece insole to fit your foot.
6 row-48sc for the front p / loop (if we knit on the wrong side), for the back p /
loop (if we knit on the front side) (48)
Change the color of the yarn to the color of the sweater, do not cut the white thread, leave it
outside of the foot to tie the boot edging later.
7-8 rows – 48sc (48), at the end of the 8th row we knit 5 alignment loops,
place the marker exactly in the middle of the heel.
Let’s go back to the white sole and make the strapping of the boot sole with thread
white (the thread that we left was not cut off) – knit for
front stitches 6 row 48sc, fasten and cut the thread, tighten
inside the boot. We glue the insole.
Boots for Santa:
9th row – 46sc, 1dec (47)
10 row – 1dec, 45sc (46)
11th row – 46sc (46)
We very carefully hide all the ends of the threads inside the sole and glue
insole. We begin to shape the foot.
12th row – 9sc, 14decDC for the back p / loop, 9sc (32)
13th row – 9sc, 7decDC for the front p / loop, 9sc (25)
Boot slits on the outside (not on the inside).
14 row – 19sc, 2 lifting loops, we turn knitting, then
we knit with rotary rows DC, at the end of each row 2 pp
For the boot on the right foot:
15th row – 18DC, 1 decDC for a full loop, 5DC, 2 lifting loops (24)
16-18 row – 24DC (24), fasten the thread and cut it off.
The result is a boot on the right leg.
For the boot on the left foot:
1-13 row – like the right boot
Boots for Santa (continued):
14th row – 7sc, 2 lifting loops, turn knitting, then knit
turning rows DC, at the end of each row 2 pp
15th row – 5DC. 1decDC per full loop, 18DC (24),
16-18 rows – 24DC (24), fasten the thread and cut it.
Now you need to tie the boots with a white thread: all sc to the end.
I used the same thread as the Alize Decofur Fancy jacket white.
Start with the right boot at the point between the cuts in the bootleg. We do fasten and go along the cut of the bootleg up 4sc, in the corner loop we make 3sc, continue to tie the top of the boot 23sc, do 5-6 air loops for the eyelet, go down the cut 4-5sc, connecting post, fasten and cut the thread.
We tie the left boot in the same way, only we make a loop on the other bootleg.
Sew on a button and fasten with a loop.
A bag with presents:
We knit in red, hook 1.25.
1st row – 6sc in the amigurumi ring
2nd row – 6inc (12)
3rd row – (1sc, 1inc) * 6 (18)
4th row – (2sc, 1inc) * 6 (24)
5th row – (3sc, 1inc) * 6 (30)
6th row – 2sc, 1inc, (4sc, 1inc) * 5, 2sc (36)
7th row – (5sc, 1inc) * 6 (42)
8 row -3sc, 1inc, (6sc, 1inc) * 5, 3sc (48)
9 row – (7sc, 1inc) * 6, 2 lifting loops (54)
Then we knit all the DC rows in a circle to the height you like.
After that, we tie the edges of the bag with white yarn (the same as
tied the edges of the jacket), make a loop for the bag
hang on the handle. Tie a chain of air loops for
strings, insert string between DC, fill lightly bag
filler and tie a string.
You can embroider snowflakes or sew on white beads on the bag!
Dress up your doll. First, hang the loop of the bag on the handle, then put on
mittens. Tie the belt and straighten the jacket under it.
I drew the mouth with special markers on brown fabric
colors. rouge the cheeks and nose. If your glasses don’t look good on your face, wear
them over the eyebrows on the cap.
Assembly and decoration of dolls:
Dwarf and Chef Slippers:
Slippers for the Dwarf and the Chef fit the same.
We knit in red, hook 1.25.
1st row – 6 loops in the amigurumi ring (6)
2nd row – 1inc * 6 (12) if you want more elongated socks of shoes you can
add 1-2 rows of 12sc.
3rd row – (1inc, 3sc) * 3 (15)
4th row – 15sc (15)
5th row – (1inc, 4sc) * 3 (18)
6th row – 18sc (18)
7th row – (1inc, 2sc) * 6 (24)
8 and 9 rows – 24sc (24)
10th row – (1inc, 3sc) * 6 (30)
11 – 14 rows (4 rows) – -30sc (30) We tied the toes of the shoes. IN
at the end of the 14th row 1 lifting loop (pp), turn
From the 15th row, we begin to knit the side of the shoes in rotary rows.
15-19 rows (5 rows) – 24sc, 1loop, turn the canvas (24) photo1
Gnome and Cook’s Slippers (prod.):
We begin to knit the heel of the shoe. Mentally divide 24 loops
as if into 3 parts of 8 loops: two side parts and one middle part.
Row 20 – 15sc, 1dec (16 and 17 loops together), turn without lifting loop
21 row – skip 1sc, 7sc, 1dec (i.e. we knit the 8th sc together with 1sc of the side part), turn without loop Fig. 2, 3, 4
22 row – skip 1sc, 6sc, 1dec (i.e. we knit the 7th sc together with 1sc of the side part), turn without pp
23rd row – skip 1sc, 5sc, 1dec (i.e. we knit the 6th sc together with 1sc of the side part), turn without pp
Thus, the heel is formed.
24 row – skip 1sc, 4sc, 1dec (i.e. knit the 5th sc together with 1sc of the side part), turn without pp
In the next rows, we no longer skip 1sc at the beginning of the row, we knit
immediately into the 1st sc and at the end of each row we make 1 lifting loop (so as not to lose the 5th loop)
25 – 32 rows –4sc, 1 dec (ie 5th sc we knit with 1sc side part), 1p.
When we finish knitting the backdrop, we do not cut the thread. We tie the top
shoes: 1sl-st, 1ch.
The toe of the shoe can be bent and sewn, a pompom can be sewn on top or
buttons. See below for options for decorating shoes.
To decorate shoes, you can use pom-poms (I bought at
Aliexpress) or buttons to match the suit color.
Gnome and Cook’s Slippers (prod.):
How to make stripes on pants:
We make stripes on the panties according to the same principle as the iris near the eyes:
we knit pigtails from air loops and fix them.