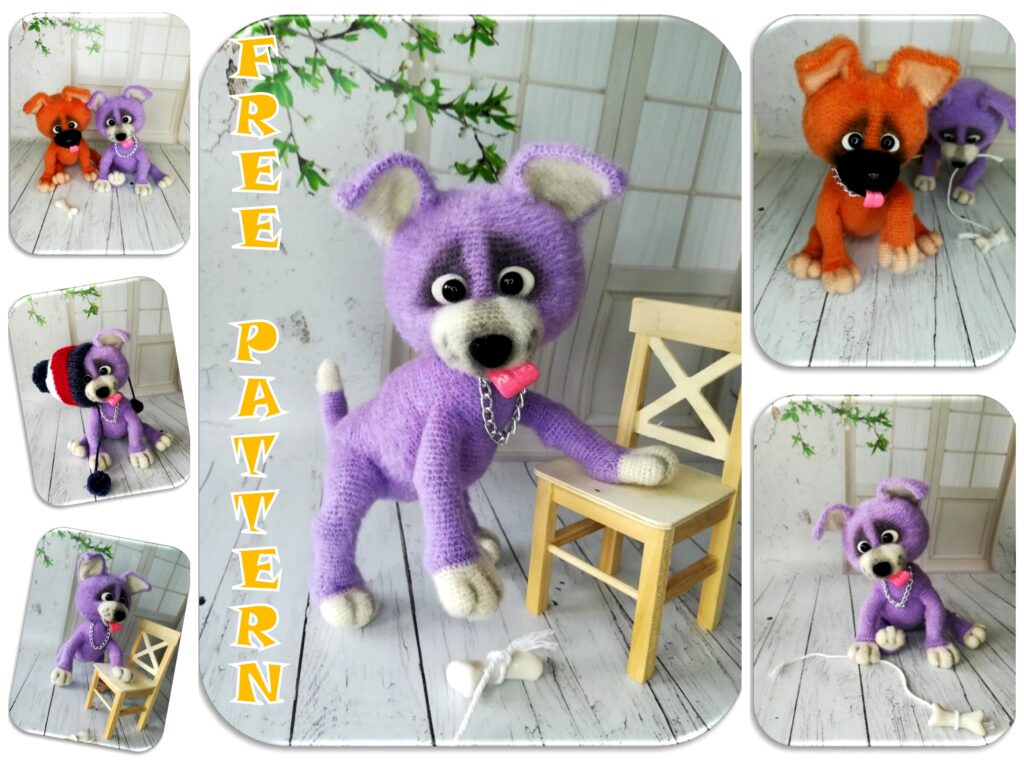
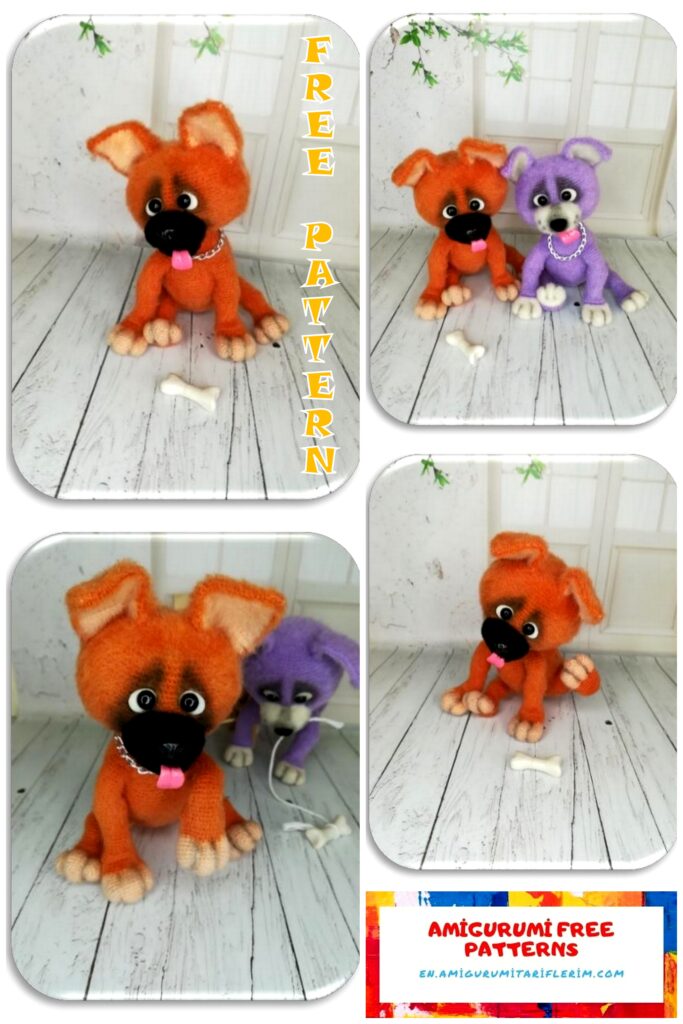
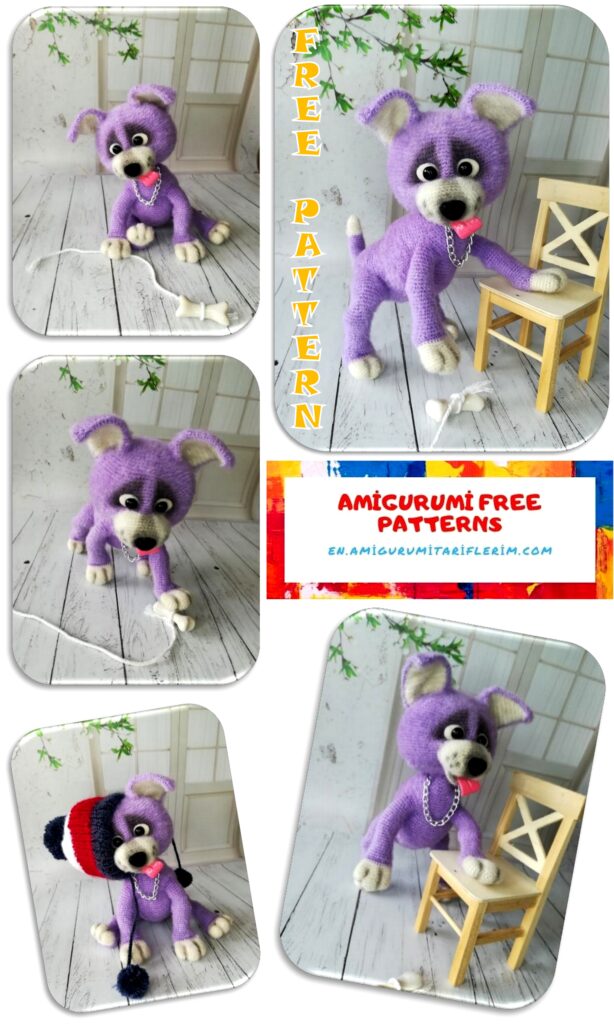
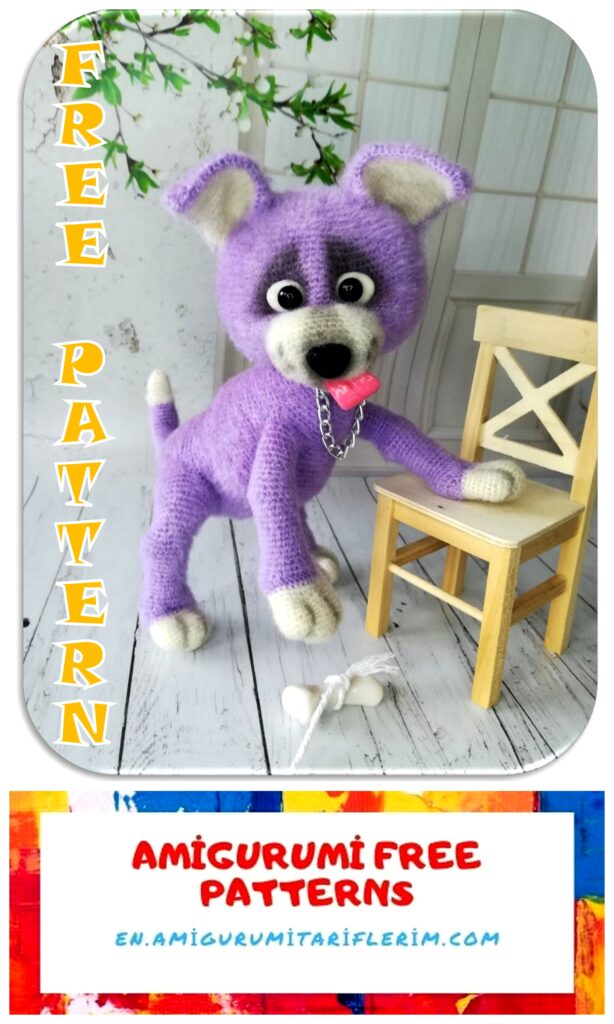
Cute Puppy Amigurumi Free Crochet Pattern
The best quality amigurumi dog patterns are available for free on this site. I shared the amigurumi cute puppy pattern in this article.
Important
The toy is knitted in a spiral. It is not necessary to connect the rows to each other.
During knitting, you need to grab both sides of the loop, unless there is a separate instruction to do it differently.
Use a contrasting thread as a marker.
In the process of knitting, it is necessary to monitor the symmetry of the part. That is, if the marker begins to deviate to the right, an additional column must be knitted at the end of the row. This is the so-called offset loop – it is not shown in the description.
When crocheting toys, use a crochet hook that is thinner than recommended for the thread you choose.
The thicker the threads, the larger the toy.
Abbrevations:
CH – chain
SC – single crochet
DC – double crochet
HDC – half double crochet
INC – Increase (knit 2 sc from 1sc)
DEC – Decrease (from 2 sc we knit 1 sc)
sl-st – slip stitch
(… ..) *… p – this means that the operations indicated in brackets repeat the number of times indicated after *.
+ 1 offset loop (knit another loop, the row will start from here)
Level: Intermediate
Height: 16 cm
Materials and tools:
✓ Yarn “Angora Magig Delicate” in the main color (any color) and a little white for the face, tips of the legs and tail. (500m / 100g)
Any similar yarn can be used (450-550m / 100g)
✓ Hook 1.5 or any other suitable for your yarn.
✓ 2 finished eyes (8 mm)
✓ Finished spout, if you will not sculpt from clay
✓ Polymer clay of white, black and pink colors
✓ Filler: holofiber.
✓ Copper wire of the frame.
✓ Toning Pastel art
✓ The needle is long for sewing parts and making ties.
✓ Strong thread for muzzle and paws tightening.
✓ Transparent glue “Crystal”.
✓ Cloth-based adhesive plaster.
Note: The description is copyrighted and intended for personal use only. Full or partial copying, as well as distribution and sale of the description on the Internet are FORBIDDEN!
When publishing photos related to this master class, indicate the author. Thank you for your understanding and decency.
PLEASANT KNITTING!
Head
Symmetry can be ignored.
We knit with the main yarn.
1st row: 6 into magic ring
2nd row: 6 inc = 12
3rd row: (1 sc, inc) * 6 times = 18
4th row: 1 sc, inc, (2 sc, inc) * 5 times, 1 sc = 24
5 row: (3 sc, inc) * 6 times = 30
6 row: 2 sc, inc, (4 sc, inc) * 5 times, 2sc = 36
7 row: (5 sc, inc) * 6 times = 42
8 row: 3 sc, inc, (6 sc, inc) * 5 times, 3 sc = 48
9th row: (7 sc, inc) * 6 times = 54
10 row: 4 sc, inc, (8 sc, inc) * 5 times, 4 sc = 60
11 row: (9 sc, inc) * 6 times = 66
12th row: 5 sc, inc, (10 sc, inc) * 5 times, 5 sc = 72
13 row: (11 sc, inc) * 6 times = 78
14th row: 6 sc, inc, (12 sc, inc) * 5 times, 6 sc = 84
15 row: (13 sc, inc) * 6 times = 90
16 row: 90 sc
17th row: 7 sc, inc, (14 sc, inc) * 5 times, 7 sc = 96
18 row: 96 sc
19 row: (15 sc, inc) * 6 times = 102
20-26 rows: (7 rows) 102 sc
27 row: (15 sc, dec) * 6 times = 96
28 row: 96 sc
29 row: 7 sc, dec, (14 sc, dec) * 5 times, 7 sc = 90
30 row: 90 sc
31 row: (13 sc, dec) * 6 times = 84
32 row: 84 sc
33 row: 6 sc, dec, (12 sc, dec) * 5 times, 6 sc = 78
34 row: (11 sc, dec) * 6 times = 72
35 row: 5 sc, dec, (10 sc, dec) * 5 times, 5 sc = 66
36 row: (9 sc, dec) * 6 times = 60
37 row: 4 sc, dec, (8 sc, dec) * 5 times, 4 sc = 54
38 row: (7 sc, dec) * 6 times = 48
Row 39: 3 sc, dec, (6 sc, dec) * 5 times, 3 sc = 42
Stuff your head tightly enough.
40 row: (5 sc, dec) * 6 times = 36
41 row: 2 sc, dec, (4 sc, dec) * 5 times, 2 sc = 30
42 -49 rows: (8 rows) 30 sc
Cut the thread and fasten.
Muzzle
The marker runs from the side
If necessary, knit offset loops.
1st row: 8 CH, in the second loop from the hook: inc, 5 sc, 3 sc in one loop, knit on the other side: 5 sc, inc = 17
2nd row: 2 inc, 5 sc, 3 inc, 6 sc, inc = 23
Knit offset loop
3rd row: 2 inc, 6 sc, 5 inc, 7 sc, 3 inc = 33
4th row: (inc, 4 sc) * 2 p, inc, (2 sc, inc) * 2 p, 10 sc, (inc, 2 sc) * 2 p = 40
5 row: inc, 11 sc, (inc, 3 sc) * 2 p, inc, 11 sc, (inc, 3 sc) * 2 p = 46
6-8 rows: 46 sc
9th row: 8 sc, 2 dec, 34 sc = 44
10 row: 7 sc, 2 dec, 33 sc = 42
11 row: 5 sc, 3 sts together, 34 sc = 40
We leave the thread for sewing.
Ears (4 identical parts)
2 pieces in white, 2 pieces in the main color
1st row: 3 CH, second from hook: 1 sc, inc
We knit in rotary rows. At the end of each row we knit an air loop.
2nd row: 3 sc
3rd row: inc, 1 sc, inc = 5
4th row: 5 sc
5th row: inc, 3 sc, inc = 7
6 row: 7 sc
7 row: inc, 5 sc, inc = 9
8 row: 9 sc
9th row: inc, 7 sc, inc = 11
10 row: 11 sc
11th row: inc, 9 sc, inc = 13
12 row: 13 sc
13th row: inc, 11 sc, inc = 15
Row 14: 15 sc
15th row: inc, 13 sc, inc = 17
16 row: 17 sc
17 row: 1 sc, dec, 14 sc = 16
18 row: 16 sc
19 row: inc, 14 sc, inc = 18
20 row: 18 sc
21 row: inc, 16 sc, inc = 20
22 row: 20 sc
23 row: 1 sc, dec, 14 sc, dec, 1 sc = 18
We tie two parts (main and white) together with a main thread.
Leave the thread for sewing.
Lip
We knit the lip with white yarn
1st row: 6 into magic ring
2nd row: 6 inc = 12
3rd row: (1 sc, inc) * 6 times = 18
4th row: 1 sc, inc, (2 sc, inc) * 5 times, 2 sc = 24
5 row: (3 sc, inc) * 6 times = 30
6 row: 2 sc, inc, (4 sc, inc) * 5 times, 2 sc = 36
Fold in half and knit on both sides together 17 sc.
Leave the thread for sewing.
Front feet (2 parts)
Marker runs on the side If desired, you can tie the ends of the feet with white yarn
We knit with white yarn.
1st row: 6 into magic ring
2nd row: 6 inc = 12
3rd row: (1 sc, inc) * 6 p = 18
4th row: 1 sc, inc, (2 sc, inc) * 5 p, 1 sc = 24
5 row: (3 sc, inc) * 6 p = 30
6-11 rows: 30 sc
12 row: (4 sc, dec) * 5 p = 25
Row 13: 25 sc
Change the yarn to the main color Follow the marker. If necessary, align the marker with the offset loop.
Row 14: 25 sc
15 row: 12 ss, 13 DC = 25
16 row: 12 ss, 13 HDC = 25
17th row: dec, 8 sc, dec, 13 sc = 23
18 row: 23 sc
19 row: (2 sc, dec) * 5 p, 3 sc = 18
Rows 20 – 28: (9 rows) 18 sc
Row 29: 9 sc, 9inc HDC = 27
30 row: 27 sc
31 row: 9 sc, 9 dec = 18
32 row: dec, 5 sc, dec, 9 sc = 16
Rows 33 – 43: (11 rows) 16 sc
Cut the thread. Count 9 stitches from the marker to the left.
Add an additional marker. Place of tying the paws into the body.
Cut off 2 pieces of wire equal to the length of the foot multiplied by 2 Make a loop at the end of the wire. Wrap the junction with an adhesive plaster on a fabric base.
Insert the frame into the feet and fill evenly.
Hind feet (2 parts)
Marker runs sideways If necessary, align marker with offset loop.
We knit with white yarn.
1st row: 6 into magic ring
2nd row: 6 inc = 12
3rd row: (1 sc, inc) * 6 p = 18
4th row: 1 sc, inc, (2 sc, inc) * 5 p, 1 sc = 24
5 row: (3 sc, inc) * 6 p = 30
6-11 rows: 30 sc
12 row: (4 sc, dec) * 5 p = 25
Row 13: 25 sc
Change the yarn to the main color
Row 14: 25 sc
15 row: 12 ss, 13 DC = 25
16 row: 12 ss, 13 DC = 25
17th row: dec, 8 sc, dec, 13 sc = 23
18 row: 23 sc
19 row: (2 sc, dec) * 5 p, 3 sc = 18
20 – 27 rows: 18 sc
28 row: 9 sc, 9 inc HDC = 27
Row 29: 27 sc
30 row: 9 sc. 9 dec = 18
31 row: dec, 5 sc, dec, 9 sc = 16
32 row: 16 sc
33rd row: 1 sc, inc, 2 sc, inc, 11 sc = 18
34 row: (1 sc, inc) * 4 p, 10 sc = 22
35 row: 22 sc
36 row: (inc, 2 sc) * 3 p, inc, 12 sc = 26
37 row: (2 sc, inc) * 4 p, 14 sc = 30
38 – 41 rows: 30 sc
Cut the thread. For the left foot, count 10 stitches from the marker to the left. Add an additional marker.
For the right foot, count 10 stitches to the right. Add an additional marker.
This is the place where the foot is tied into the body.
Cut 2 pieces of wire equal to the length of the foot multiplied by 2 Make a loop at the end of the wire. Wrap the junction with an adhesive plaster on a fabric base.
Insert the frame into the feet and fill evenly.
Body
We start knitting from the neck.
The marker runs down the center of the front. Strictly observe symmetry.
If necessary, knit offset loops.
We knit with the main color
We knit 28 CH and connect in a ring
Rows 1-13: 28 sc in a circle
14 row: (13 sc, inc) * 2 p = 30
15 row: 30 sc
16 row: 2 sc, inc, (4 sc, inc) * 5 p, 2 sc = 36
17 row: 36 sc
18 row: (2 sc, inc) * 3 p, 18 sc, (inc, 2 sc) * 3 p = 42
19 row: 42 sc
20 row: (3 sc, inc) * 3 p, 18 sc, (inc, 3 sc) * 3 p = 48
21 row: 48 sc
22 row: 2 sc, (3 sc, inc) * 2 p, 28 sc, (inc, 3 sc) * 2 sc, 2 sc – = 54
23 row: 54 sc
24 row: 4 sc, 8 sc with 8 loops of the left foreleg, 30 sc, 8 sc with 8 loops of the right foreleg, 4 sc = 54
25 row: 4 sc, 8 sc along the remaining loops of the left foot, 30 sc, 8 sc along the remaining loops of the right foot, 4 sc = 54
26 row: (inc, 1 sc) * 2 p, inc, 44 sc, inc, (1 sc, inc) * 2 p = 60
27 row: (9 sc, inc) * 6 p = 66
28 row: 66 sc
Row 29: 1 sc, inc, 2 sc, inc, 56 sc, inc, 2 sc, inc, 1 sc = 70
Measure a 35 cm piece of wire for the main frame.
Connect the frame of the front legs with the main frame. Wrap the junction with an adhesive plaster on a fabric base.
Insert the insulated end of the frame into the neck.
We stuff the body tightly during the knitting process.
30 row: 4 sc, inc, 60 sc, inc, 4 sc = 72
Rows 31-40: (10 rows) 72 sc
41 row: 2 sc, dec, 15 sc, dec, 2 sc, dec, 22 sc, dec, 2 sc, dec, 15 sc, dec, 2 sc = 66
42 row: 18 sc, dec, 2 sc, dec, 18 sc, dec, 2 sc, dec, 18 sc = 62
43 row: 62 sc
44 row: 5 sc, dec, 48 sc, dec, 5 sc = 60
45 – 46 rows: 60 sc
47 row: (9 sc, inc) * 6 p = 66
48 – 49 rows: 66 sc
Row 50: 10 sc, 9 sc with 9 sts of the left hind leg, 28 sc, 9 sc with 9 sts of the hind right leg, 10 sc = 66
Row 51: 10 sc, 21 sc along the remaining loops of the left paw, 28 sc, 21 sc along the remaining loops of the right paw, 10 sc = 90
Connect the frame of the hind legs to the main frame. Wrap the junction with an adhesive plaster on a fabric base.
52 row: 30 sc, dec, 2 sc, inc, (3 sc, inc) * 2 p, 4 sc, (inc, 3 sc) * 2 p, inc, 2 sc, dec, 30 sc = 94
53 row: (2 sc, dec) * 2 p, 1 sc, dec, 18 sc, dec, 32 sc, dec, 18 sc, dec, 1 sc, (dec, 2 sc) * 2 p = 86
54 row: 8 sc, dec, 15 sc, dec, 32 sc, dec, 15 sc, dec, 8 sc = 82
55 row: (1 sc, dec) * 2 p, 2 sc, dec, 13 sc, dec, (4 sc, dec) * 2 p, 8 sc, (dec, 4 sc) * 2 p, dec, 13 sc , dec, 2 sc, (dec, 1 sc) * 2 p = 70
56 row: 6 sc, dec, 12 sc, dec, 26 sc, dec, 12 sc, dec, 6 sc = 66
Row 57: 5 sc, dec, 11 sc, dec, 26 sc, dec, 11 sc, dec, 5 sc = 62
Row 58: 5 sc, dec, 10 sc, dec, 24 sc, dec, 10 sc, dec, 5 sc = 58
Row 59: 4 sc, dec, 9 sc, dec, 24 sc, dec, 9 sc, dec, 4 sc = 54
60 row: 4 sc, dec, 8 sc, dec, 22 sc, dec, 8 sc, dec, 4 sc = 50
Row 61: 4 sc, dec, 7 sc, dec, 20 sc, dec, 7 sc, dec, 4 sc = 46
Row 62: 3 sc, dec, 7 sc, dec, 18 sc, dec, 7 sc, dec, 3 sc = 42
Row 63: 3 sc, dec, 5 sc.dec, 18 sc, dec, 5 sc, dec, 3 sc = 38
64 row: 2 sc, dec, 5 sc, dec, 16 sc, dec, 5 sc, dec, 2 sc = 34
65 row: 2 sc, dec, 4 sc, dec, 14 sc, dec, 4 sc, dec, 2 sc = 30
Row 66: 2 sc, dec, 3 sc, dec, 12 sc, dec, 3 sc, dec, 2 sc = 26
67 row: 26 sc
Row 68: 2 sc, dec, 3 sc, dec, 8 sc, dec, 3 sc, dec, 2 sc = 22
69 – 70 rows: 22 sc
71 row: 5 sc, dec, 8 sc, dec, 5 sc = 20
72 row: 4 sc, dec, 8 sc, dec, 4 sc = 18
73 – 82 Rows: (10 Rows) 18 sc
Row 83: 3 sc, dec, 8 sc, dec, 3 sc = 16
84 row: 16 sc
Change the yarn to white
85 – 87 rows: 16 sc
Row 88: 3 sc, dec, 6 sc, dec, 3 sc = 14
Cut off the excess from the frame.
Bend the end of the wire into a small loop and wrap it with adhesive tape.
We do not stuff the tail tightly.
89 – 90 rows: 14 sc
91 row: 2 sc.dec, 6 sc, dec, 2 sc = 12
92 row: (1 sc, dec) * 4 p = 8
Pull the thread, cut and hide.
Registration
The design of the face is one of the most important stages. It’s no secret that many toys are knitted according to the same principle. Their difference is in the design of the muzzle or face.
First, we sew the muzzle.
If you are using a secure nose, then you need to secure it before you sew the muzzle to the head.
We fix the muzzle with needles (we fix the upper edge on the 25th row from the beginning of knitting).
Decreases – the bottom of the muzzle.
Before sewing, the muzzle should be stuffed.
Then we make markings for the muzzle tightenings.
Visually draw a line in the center of the face.
2 and 3 points – counting up from the beginning of the muzzle of the 3rd row, then 5 sc to the right and left of the center line.
1 and 4 points – counting up from the beginning of the muzzle of 3 rows, then 8 sc to the right and left of the center line.
We mark approximately points 5 and 6.
They should be located at the lower edge of the muzzle, on the sides.
For tightening, we need a long needle and strong thread.
We introduce the needle to point 1 and bring it to point 5. Then we need to insert the needle next to it and output it at point 1.
We retreat from point 1 two loops and bring the needle to point 2 and bring it to point 5.
We return to the starting point 1. Tie the two ends of the thread into a knot so that we get indentations for the eyes and a raised cheek.
Repeat if necessary.
We hide the ends of the threads in the head.
Similarly, we make a tightening on the other side.
4 – 6, 6 – 4, 4 – 3, 3 – 6, 6 – 4
We tighten the bridge of the nose: We introduce the needle to point 2 and bring it to point 3. Retreat several loops, insert the needle nearby and bring it to point 2. Tie the two ends of the thread into a knot, forming the bridge of the nose.
We tint the area under the eyes with dry pastel to give expressiveness to the muzzle.
Next are the ears.
Sew on the way you like.
The main thing is that the ears are sewn symmetrically.
Embossed lug side – outer edge
Before you sew on the lip, you need to sew or glue the tongue.
The tongue can be molded from pink clay or cut out of felt.
I sculpted from clay. Before baking, I made a hole at the base of the tongue so that you can sew on.
Sew on the lip.
If desired, you can blind the whites of the eyes from white clay.
Roll up small balls, flatten slightly and make a depression with a half bead.
Bake the whites of the eyes according to the instructions on the package.
Glue the eyes.
We make the legs tighten.
We count 10 rows up from the beginning of knitting. We will do the banners from right to left. Distance between them – 5 sc (on each foot, 2 constrictions)
The doggie is almost ready. It remains to secure the head.
The puppy’s head will be mobile.
To secure the head, you must use a strong thread and a long needle.
We insert the needle next to the ear and take it out through the hole in the head (we try not to touch the knitted fabric).
Now you need to insert the needle (through) at the base of the neck and return to the starting point (through the hole in the head, without touching the knitted fabric).
We draw the needle to the same point at the ear.
We do the same on the other side.
We insert the neck into the hole in the head.
We tie the ends of the threads into a knot, pulling tightly.
We hide the ends of the threads in the head.
Let him give you joy and good mood!
