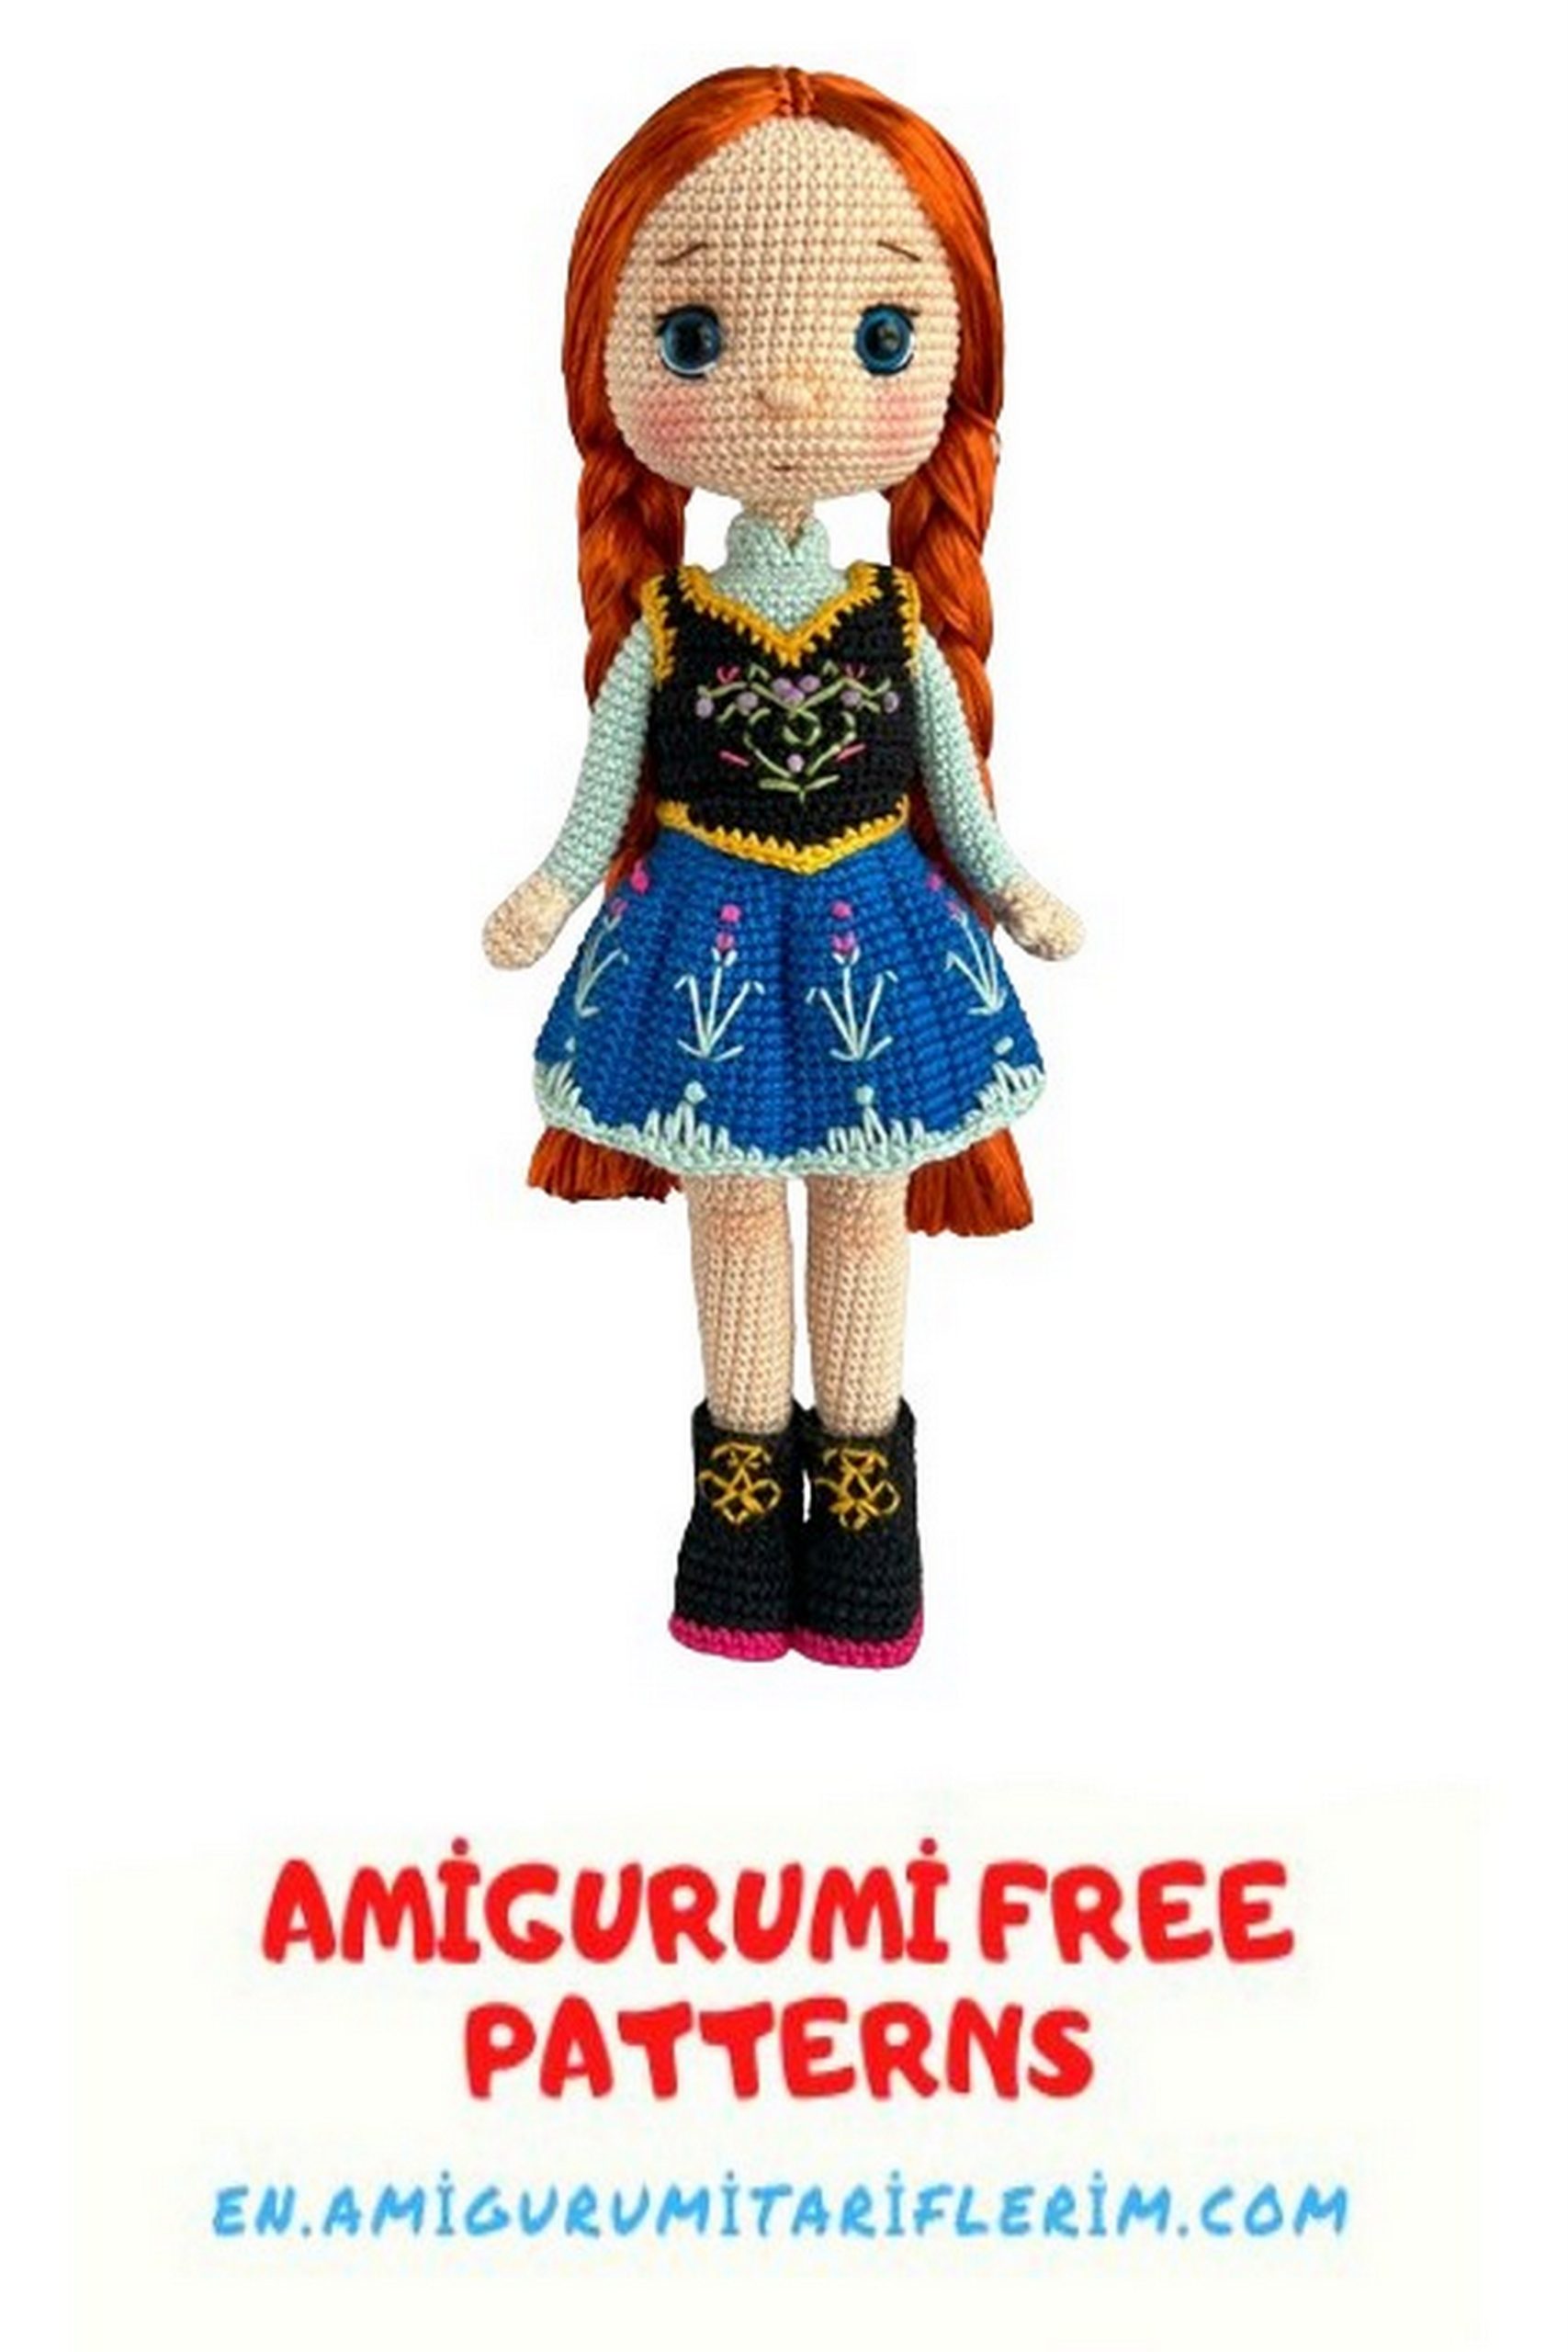
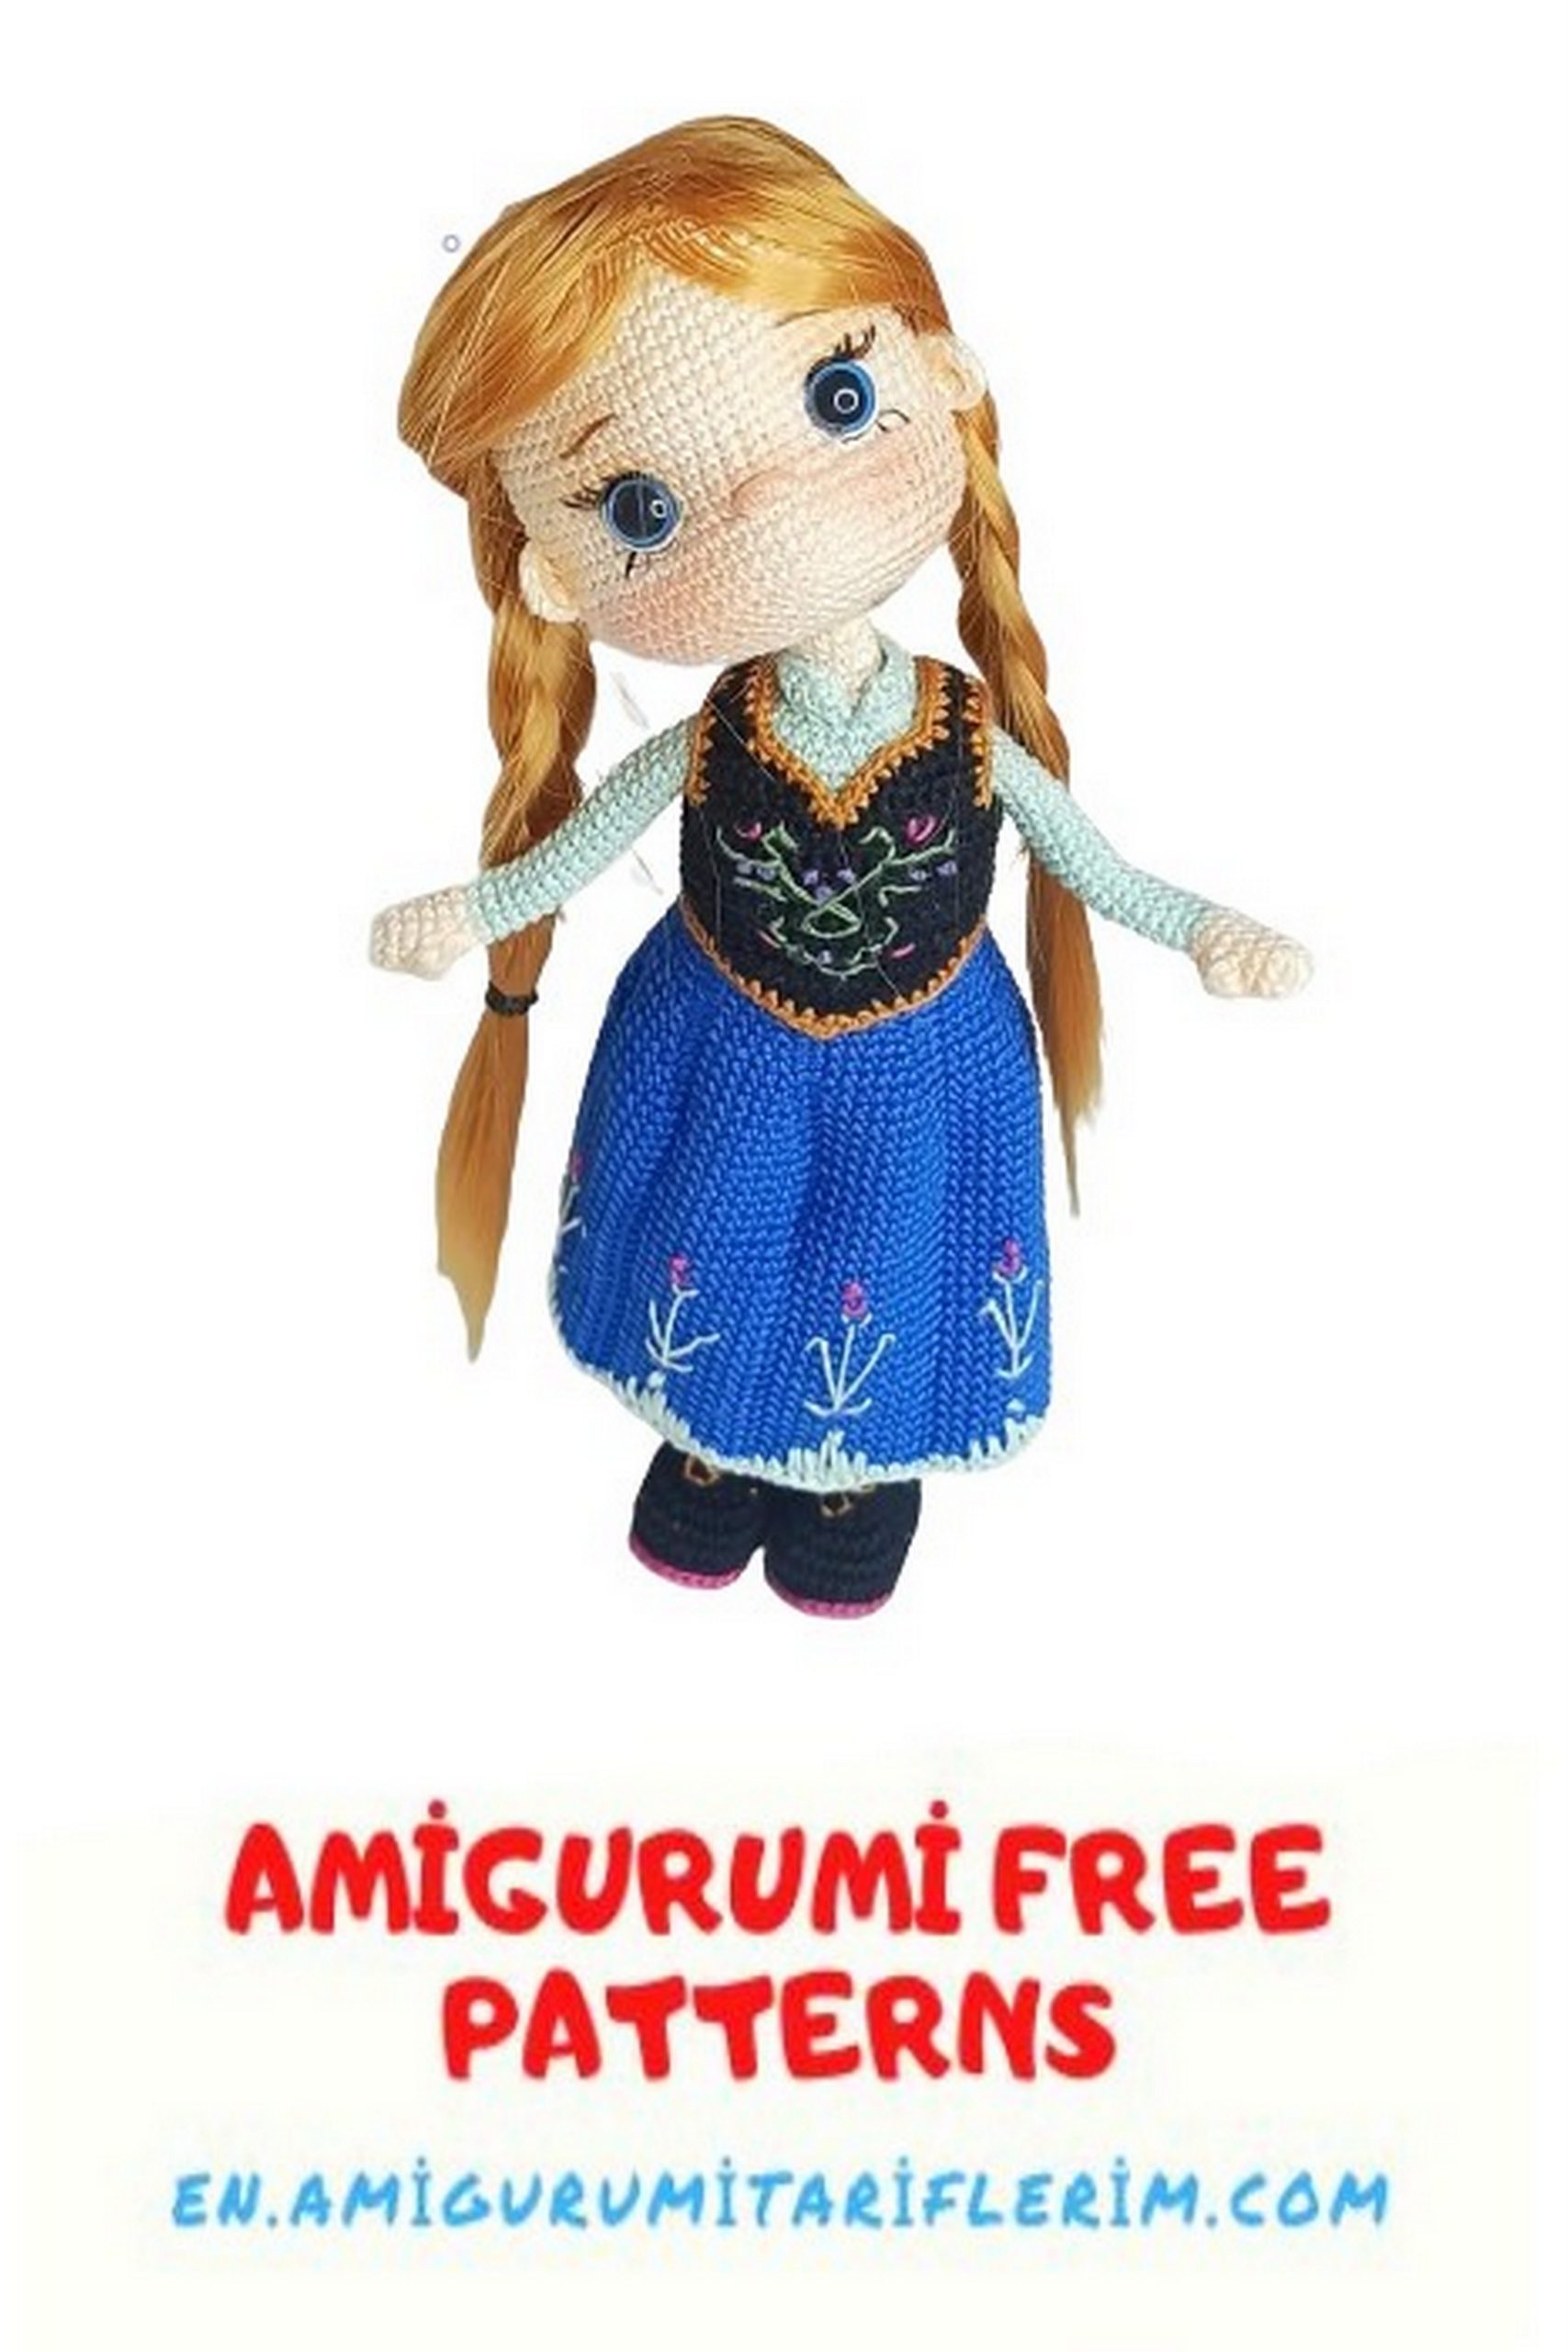
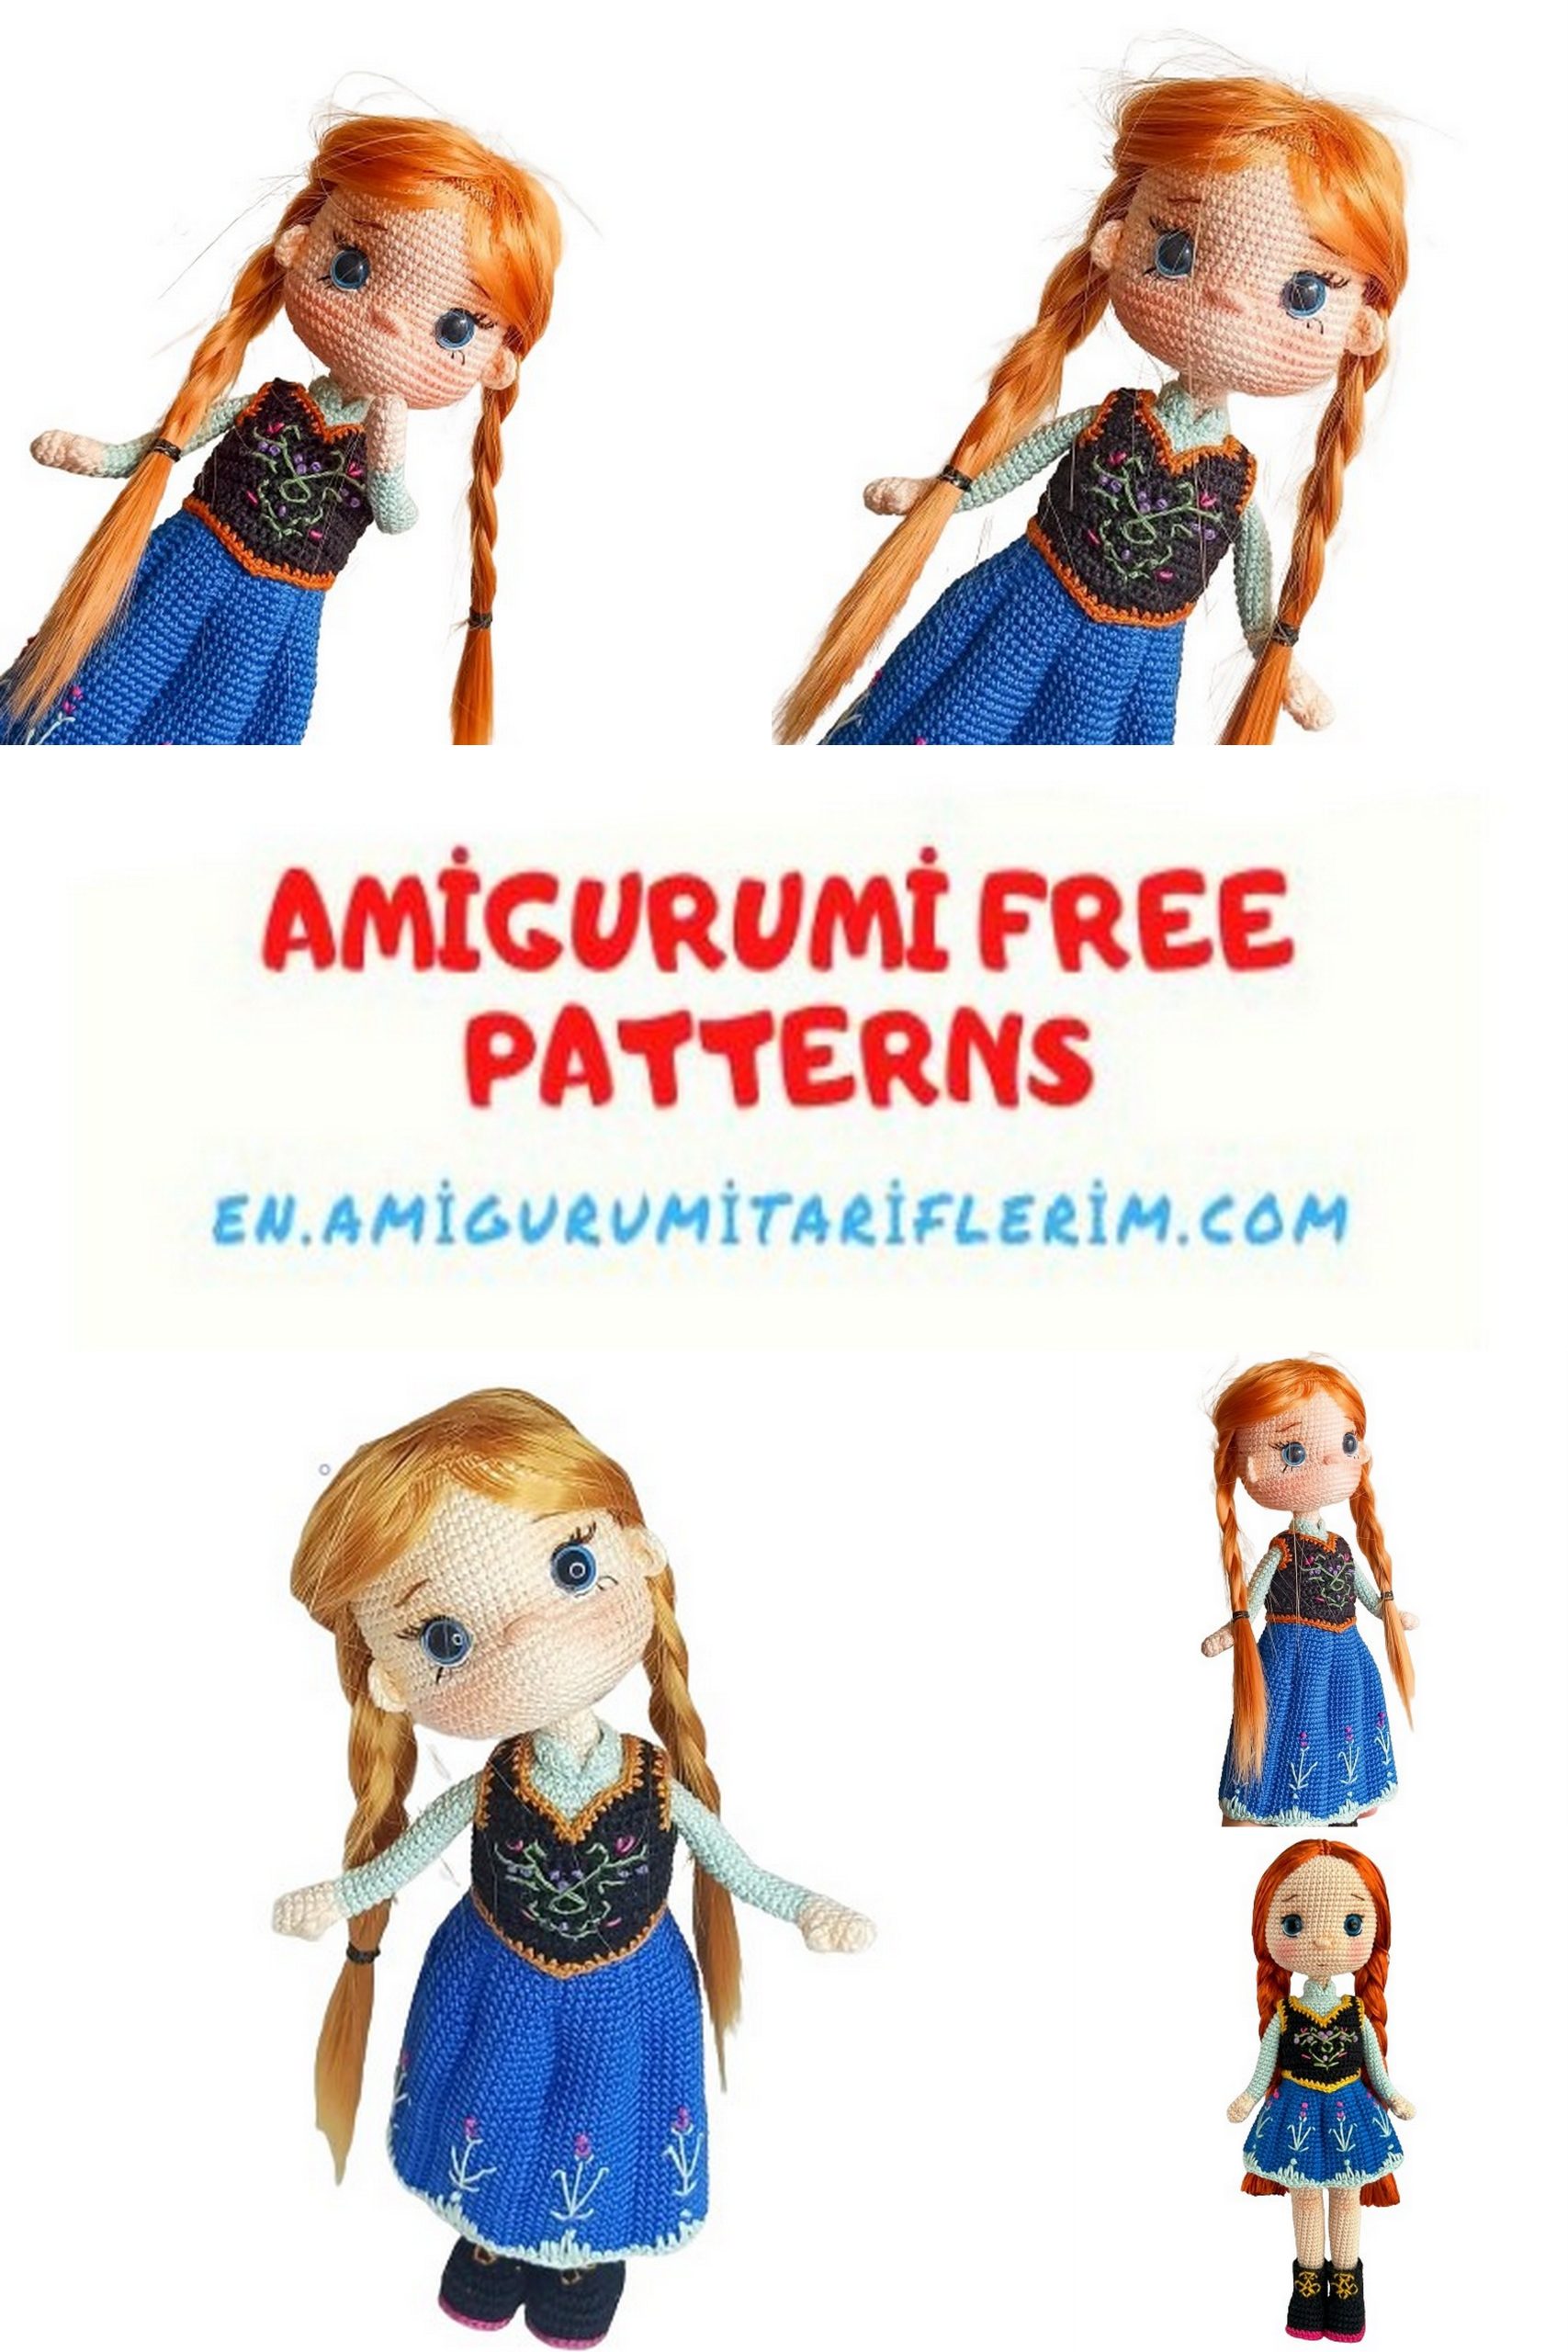
Free Princess Anna Amigurumi Pattern: Craft Your Own Magical Companion!
Welcome to the enchanting world of amigurumi crochet! If you’re a fan of Disney’s beloved character Amigurumi Princess Anna, you’re in for a treat. Our free Princess Anna Amigurumi pattern allows you to bring this iconic princess to life with your own hands. Whether you’re crafting for yourself or a loved one, this project is sure to spark joy and creativity. Join us as we embark on a crochet journey filled with magic, whimsy, and endless possibilities. Let’s create a charming companion fit for any fairy tale adventure!
MATERIALS
-CATANIA TR263 TEN (Body)
-GAZZAL GIZA 2469 FUCHSIA
(CLOAK AND EMBROIDERY)
-GAZZAL GIZA 2477 SKY BLUE (SKIRT)
-GAZZAL GIZA 2482 TURQUOISE
(BLOUSE AND EMBROIDERY)
-GAZZAL GIZA 2457 BLACK
(TOP DRESS AND SHOES)
-CATANIA 00383 CINNAMON
(BLOUSE EDGE AND HAIR WIG)
-1 PIECE SYNTHETIC HAIR ORANGE
-1.75 HOOK
-10 MM BLUE LOCK EYES
-2 PIECES SMALL BUTTONS
-1.5 MM COPPER WIRE
-1 PIECE COLLAR HOOK
(TO JOIN THE CLOAK COLLAR)
Abbreviations
mr: magic ring
sc: single crochet
inc: increase
dec: decrease
W: 3sc in the same stitch
M: 3sc together decrease
ch: chain
sl st: slip stitch
Dc: Double crochet
Dcinc: Double crochet increase
Hdc: Half double crochet
Hdcinc: Half double crochet increase
Tr: Triple crochet
Bpsc: Back post single crochet
Blo: Back loop only
Flo: Front loop only
*: Number of repetitions

ARM
With 1.75 hook;
1: Ch 6, 6 sc in the second chain from the hook
2: 6 inc, 12 sc
3-4: 12 sc (2 rows)
5: 5 sc, 1 4-popcorn stitch, 6 sc, 12 sc
6: 12 sc
7: 4 sc, 2 dec, 4 sc, 10 sc
Switch to light blue yarn
8: 4 sc, 2 sl st, 4 sc, 10 sc
9: 4 sc, 2 sc in the front loop of sl st, 4 sc, 10 sc
10-27: 10 sc (18 rows) Finish
***DO NOT STUFF WITH FIBER. WE WILL ONLY USE WIRE FOR ASSEMBLY TO THE BODY.
FOOT
With 1.75 hook;
1: Ch 7, turn, 5 sc, 1 W, 4 sc, 1 inc, 14 sc
2-8: 14 sc
9: Turn, 7 sc, turn, 6 sc, turn
10: 6 sc, turn
11: 1 dec, 2 sc, 1 dec, turn
12: 4 sc, we will now crochet around it
13: 3 sc along the edge, 8 sl st forward, 3 sc along the edge, place a marker here
14: 2 dec, 2 sc, 1 dec, 6 sc (in the front loop of sl st), 1 dec, 2 sc, 14 sc
15: 5 sc, 1 dec, 3 sc, 1 dec, 2 sc, 12 sc
***PLACE THE WIRE IN THE BASE.
16-20: 12 sc (5 rows)
21: 1 sc, 1 inc, 10 sc, 13 sc
22: 13 sc
23: 2 sc, 1 inc, 10 sc, 14 sc
24: 14 sc
25: 3 sc, 1 inc, 10 sc, 15 sc
26: 3 sc, 1 inc, 11 sc, 16 sc
27: 16 sc
28: 4 sc, 1 inc, 11 sc, 17 sc
29: 17 sc
30: 4 sc, 1 inc, 12 sc, 18 sc
31-34: 18 sc (4 rows)
35: 3 sc, 3 dec, 4 sc, 3 inc, 2 sc, 18 sc
36-37: 18 sc (2 rows)
38: 4 sc, 1 inc, 3 sc, 1 inc, 1 sc, 3 dec, 1 sc, 1 inc, 18 sc
39: 18 sc
40: 1 inc, 8 sc, 1 inc, 8 sc, 20 sc
41-53: 20 sc (13 rows)
Cut the wire on the first leg after 3 rows.
Crochet +13 sc on the leg, ch 2, cut the yarn, we will make leg joining.
***SEE THE PICTURES ON THE NEXT PAGE.
-DO NOT OVERSTUFF THE UPPER PART OF THE FOOT, KEEP IT FLAT. FILL THE HEEL PART NICELY WITH FIBER.
-INCREASES WILL BE AT THE BACK, PAY ATTENTION.
-WHILE CROCHETING, ADJUST THE STITCHES WITH YOUR HANDS SO THAT THE STARTING POINT DOESN’T SHIFT.
-STUFF THE FIBER EVERY 3-4 ROWS.
CUT THE WIRE TO THE SIZE OF 30 CM. CURL THE ENDS ACCORDING TO THE BASE, TAPE WITH ELECTRICAL TAPE, SEE THE PICTURE ON THE NEXT PAGE. **

JOINING THE LEGS
54: 20 sc from one leg, 2 sc on ch, 20 sc from the other leg, 2 sc on ch: 44 sc, place a marker here.
55-61: 44 sc (7 rows)
62: 10 sc, 1 dec, 20 sc, 1 dec, 10 sc: 42 sc (decreases will be on the sides)
63: 42 sc
64: 10 sc, 1 dec, 19 sc, 1 dec, 9 sc: 40 sc
65: 40 sc
Switch to turquoise yarn
66: Blo 40 sc
67: 9 sc, 1 dec, 18 sc, 1 dec, 9 sc: 38 sc
68-77: 38 sc (10 rows)
Now we will make arm joining.
ARM JOINING
78: 9 sc, 4 sc by picking up from the inside of the arm and body, 15 sc, 4 sc by picking up from the inside of the arm and body, 6 sc: 38 sc
79: 9 sc, 6 sc remaining on the outside of the arm, 15 sc, 6 sc remaining on the outside of the arm, 6 sc: 42 sc
80: 8 sc, 1 dec, 4 sc, 1 dec, 13 sc, 1 dec, 4 sc, 1 dec, 5 sc: 38 sc
81: 38 sc
82: 1 dec, 6 sc, 1 dec, 2 sc, 1 dec, 5 sc, 1 dec, 6 sc, 1 dec, 2 sc, 1 dec, 5 sc: 32 sc
83: 1 dec, 4 sc, 3 dec, 4 sc, 1 dec, 4 sc, 3 dec, 4 sc: 24 sc
84: (2 sc, 1 dec) * 6: 18 sc
Switch to beige yarn
85: (blo 1 sc, 1 dec) * 6: 12 sc
86-90: 12 sc (5 rows)
**FOR THE 82ND ROW, ATTACH THE BLUE YARN TO THE FRONT AND MIDDLE LOOP.
CROCHET 18 SC, TURN
CROCHET 18 SC, TURN
1 DEC, 14 SC, 1 DEC END.

SKIRT
Attach the sky blue yarn to the front loop of the 63rd row.
1: 40 sc, sl st (Ch 1 at the end of each row)
2: (3 sc, blo 2 sc) * 8: 40 sc
3: (1 sc, 1 inc, 1 sc, blo 2 sc) * 8: 48 sc
4: (2 sc, 1 inc, 1 sc, blo 2 sc) * 8: 56 sc
5: (5 sc, blo 2 sc) * 8: 56 sc
6: (2 sc, 1 inc, 2 sc, blo 2 sc) * 8: 64 sc
7: (6 sc, blo 2 sc) * 8: 64 sc
8: (3 sc, 1 inc, 2 sc, blo 2 sc) * 8: 72 sc
9: (7 sc, blo 2 sc) * 8: 72 sc
10: (3 sc, 1 inc, 3 sc, blo 2 sc) * 8: 80 sc
11: (8 sc, blo 2 sc) (24 rows)
12: (4 sc, 1 inc, 3 sc, blo 2 sc) * 8: 88 sc
13-37: (9 sc, blo 2 sc) * 8: 88 sc (25 rows)
Switch to turquoise yarn
35: 2 sc, insert into the sc from one row below (34th row) in sky blue,
1 hdc, dc next to it (34th row), insert into the sc from the sky blue row of the 33rd row,
1 tr, dc (sky blue) of the 34th row, dc (sky blue) of the 34th row,
1 hdc, 2 sc from the start, 2 sc to the blo: Apply the same process to the entire row (See the picture) finish.
Make the embroideries shown in the picture with pink and turquoise yarn in single layers.
SHORT SKIRT
Attach the sky blue yarn to the front loop of the 63rd row.
1: 40 sc, sl st (Ch 1 at the end of each row)
2: (3 sc, blo 2 sc) * 8: 40 sc
3: (1 sc, 1 inc, 1 sc, blo 2 sc) * 8: 48 sc
4: (2 sc, 1 inc, 1 sc, blo 2 sc) * 8: 56 sc
5: (5 sc, blo 2 sc) * 8: 56 sc
6: (2 sc, 1 inc, 2 sc, blo 2 sc) * 8: 64 sc
7: (6 sc, blo 2 sc) * 8: 64 sc
8: (3 sc, 1 inc, 2 sc, blo 2 sc) * 8: 72 sc
9: (7 sc, blo 2 sc) * 8: 72 sc
10: (3 sc, 1 inc, 3 sc, blo 2 sc) * 8: 80 sc
11: (8 sc, blo 2 sc) (24 rows)
12: (4 sc, 1 inc, 3 sc, blo 2 sc) * 8: 88 sc
13-24: (9 sc, blo 2 sc) * 8: 88 sc (12 rows)
Switch to turquoise yarn
35: 2 sc, insert into the sc from one row below (34th row) in sky blue,
1 hdc, dc next to it (34th row), insert into the sc from the sky blue row of the 33rd row,
1 tr, dc (sky blue) of the 34th row, dc (sky blue) of the 34th row,
1 hdc, 2 sc from the start, 2 sc to the blo: Apply the same process to the entire row (See the picture) finish.
Make the embroideries shown in the picture with pink and turquoise yarn in single layers.
VEST
1: Ch 55, turn, skip 7 sc, 8 ch (buttonhole): 48 sc
***Measure the vest against the body to ensure it’s not too loose due to hand and yarn differences.
2-6: 48 sc
7: Ch 7, turn (2nd buttonhole): 48 sc
Finish.
Now we will make the front chest part.
Turn with the buttonhole facing to the right. And count 16 stitches forward and attach our black yarn to the 17th stitch.
1: 8 sc, turn
2: 1 dec, 6 sc: 7 sc, turn
3: 5 sc, 1 dec: 6 sc, turn
4: 1 dec, 4 sc: 5 sc, finish, continue to the vest strap, turn
5: 2 sc, turn (turn at the end of each row without chaining)
6-17: 2 sc finish.
Now we’ll do the left side, turn it over, attach the black yarn to the 8th stitch (towards the first piece)
1: 8 sc, turn
2: 1 dec, 6 sc: 7 sc, turn
3: 5 sc, 1 dec: 6 sc, turn
4: 1 dec, 4 sc: 5 sc finish,
continue to the vest strap, turn
5: 2 sc, turn (turn at the end of each row without chaining)
6-17: 2 sc finish.
Now let’s do the bottom triangle.
Turn the chest part upside down. Skip 16 stitches, attach black yarn to the 17th stitch.
1: 15 sc, turn
2: 1 sl st, 1 dec, 2 sc, 1 hdc, 1 dc, 1 tr, 1 dc, 1 hdc, 2 sc, 1 dec, 1 sl st finish.
With gold yarn,
Attach the yarn from the top with the buttonhole on the right.
Pass sc through all edges.
When you get to the bottom triangle part,
make 1 sc, 1 ch, make 1 sc at the bottom, then continue sc all the way.
Finish at the buttonhole. As there is a buttonhole, we do not make gold there.
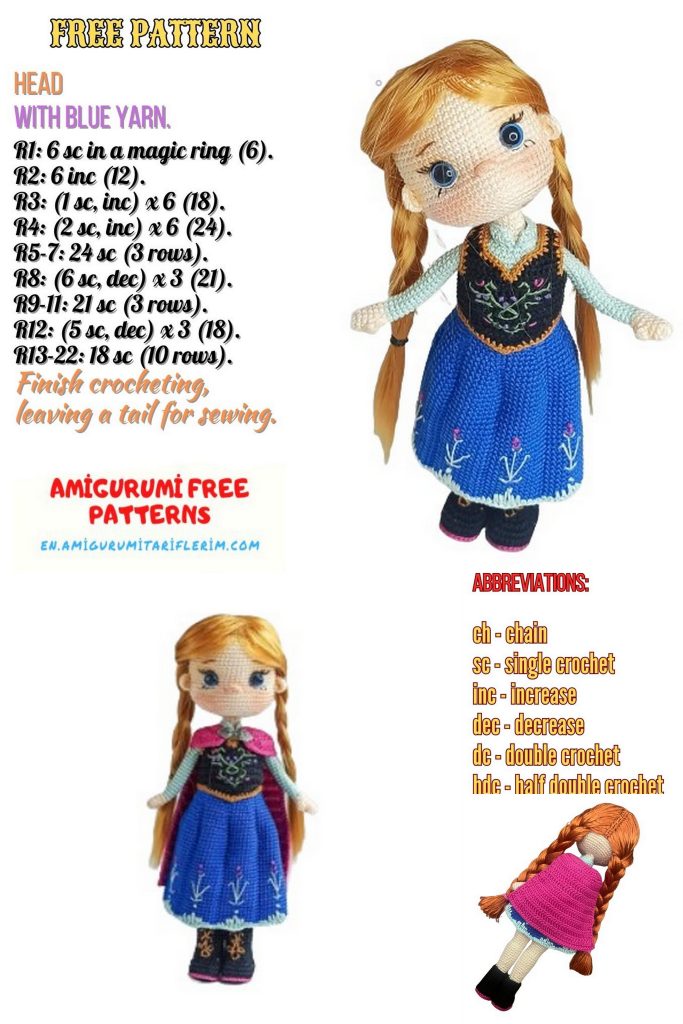
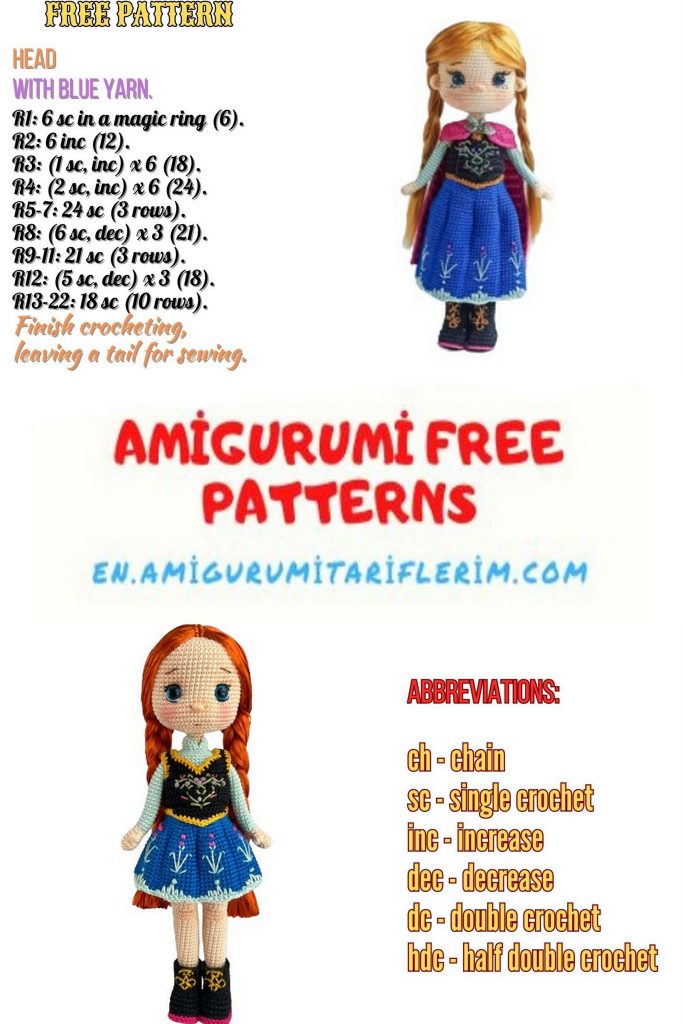
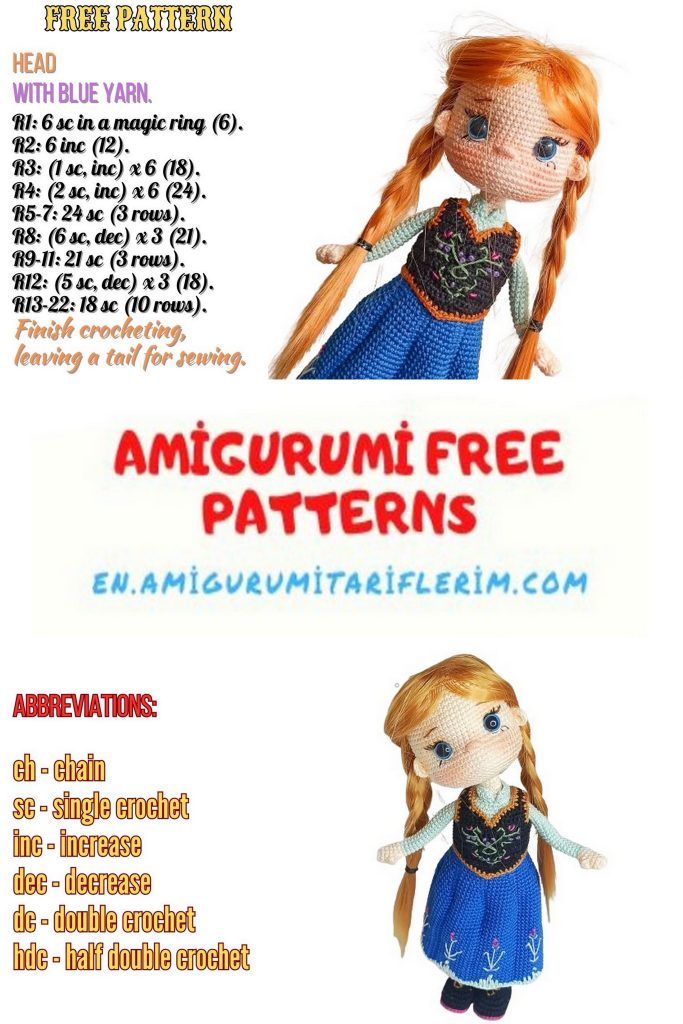
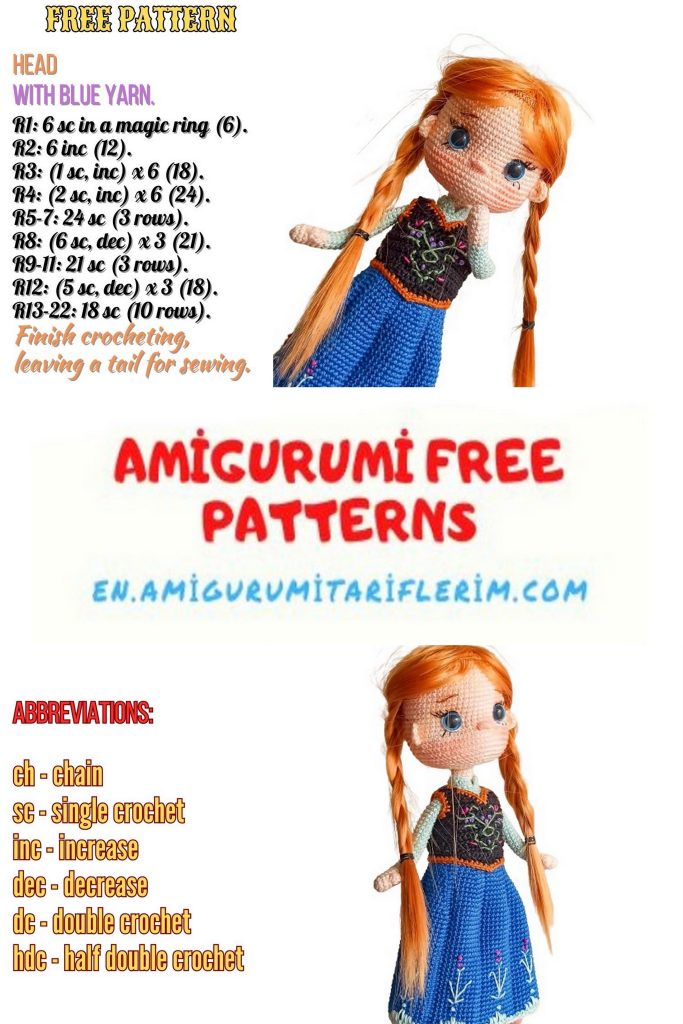
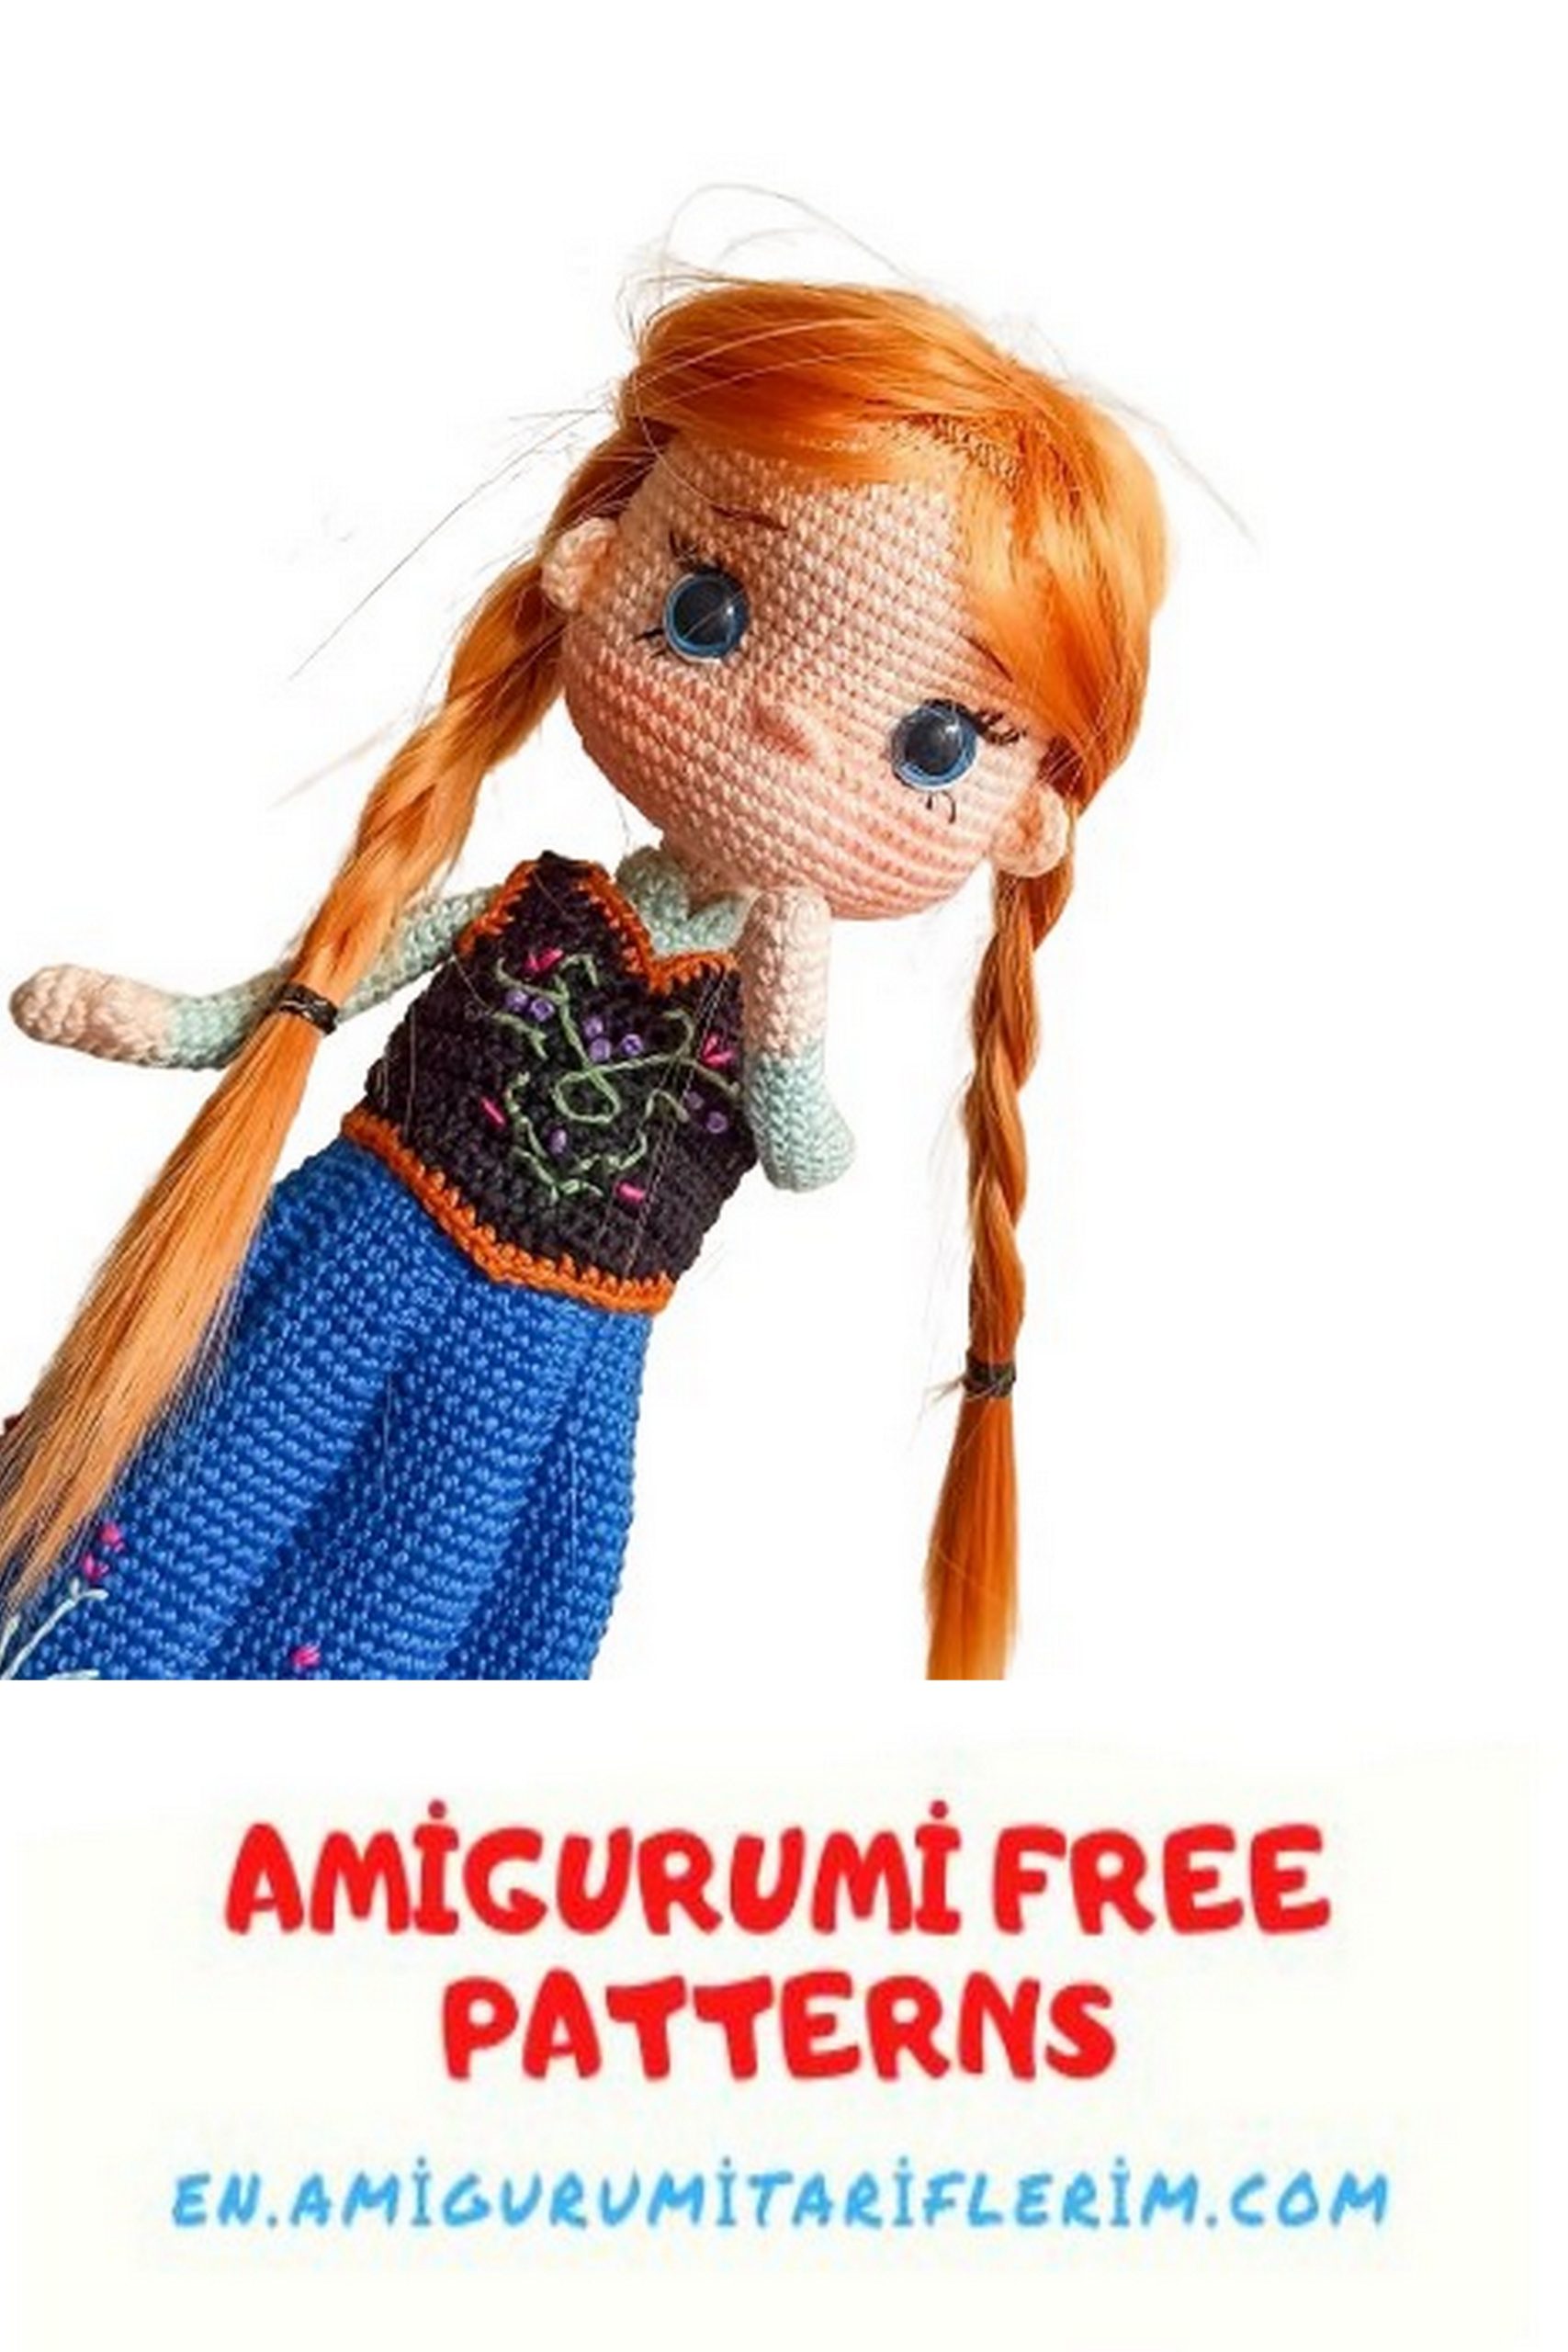
HEAD
1: MR 6sc
2: 6inc (12sc)
3: (1sc, 1inc) * 6 (18sc)
4: 1sc, 1inc, (2sc, 1inc) * 5, 1sc (24sc)
5: (3sc, 1inc) * 6 (30sc)
6: 2sc, 1inc, (4sc, 1inc) * 5, 2sc (36sc)
7: (5sc, 1inc) * 6 (42sc)
8: 3sc, 1inc, (6sc, 1inc) * 5, 3sc (48sc)
9: (7sc, 1inc) * 6 (54sc)
10: 4sc, 1inc, (8sc, 1inc) * 5, 4sc (60sc)
11-20: 60 (10 rows)
21: 24sc, 1ch, skip 1sc, 10sc, 1ch, skip 1sc, 24sc (60sc)
22: 60sc
23: 21sc, (1sc, 1inc) * 3, 6sc, (1inc, 1sc) * 3, 21sc (66sc)
24-27: 66sc
28: (9sc, 1dec) * 6 (60sc)
29: 4sc, 1dec, (8sc, 1dec) * 5, 4sc (54sc)
30: (7sc, 1dec) * 6 (48sc)
31: 3sc, 1dec, (6sc, 1dec) * 5, 3sc (42sc)
32: (5sc, 1dec) * 6 (36sc)
33: 2sc, 1dec, (4sc, 1dec) * 5, 2sc (30sc)
34: (3sc, 1dec) * 6 (24sc)
35: 12dec (12sc)
***Attach the eyes to the space on row 21.
Attach the final eyes.
***Refer to the next page for images.
1: MR 8hdc
***Work the ears 5sc forward from the eyes. (Refer to the image)
Ear
FACE SHAPING
1: For eye shaping; Insert the needle from the back of the eye, go under, come back up, repeat the same for the other eye, hold the eyes and pull. Tie the yarn. Then apply the same process to the upper and lower parts. Shape the eyes.
2: Next, make the upper line of the eye without separating the black yarn.
3: Make the eyelashes with a single strand of yarn. Keep them thin.
4: Make the whites of the eyes with white yarn.
5: With a single strand of black yarn, make a line under the eye and create eyelashes from the line.
6: Work the nose under the eye with 3sc.
7: Add one more layer of white yarn to the eyes for clarity.
Image 5
WIG
*** Do not knit too tightly, it should fit on the wig’s head without force.
1: MR 6sc (Do not tighten the center of MR, leave it open as we’ll place the hair inside later.)
2: BLO 6inc (12sc)
3: (1sc, 1inc) * 6 (18sc)
4: BLO 1sc, 1inc, (2sc, 1inc) * 5, 1sc (24sc)
5: (3sc, 1inc) * 6 (30sc)
6: BLO 2sc, 1inc, (4sc, 1inc) * 5, 2sc (36sc)
7: (5sc, 1inc) * 6 (42sc)
8: BLO 3sc, 1inc, (6sc, 1inc) * 5, 3sc (48sc)
9: (7sc, 1inc) * 6 (54sc)
10: BLO 4sc, 1inc, (8sc, 1inc) * 5, 4sc (60sc)
11-12: 60 (2 rows)
— Attach the wig to the head. Using a thin yarn in wig color, stitch the hair from one loop of the wig, and one strand of hair, respectively. When you reach the top, leave a bit of hair. Cut the hair, roll it, and secure it by stitching. Then, at the top point, secure it by stitching with yarn to the open center of the wig. You can also use synthetic yarn to add hair instead of pre-made hair.
HAIR ALTERNATIVE
With synthetic yarn or any yarn;
1: First, make a chain in the length of the top, attach hair strands to the right and left sides of the chain.
Secure them.
SHOE
With a 1.75mm hook and black yarn.
1: Ch 10, turn, 8sc, 1w, 7sc, 1inc, sl-st 1ch (20sc)
2: 1inc, 7sc, 3inc, 7sc, 2inc, sl-st, 1ch (26sc)
3: 1sc, 1inc, 7sc, (1sc, 1inc) * 3, 7sc, (1sc, 1inc) * 2, sl-st 1ch (32sc)
4: BLO 32sc, sl-st 1ch
5-7: 32sc
8: 6sc, 8dec, 10sc (24sc) sl-st
9: 6sc, 4dec, 10sc (20sc) sl-st
10: 6sc, 1inc, 3sc, 1inc, 9sc (22sc)
11-16: 22sc (6 rows)
17: 6sc, 2hdc, 2dc, 2hdc, 10sc (22)
***Attach fuchsia yarn to the front loop of the 4th row, do 32sl-st.
Do not make the sl-st too tight to prevent shrinkage.
CAPE
With a 1.75mm hook and fuchsia yarn; knit without cross stitches.
1: Ch 28, skip 2sc, starting from the 3rd ch, (1dc, 1dcinc) * 13, turn (39dc)
2: 1sc, 1inc, (2sc, 1inc) * 12, 1sc (52sc), turn
3: 1dec, 1sc, 1hdc, 44dc, 1hdc, 1sc, 1dec, turn (50)
4: 1dec, 1sc, 1hdc, 42dc, hdc, sc, 1dec, turn (48)
Cut the yarn, now we’ll make the bottom part of the cape.
Count 12 stitches from the right and attach the yarn to the 13th stitch.
5: 24sc, turn
6: 24dc, turn
7: 24sc, turn
8: 24dc, turn
9: (2sc, 1inc) * 8, turn (32sc)
10: 32dc, turn
11: 32sc, turn
12: 32dc, turn
13: 32sc, turn
14: 32dc, turn
15: 32sc, turn
16: 32dc, turn
17: 32sc, turn
18: (3dc, 1dcinc) * 8, turn (40dc)
19: 40sc, turn
20: 40dc, turn
21: 40sc, turn
22: 40dc, turn
23: 40sc, turn
24: 40dc, turn
25: 40sc, turn
26: 40dc, turn
27: 40sc, turn
28: 40dc, turn
29: 40sc, turn
30: 40dc, turn
Now, single crochet around the cape.
Make “W”s at the corners and finish.
HEART
1: MR 4sc, 2ch, 4sc, cut the yarn, tighten, and hide the yarn.
Attach the hearts to the collar clasp and stitch them to the cape.
***If you’re making a SHORT-SKIRTED ANNA, make the cape in THESE DIMENSIONS.
CONGRATULATIONS!
YOU’VE FINISHED PRINCESS ANNA.