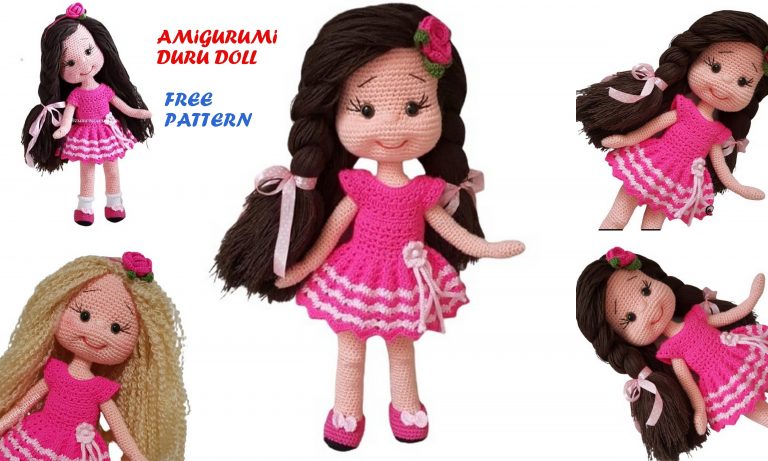
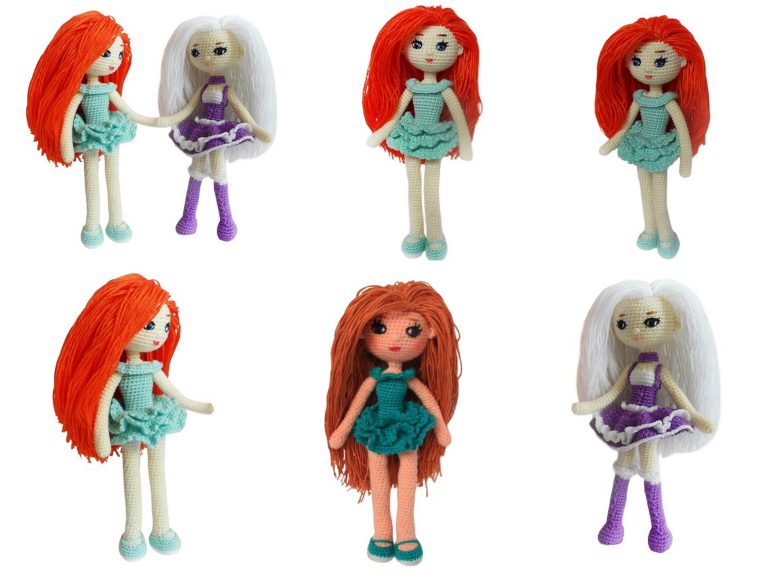
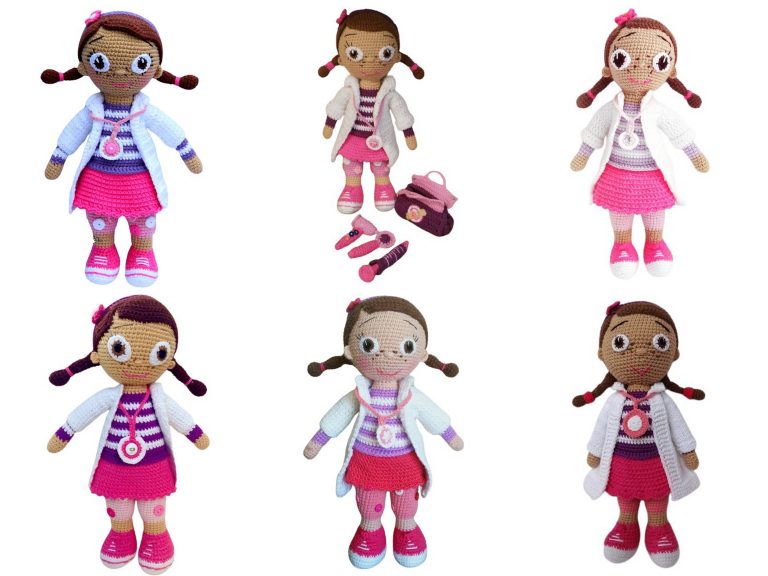
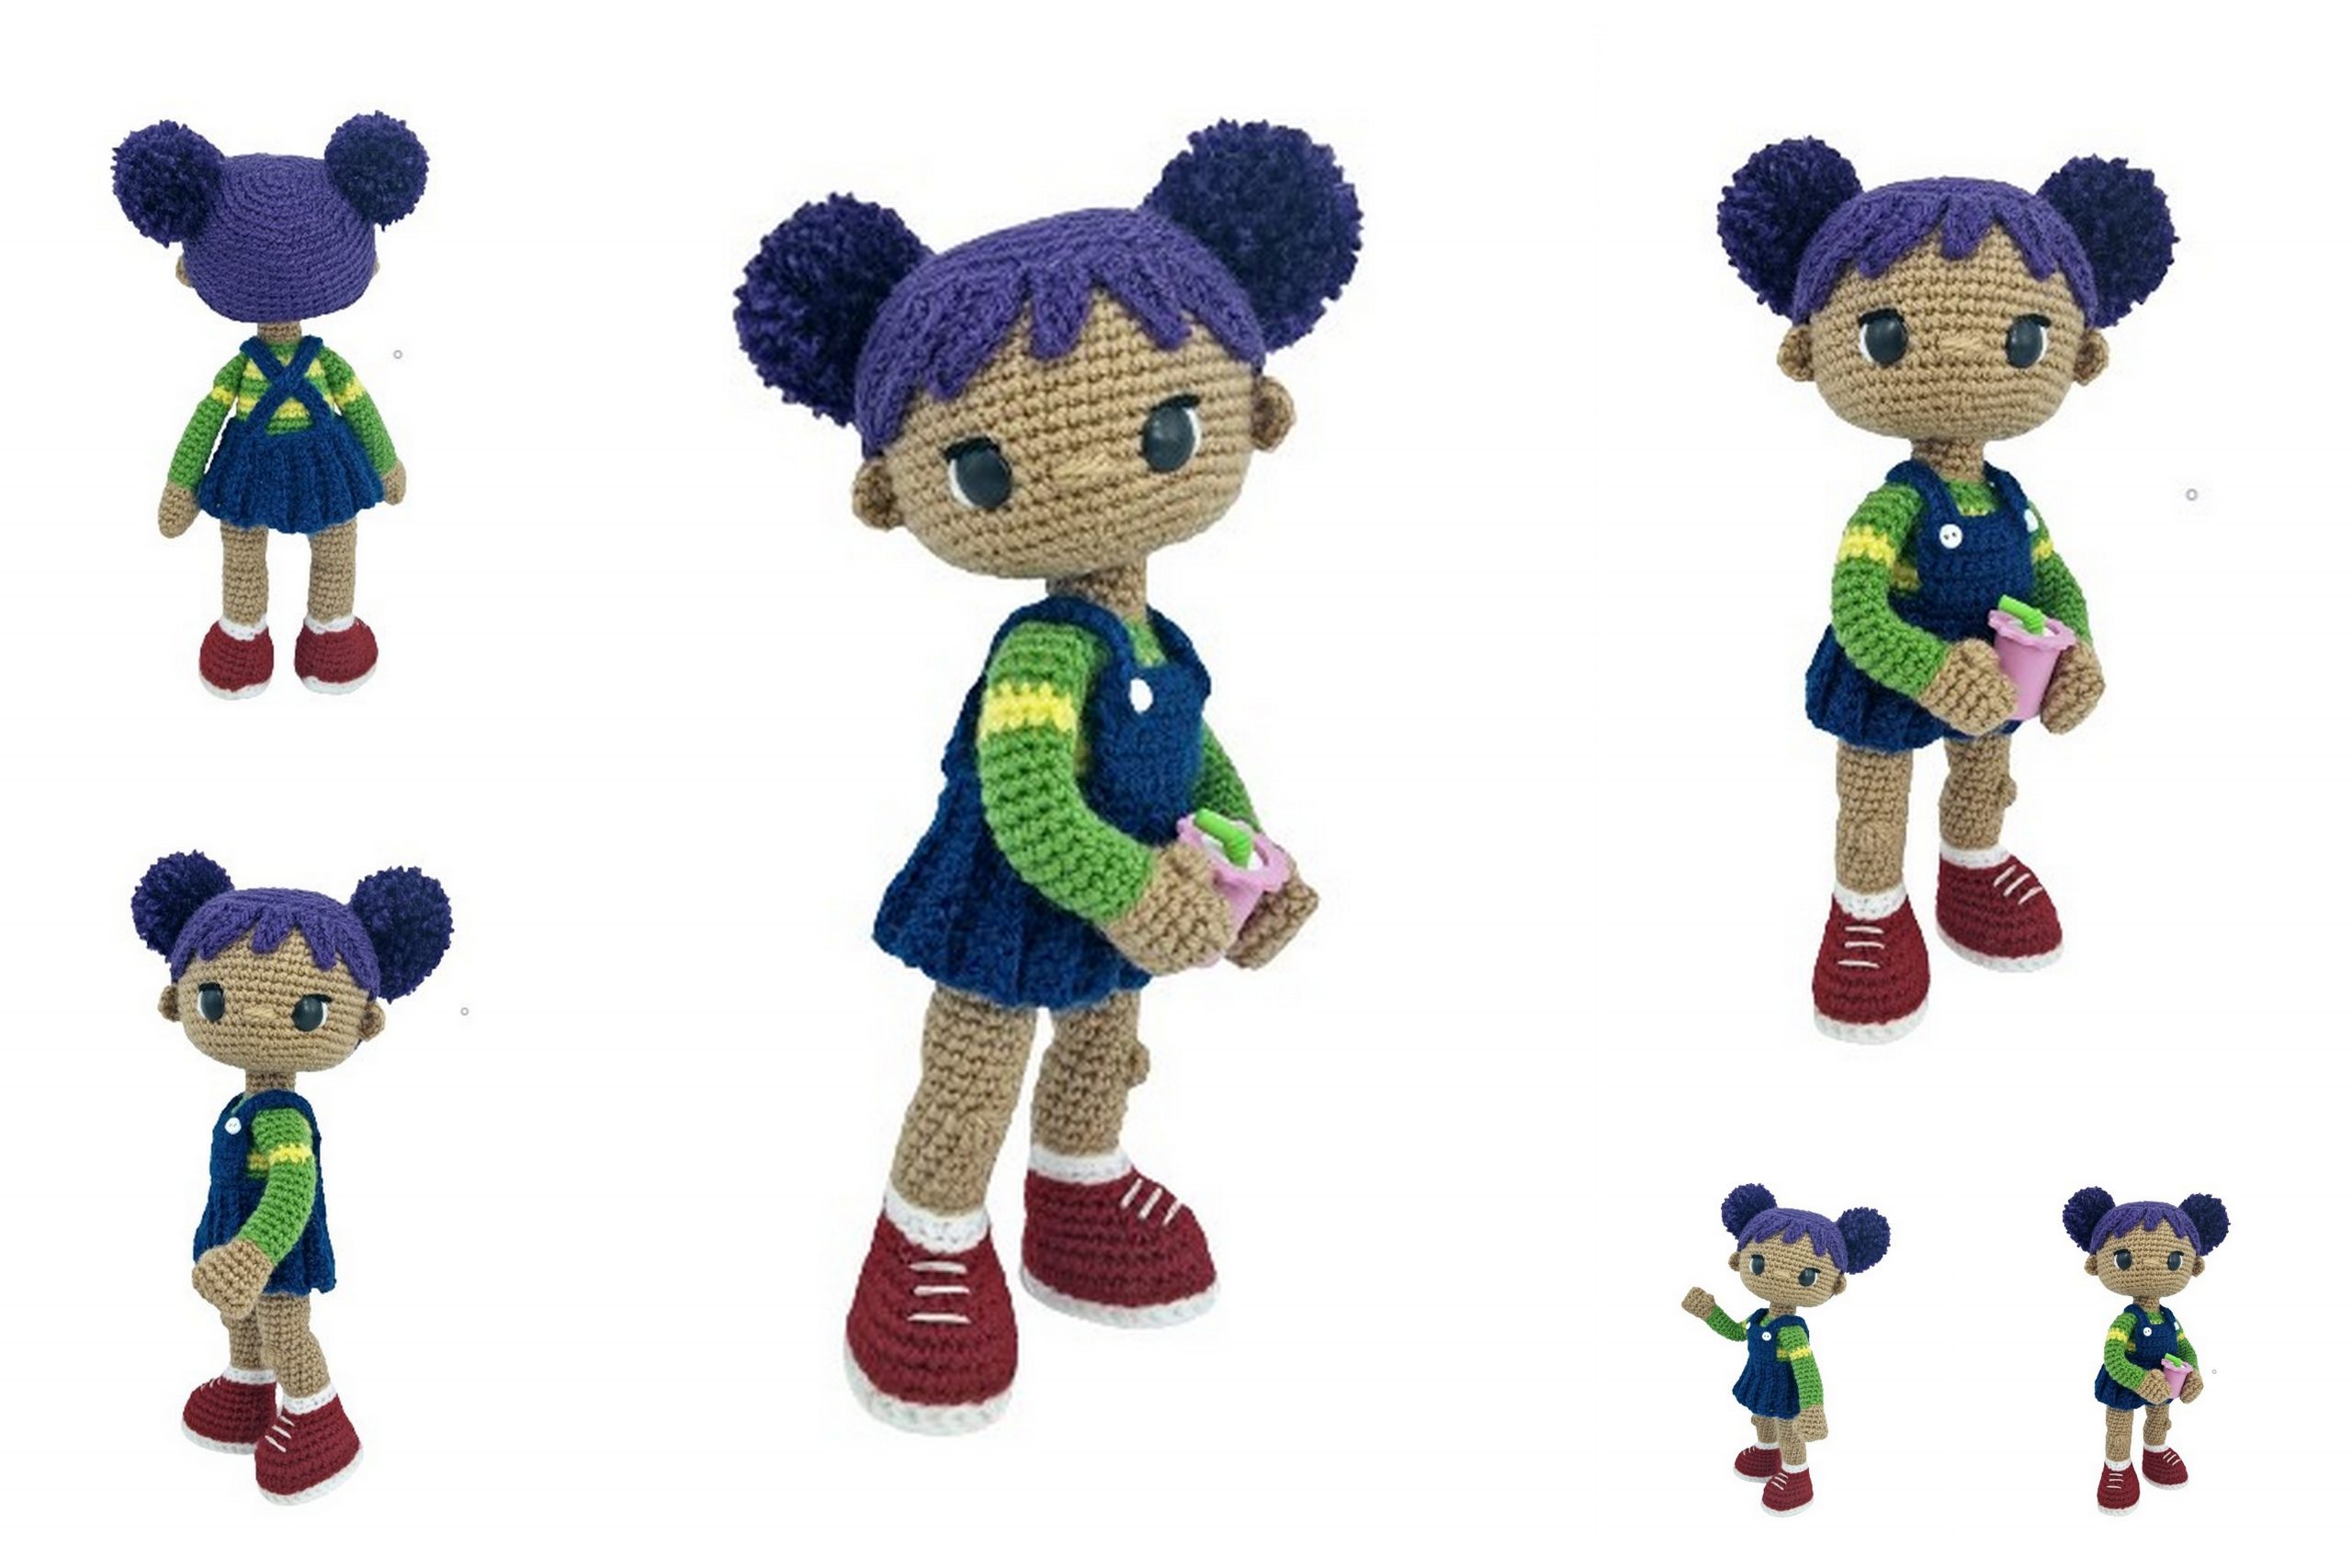
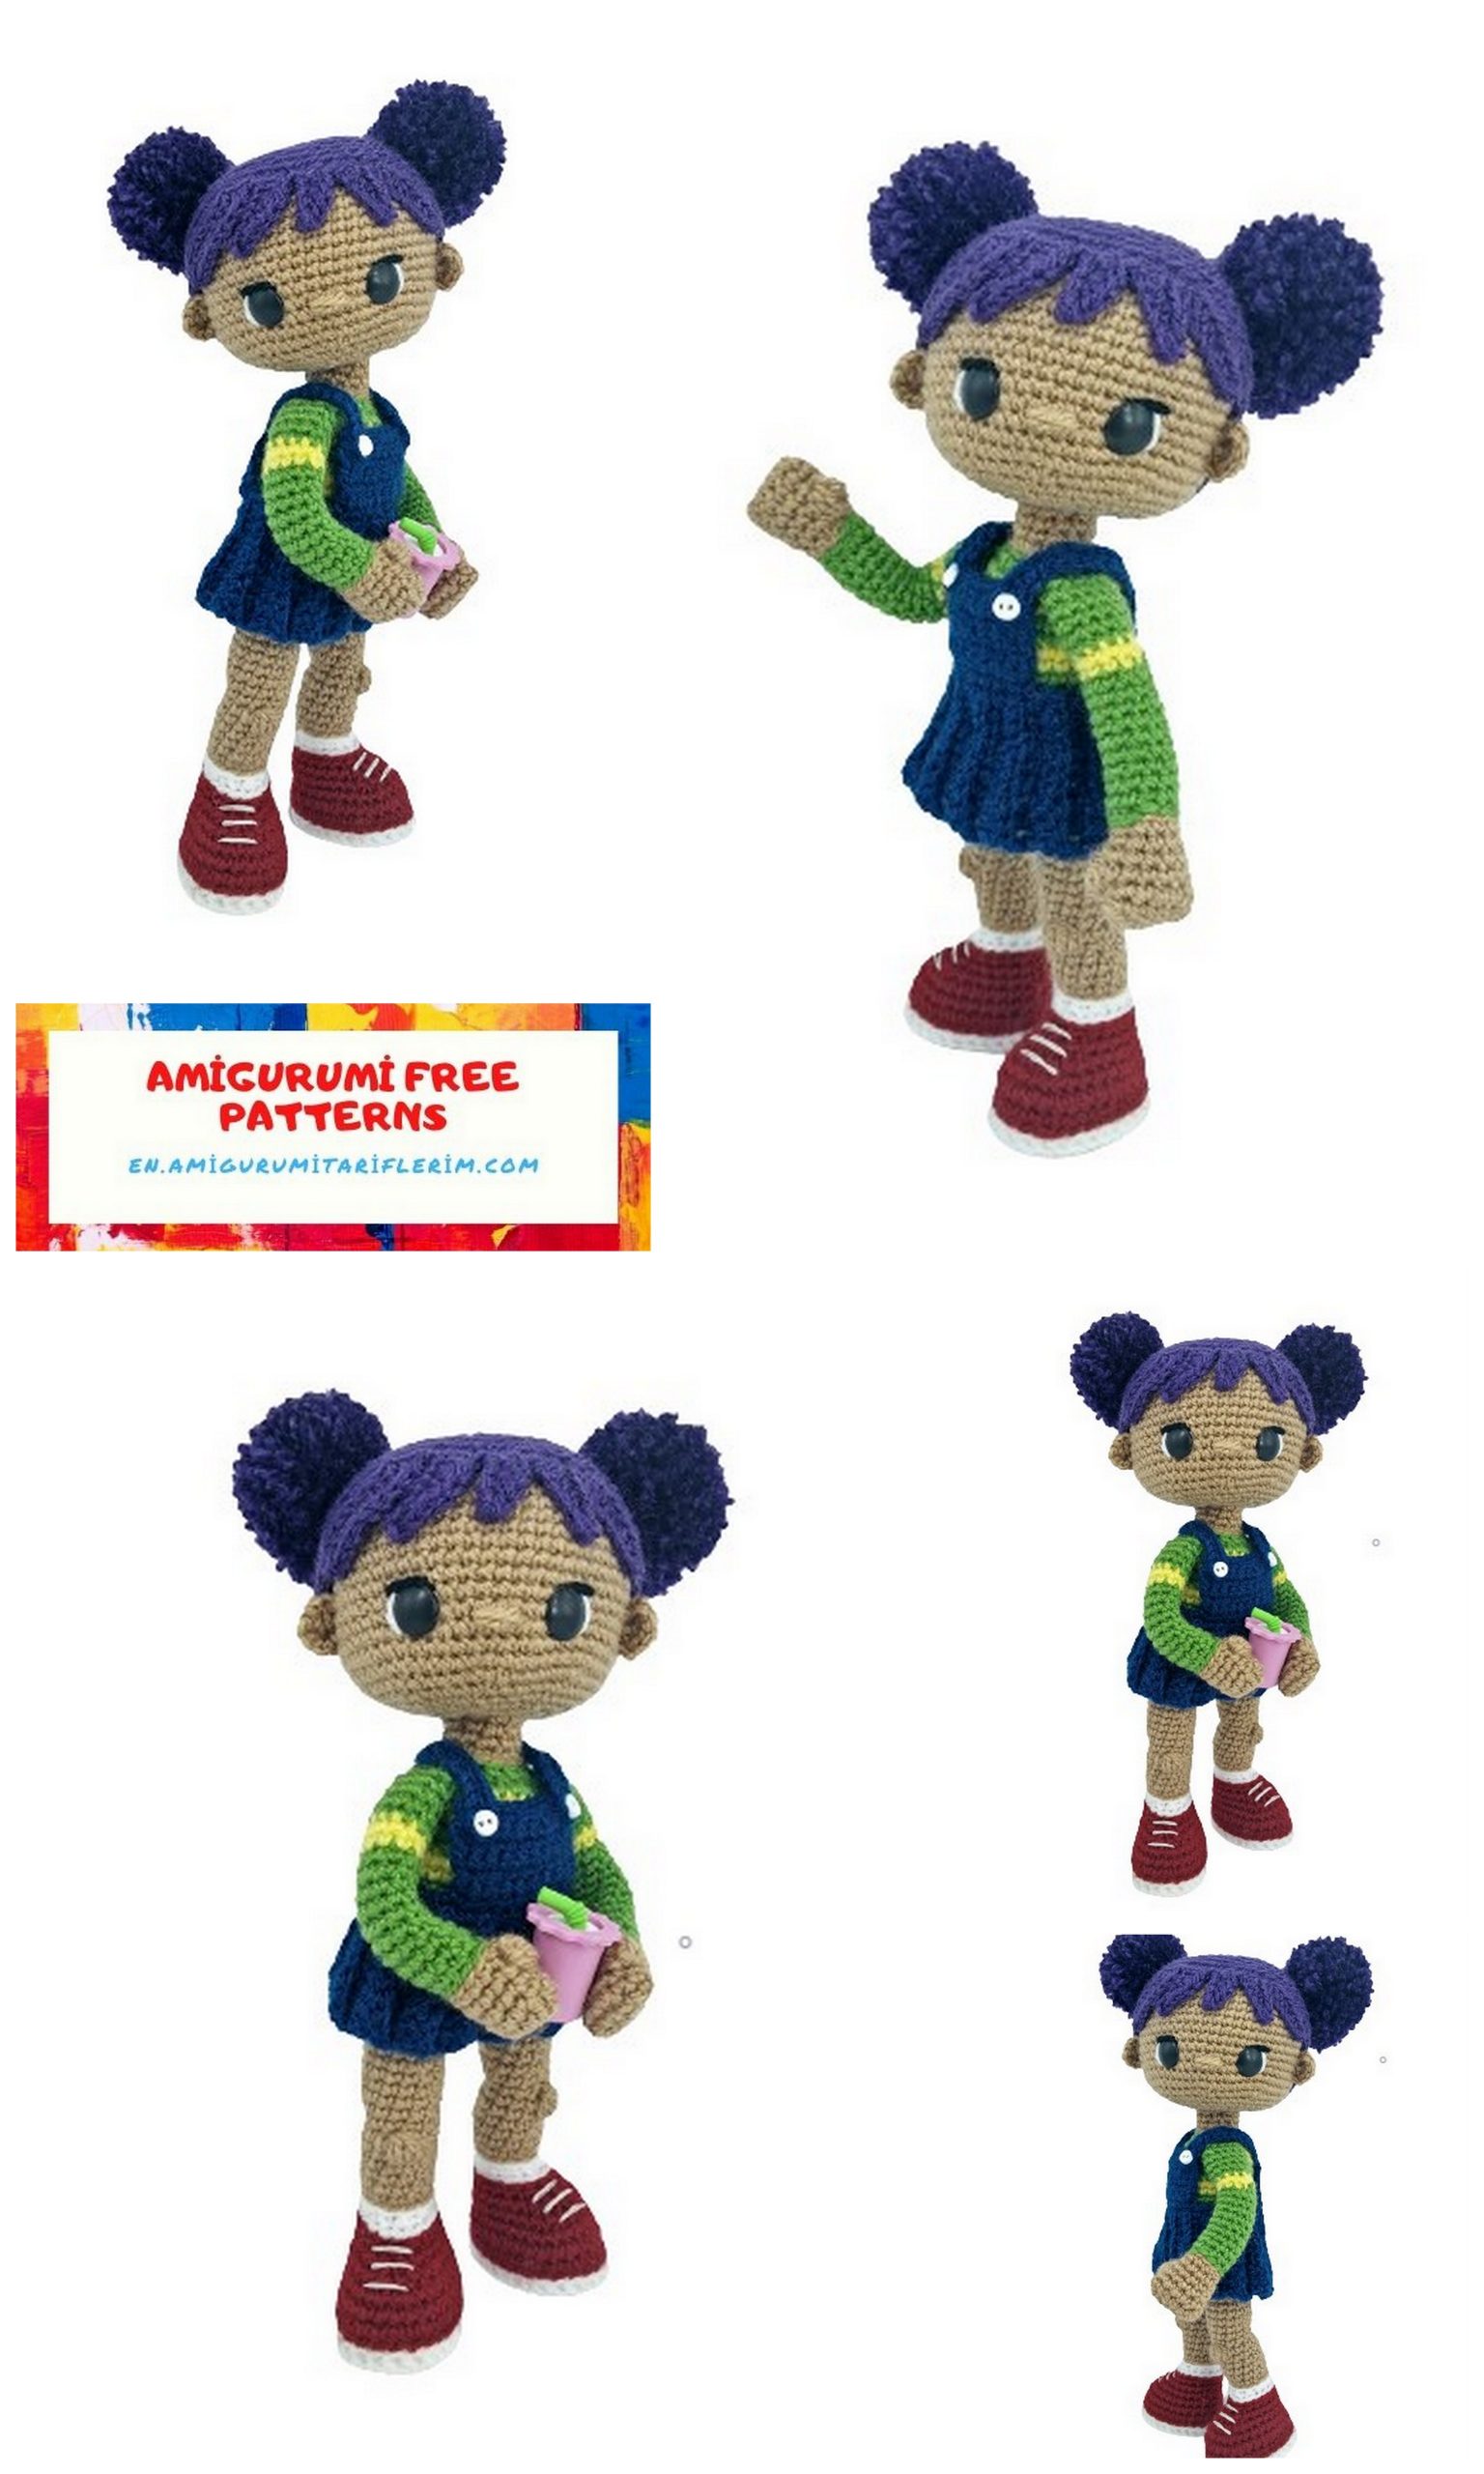
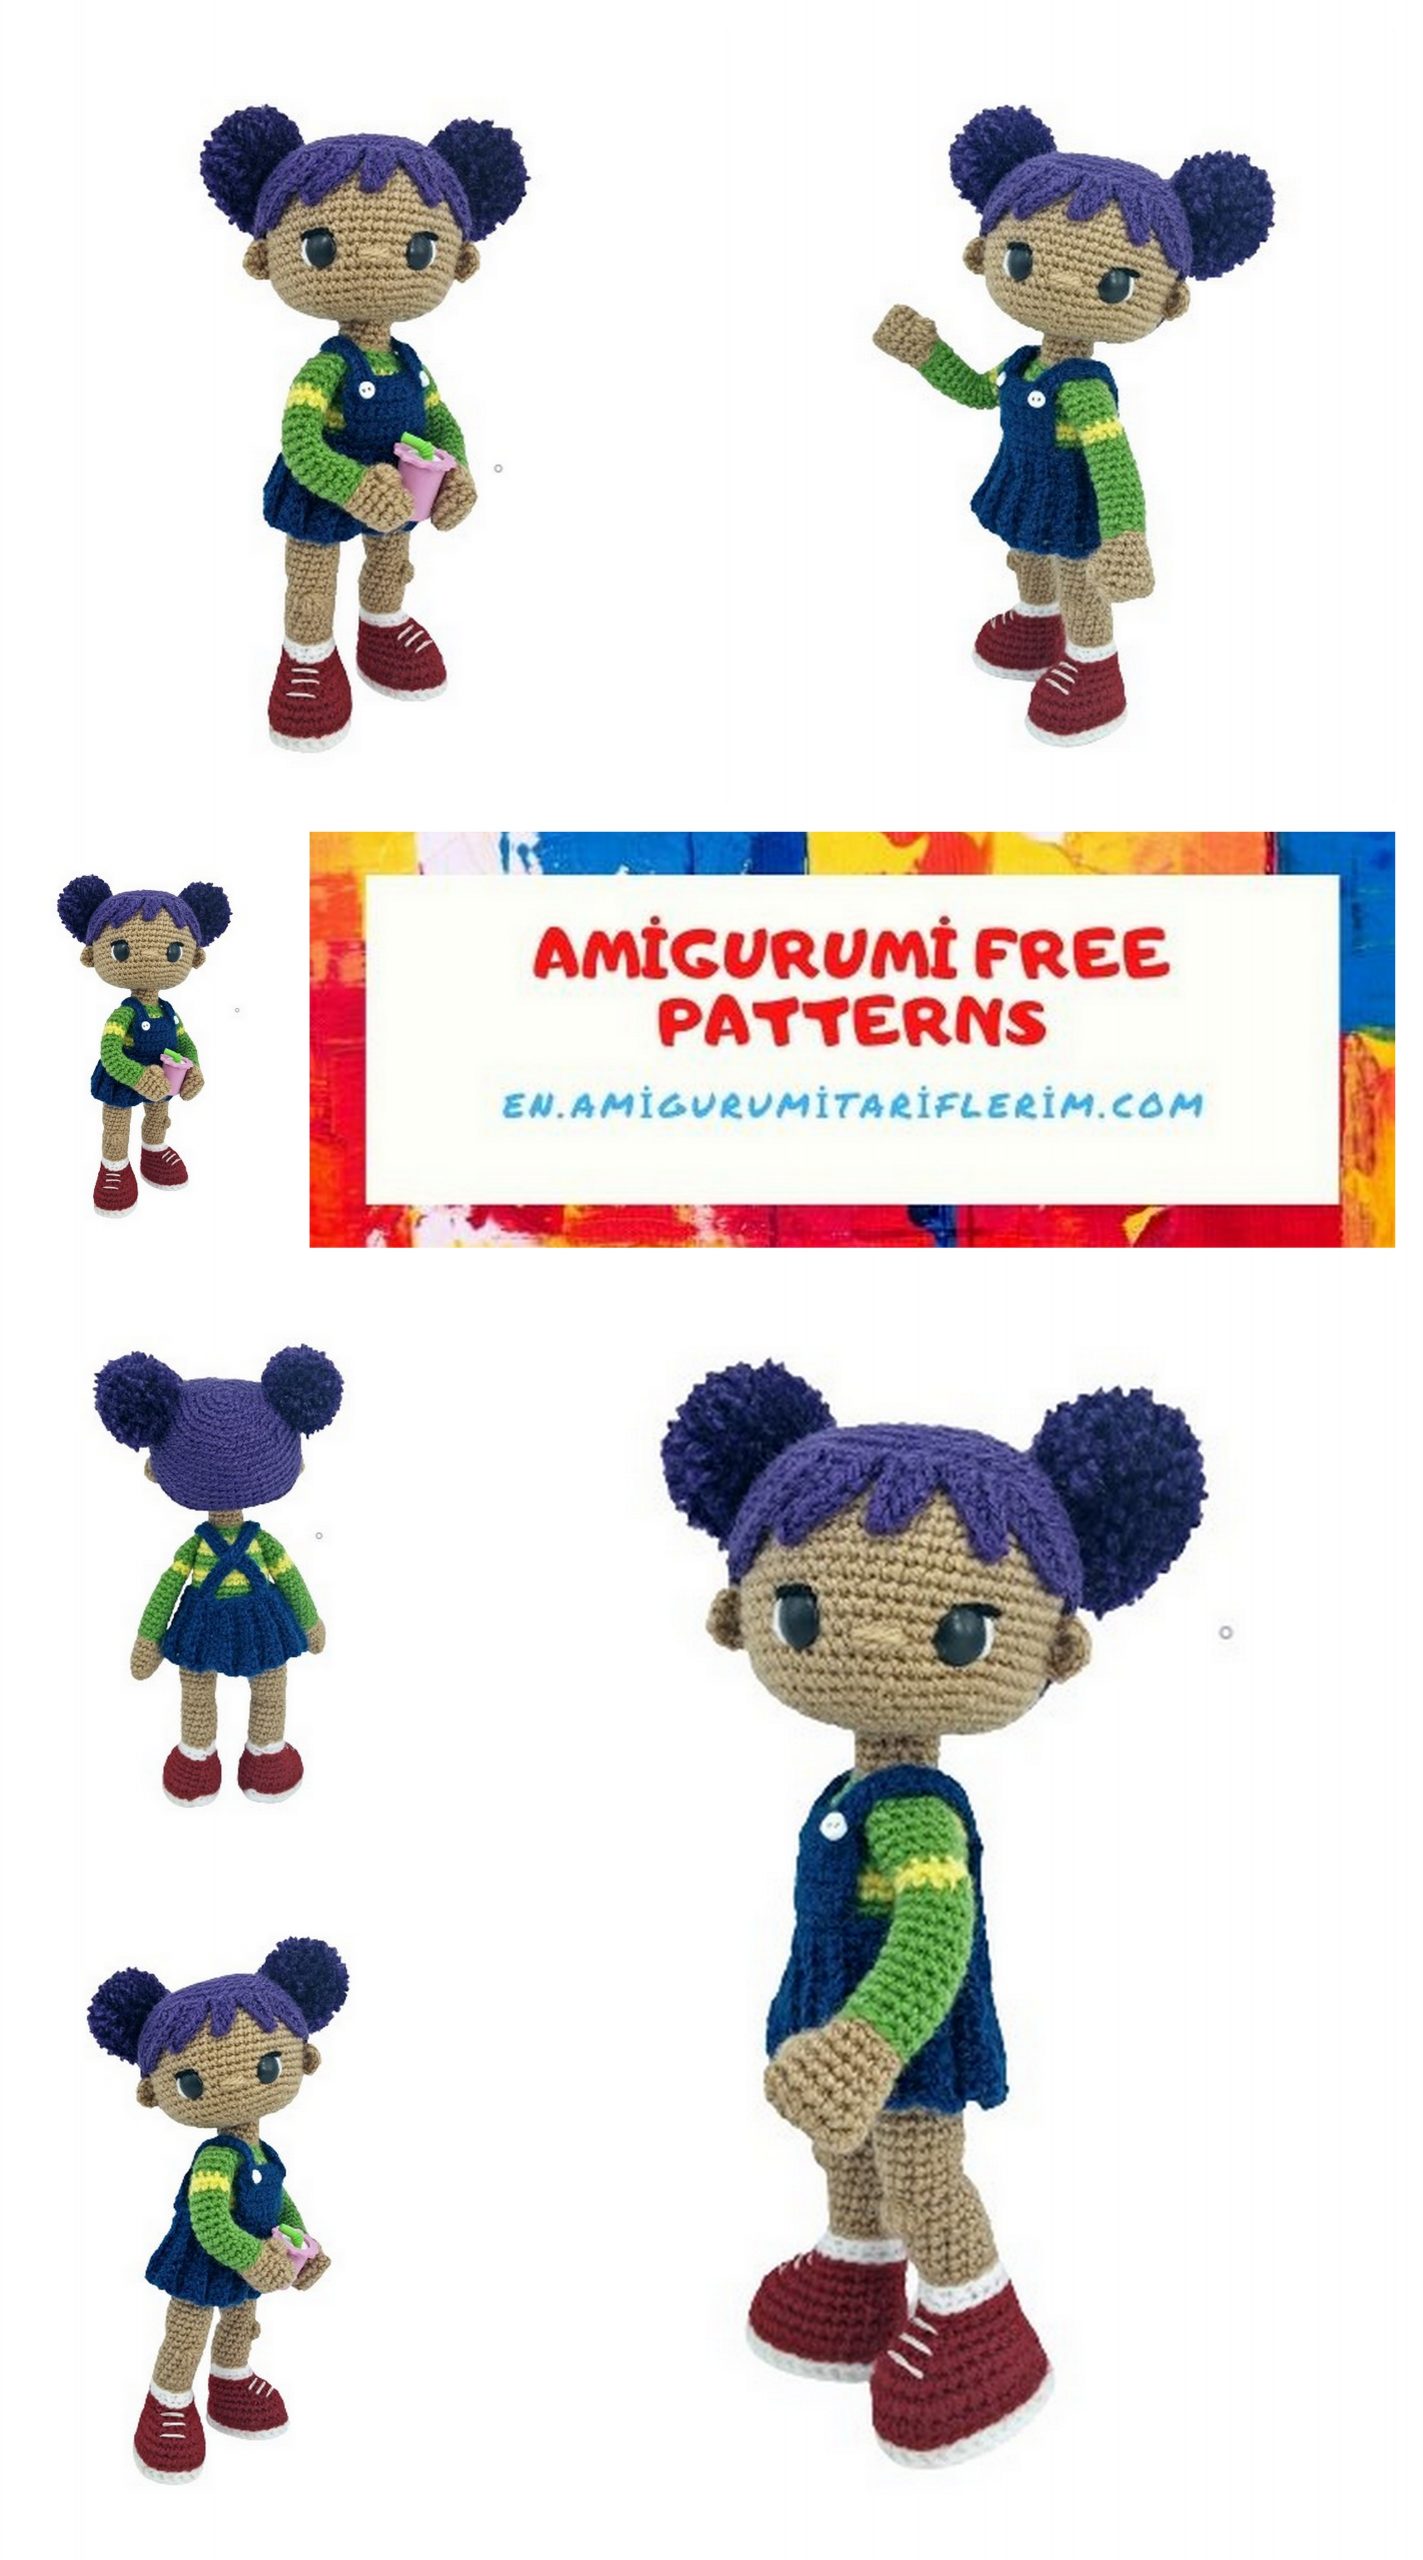
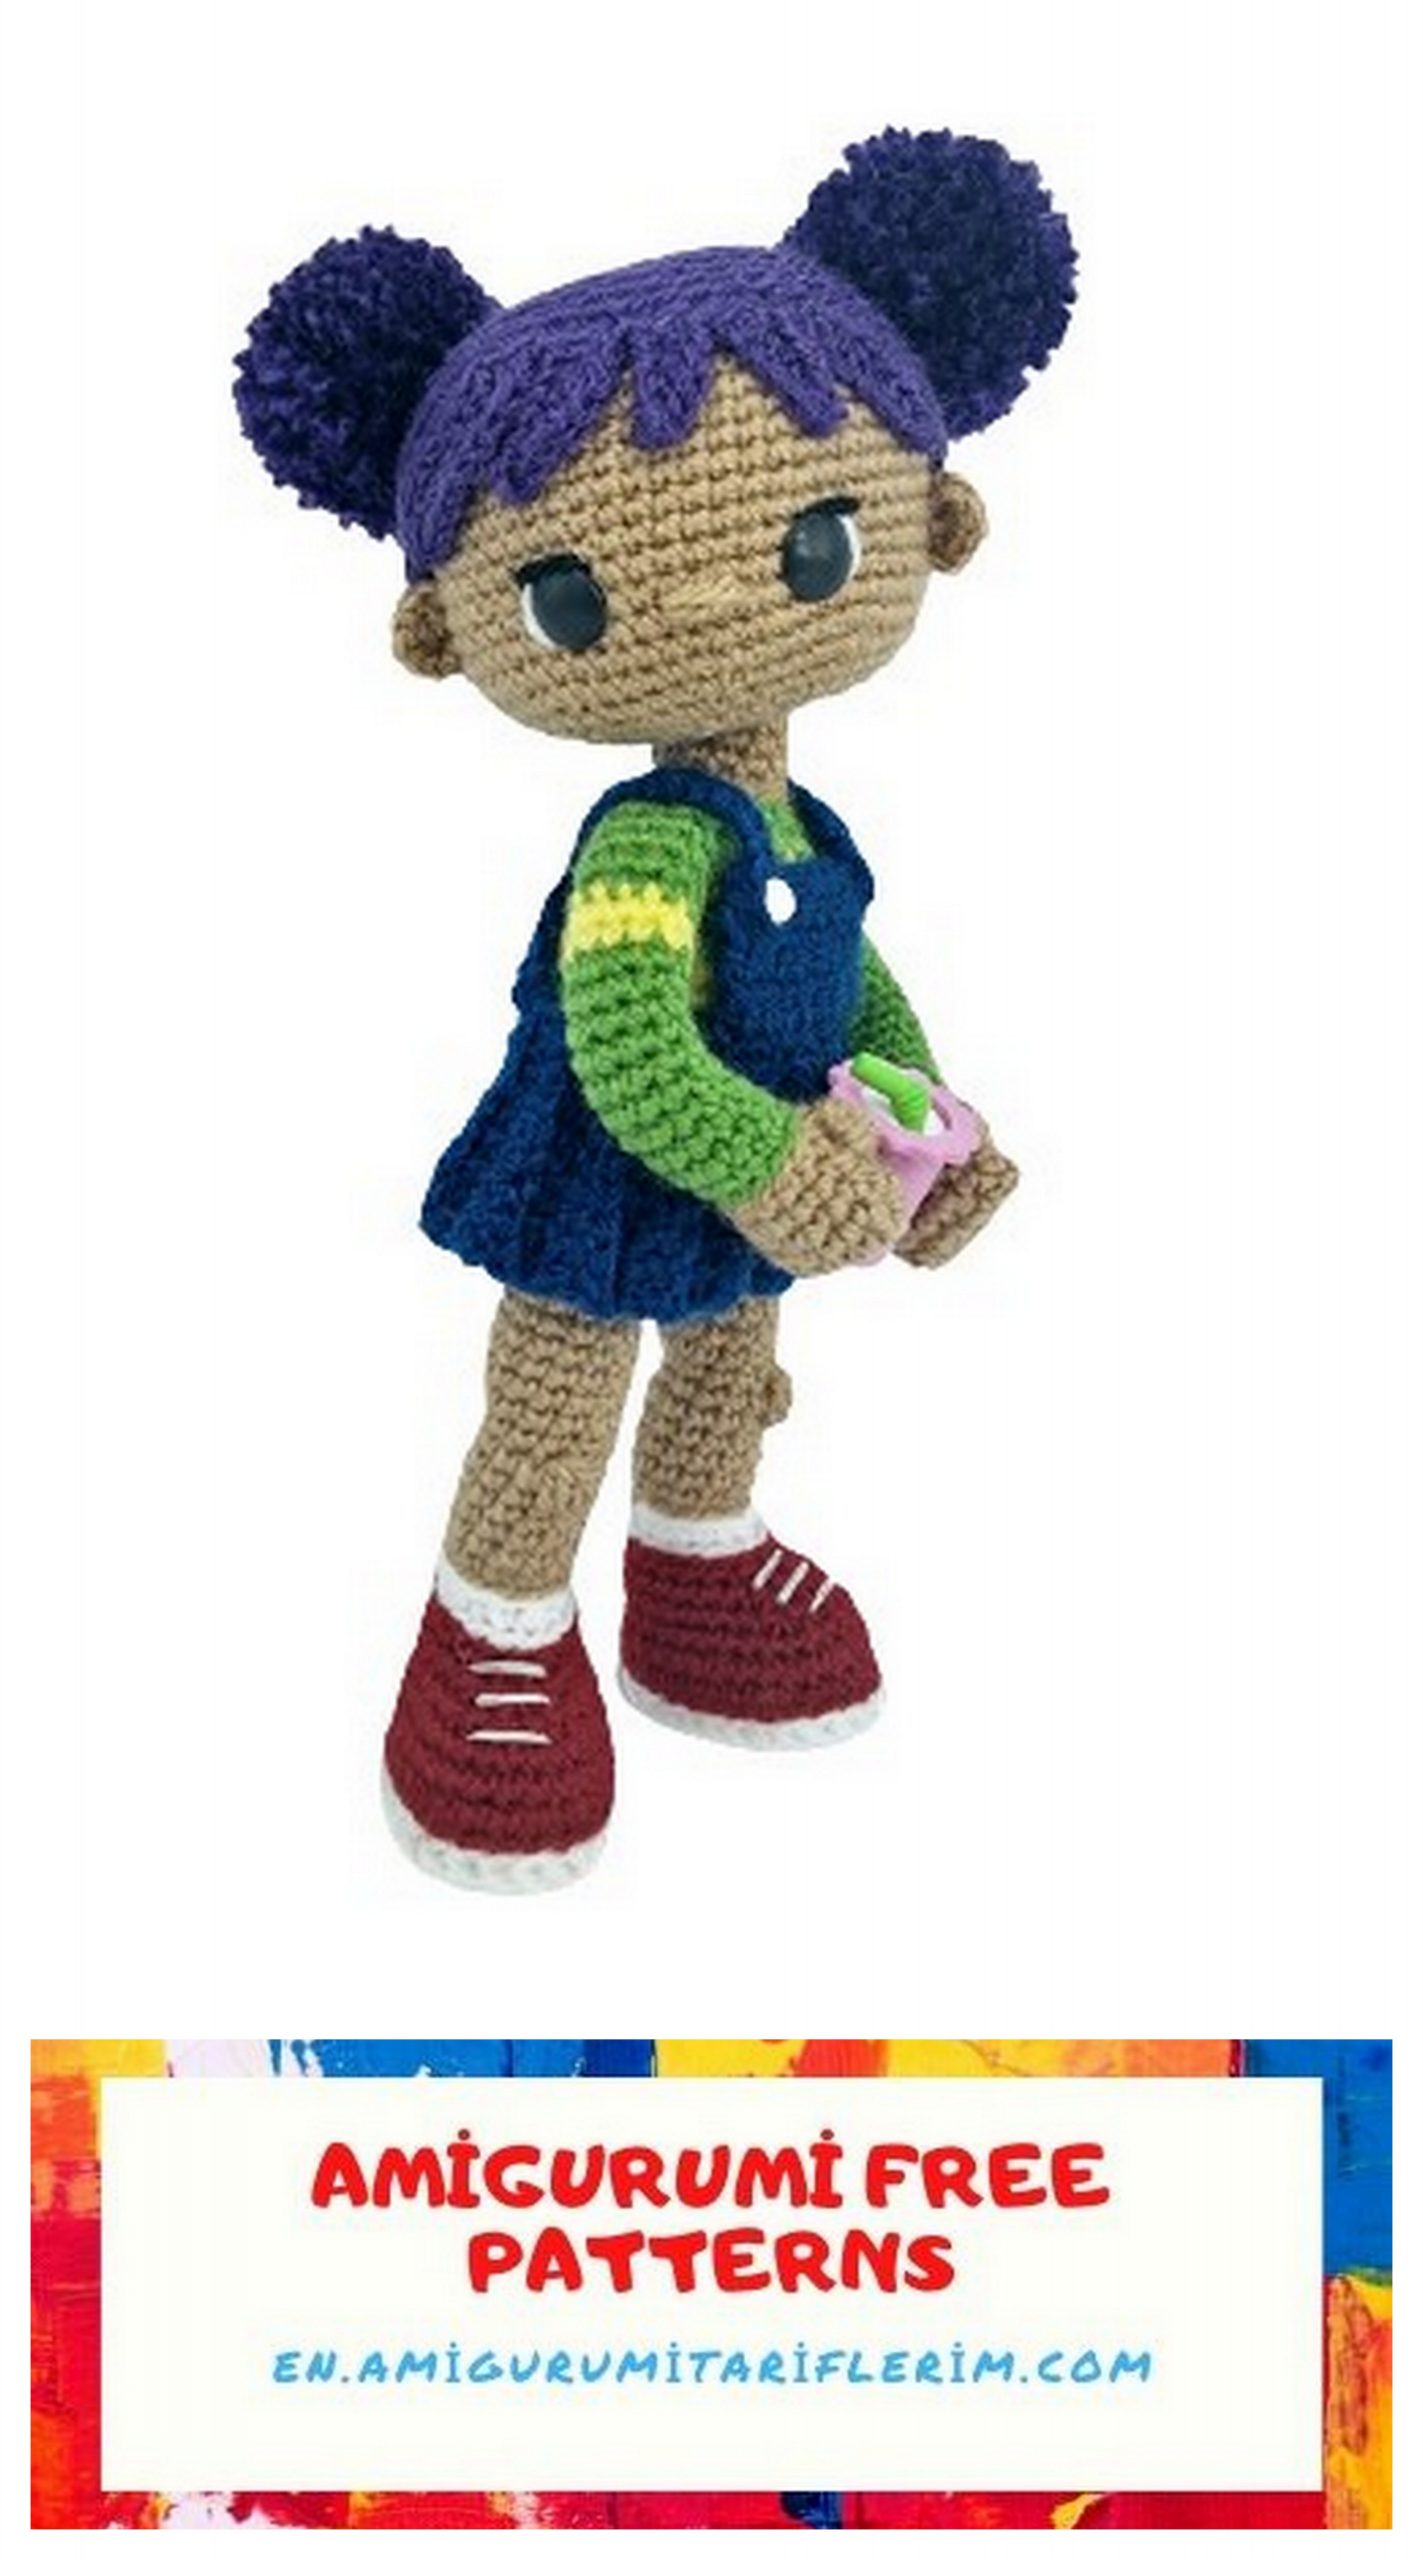
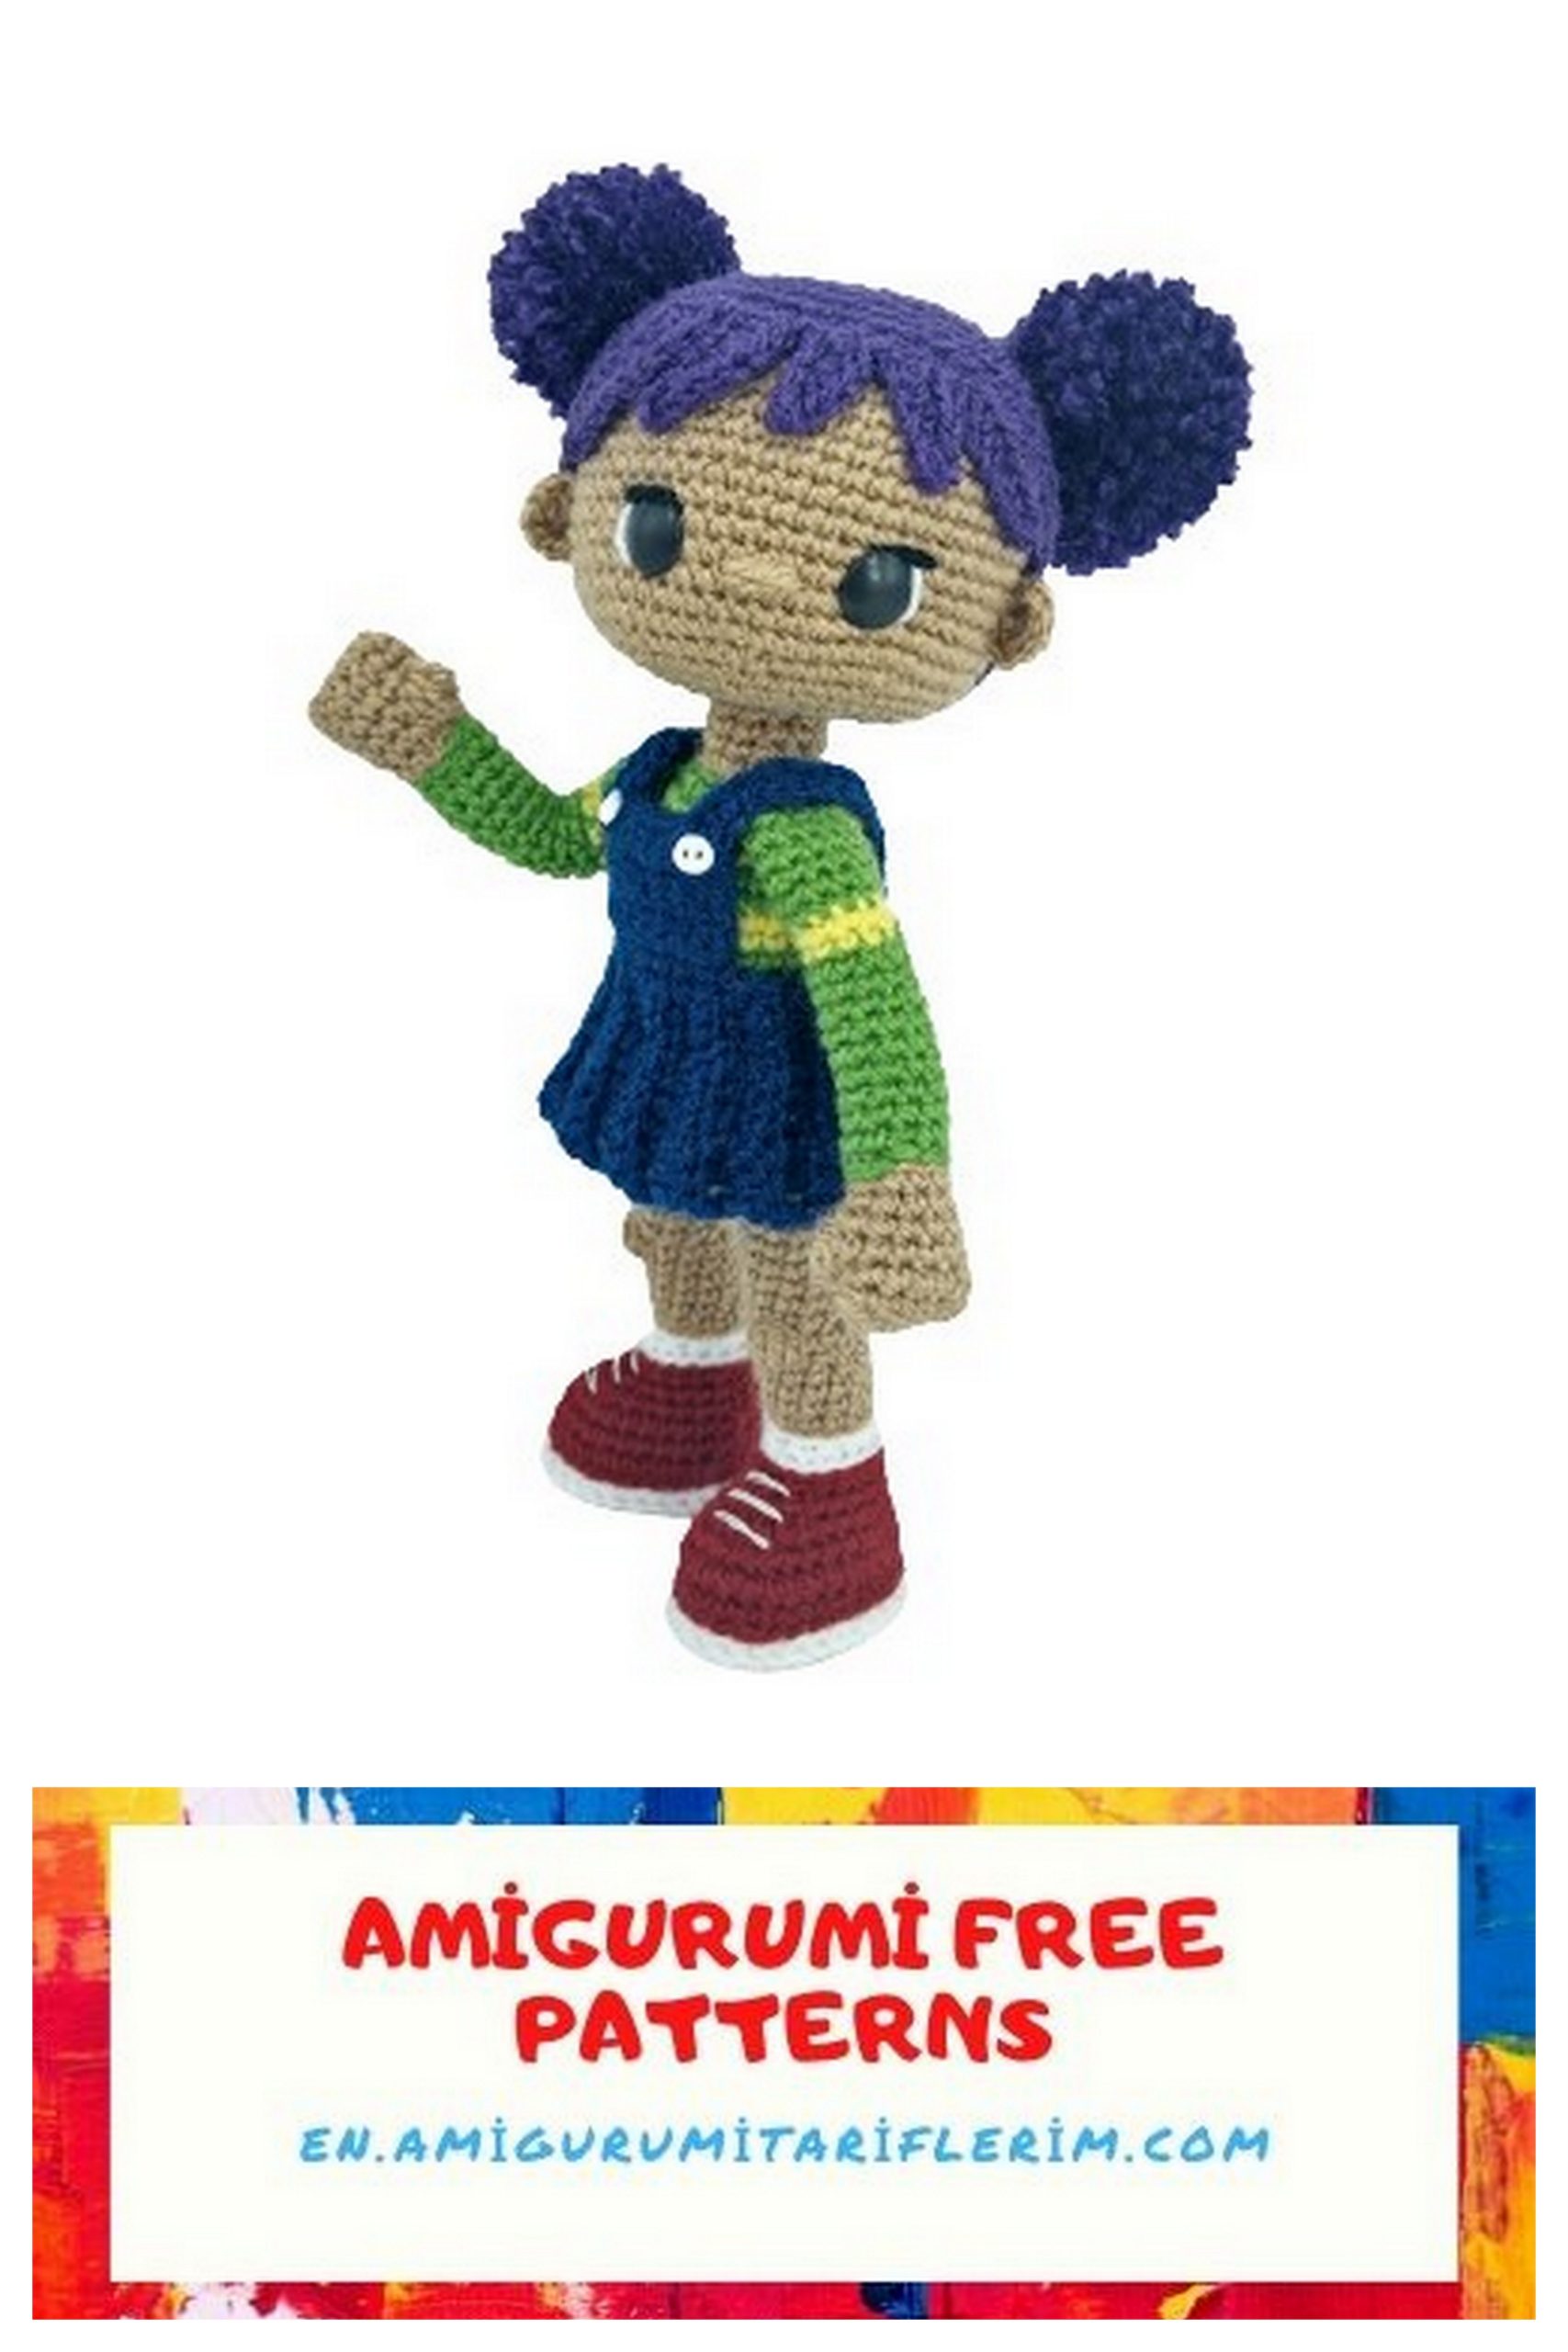
Doll Violet Amigurumi Free Pattern
I continue to share amigurumi free patterns. In this article, doll violet amigurumi free pattern is waiting for you.
Materials:
• Yarn of red, white, light brown, green, yellow, blue, purple,
plus a little black yarn to create eyelashes
• 2.5 mm hook
• A pair of 12mm black protective eyes
• Sintepon for stuffing
• Yarn needles
• Pearl pins
• Two 6 mm white round buttons
• A small piece of plastic sheet or thick cardboard
• A pair of scissors
• 3.5 cm blank for pompons
• Sewing needle
• White sewing thread
• White embroidery thread
Abbreviations
sc (single crochet)
HDC (half double crochet)
DC (double crochet)
inc – (Increase)
dec – (decrease)
BLO (only behind the back of the loop)
SL-ST – SLİP-STİTCH (connecting column, or slip loop)
CH – CHAİN
SIZE: 24 cm [approximately] when made from the specified yarn
PATTERN
FOOTWEAR AND FEET [2 pcs]
Note. Before you start working with shoes, cut 1m of white yarn and set it aside
side. You will need it to sew the sole to the shoes.
With white yarn, we recruit a chain of 8 CH.
Row 1: Starting from the second loop from the hook, sc 6, inc into the last loop. Keep knitting
on the opposite side of sc 6. [14]
2nd row: inc in all 14 tbsp. [28]
Row 3: sc around. [28]
Row 4: BLO around. [28]
Make the sole: on a small plastic sheet, lay the sole flat, circle the outline
around it and cut out the base. Check if it is written to the border. Do 2
holes in the center, at a distance of a few centimeters. Make a second sole, following those
same instructions and set them aside.
Next, knit with red yarn.
Row 5: BLO SL-ST around. [28]
Row 6: BLO around. [28]
Insert the outsole: place the plastic outsole on the inside of the crotches, tuck in
thread with a white yarn needle and, holding both parts together, insert the needle from the inside out
through the hole and from the outside in through the second hole. Knot of yarn knotted inside
shoe [Fig. 1-3].
Row 7: sc around. [28]
Row 8: sc 10, dec X 5, sc 8. [23]
Row 9: sc 8, dec X 4, sc 7. [19]
Row 10: sc 7, dec X 3, sc 6. [16]
Row 11: sc 5, dec X 3, sc 5. [13] Attach the white yarn.
Row 12: BLO SL-ST around. [13] Row 13: BLO sc around. [13] Fill the shoes.
Attach a light brown yarn.
Row 14: BLO SL-ST around. [thirteen]
Row 15: BLO sc around. [thirteen]
Row 16-19: sc around. [thirteen]
Row 20: sc 8, 4 columns in 1 loop, sc 4. [13]
Row 21: sc, dec X 2, sc 8. [11]
Row 22: sc, inc X 2, sc 8. [13]
Row 23: inc, sc 4, inc, sc 7. [15] Fill the leg.
Row 24-27: sc around. [15] Switch to green yarn.
Row 28: BLO SL-ST Around, [15]
Row 29: BLO sc around. [fifteen]
Counting counterclockwise from the last processed line, mark the 7th column. it
where we will join the legs later. To fasten. Fill the leg. Sew three shoelaces with white
embroidery thread on the shoe to make shoelaces [see Cover image for Help].
Make the second leg the same way, but do not cut the thread. Knit an extra 3 sc (you
should end up in the middle of the inside of the leg.)
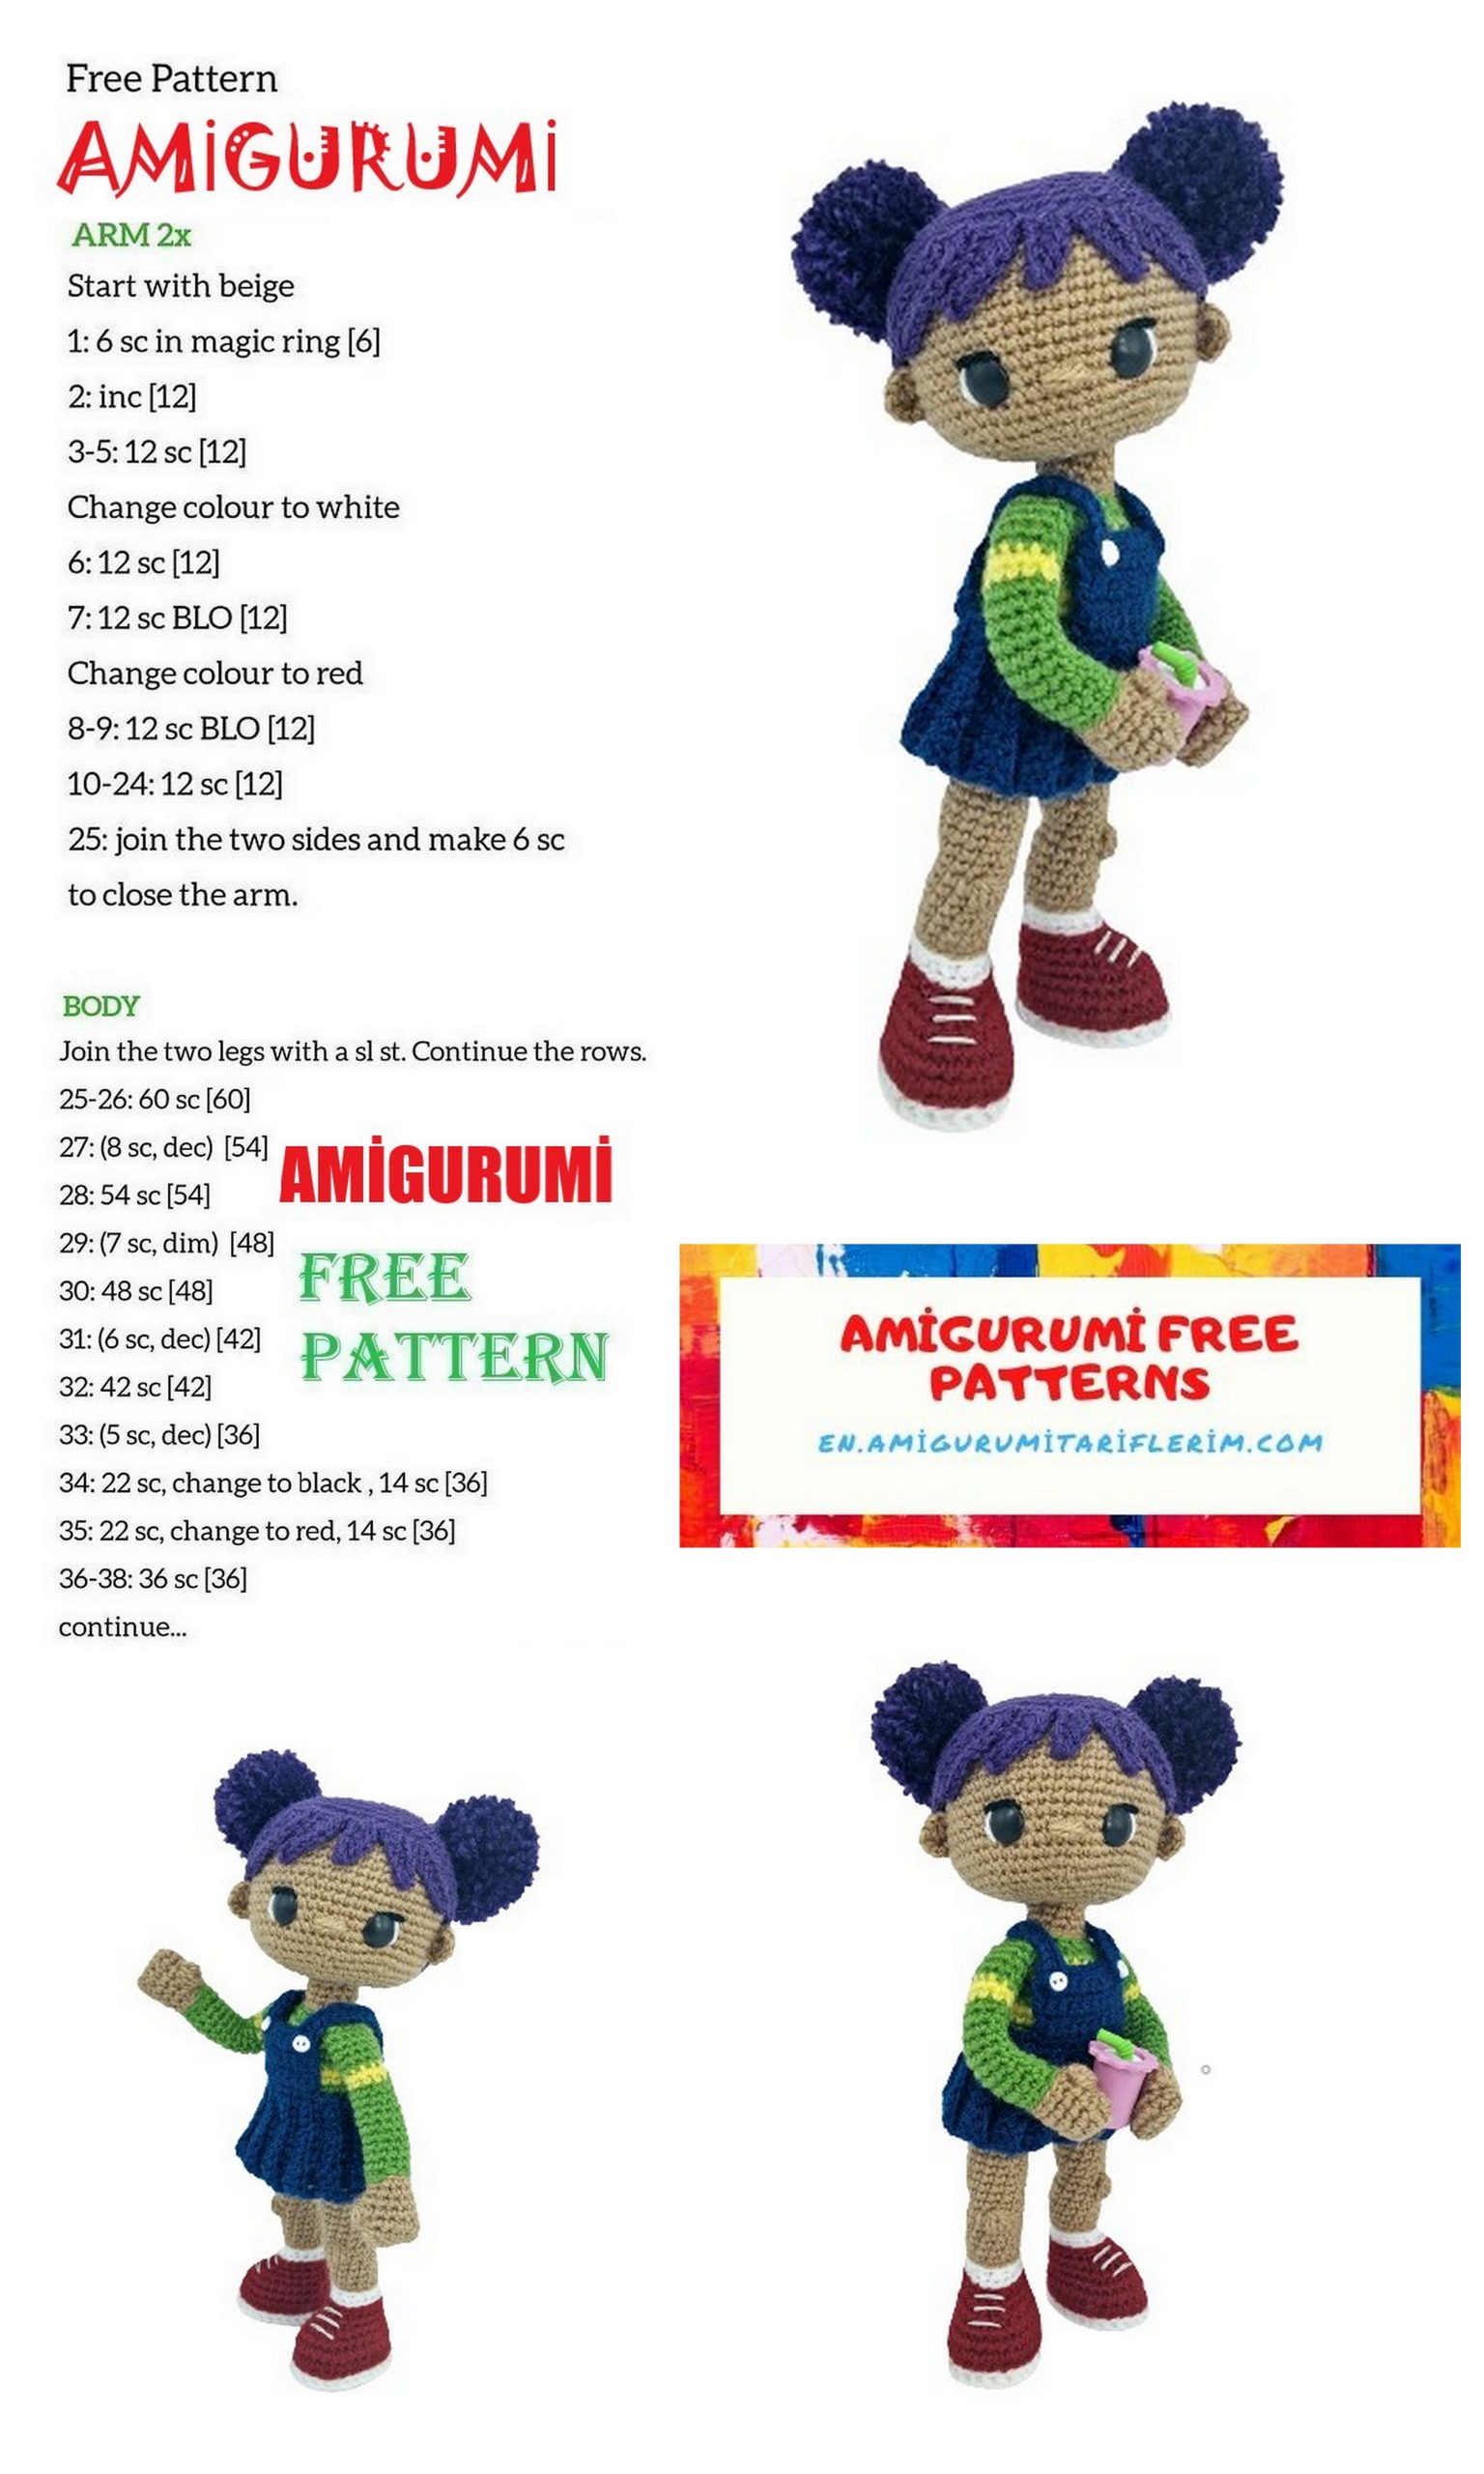
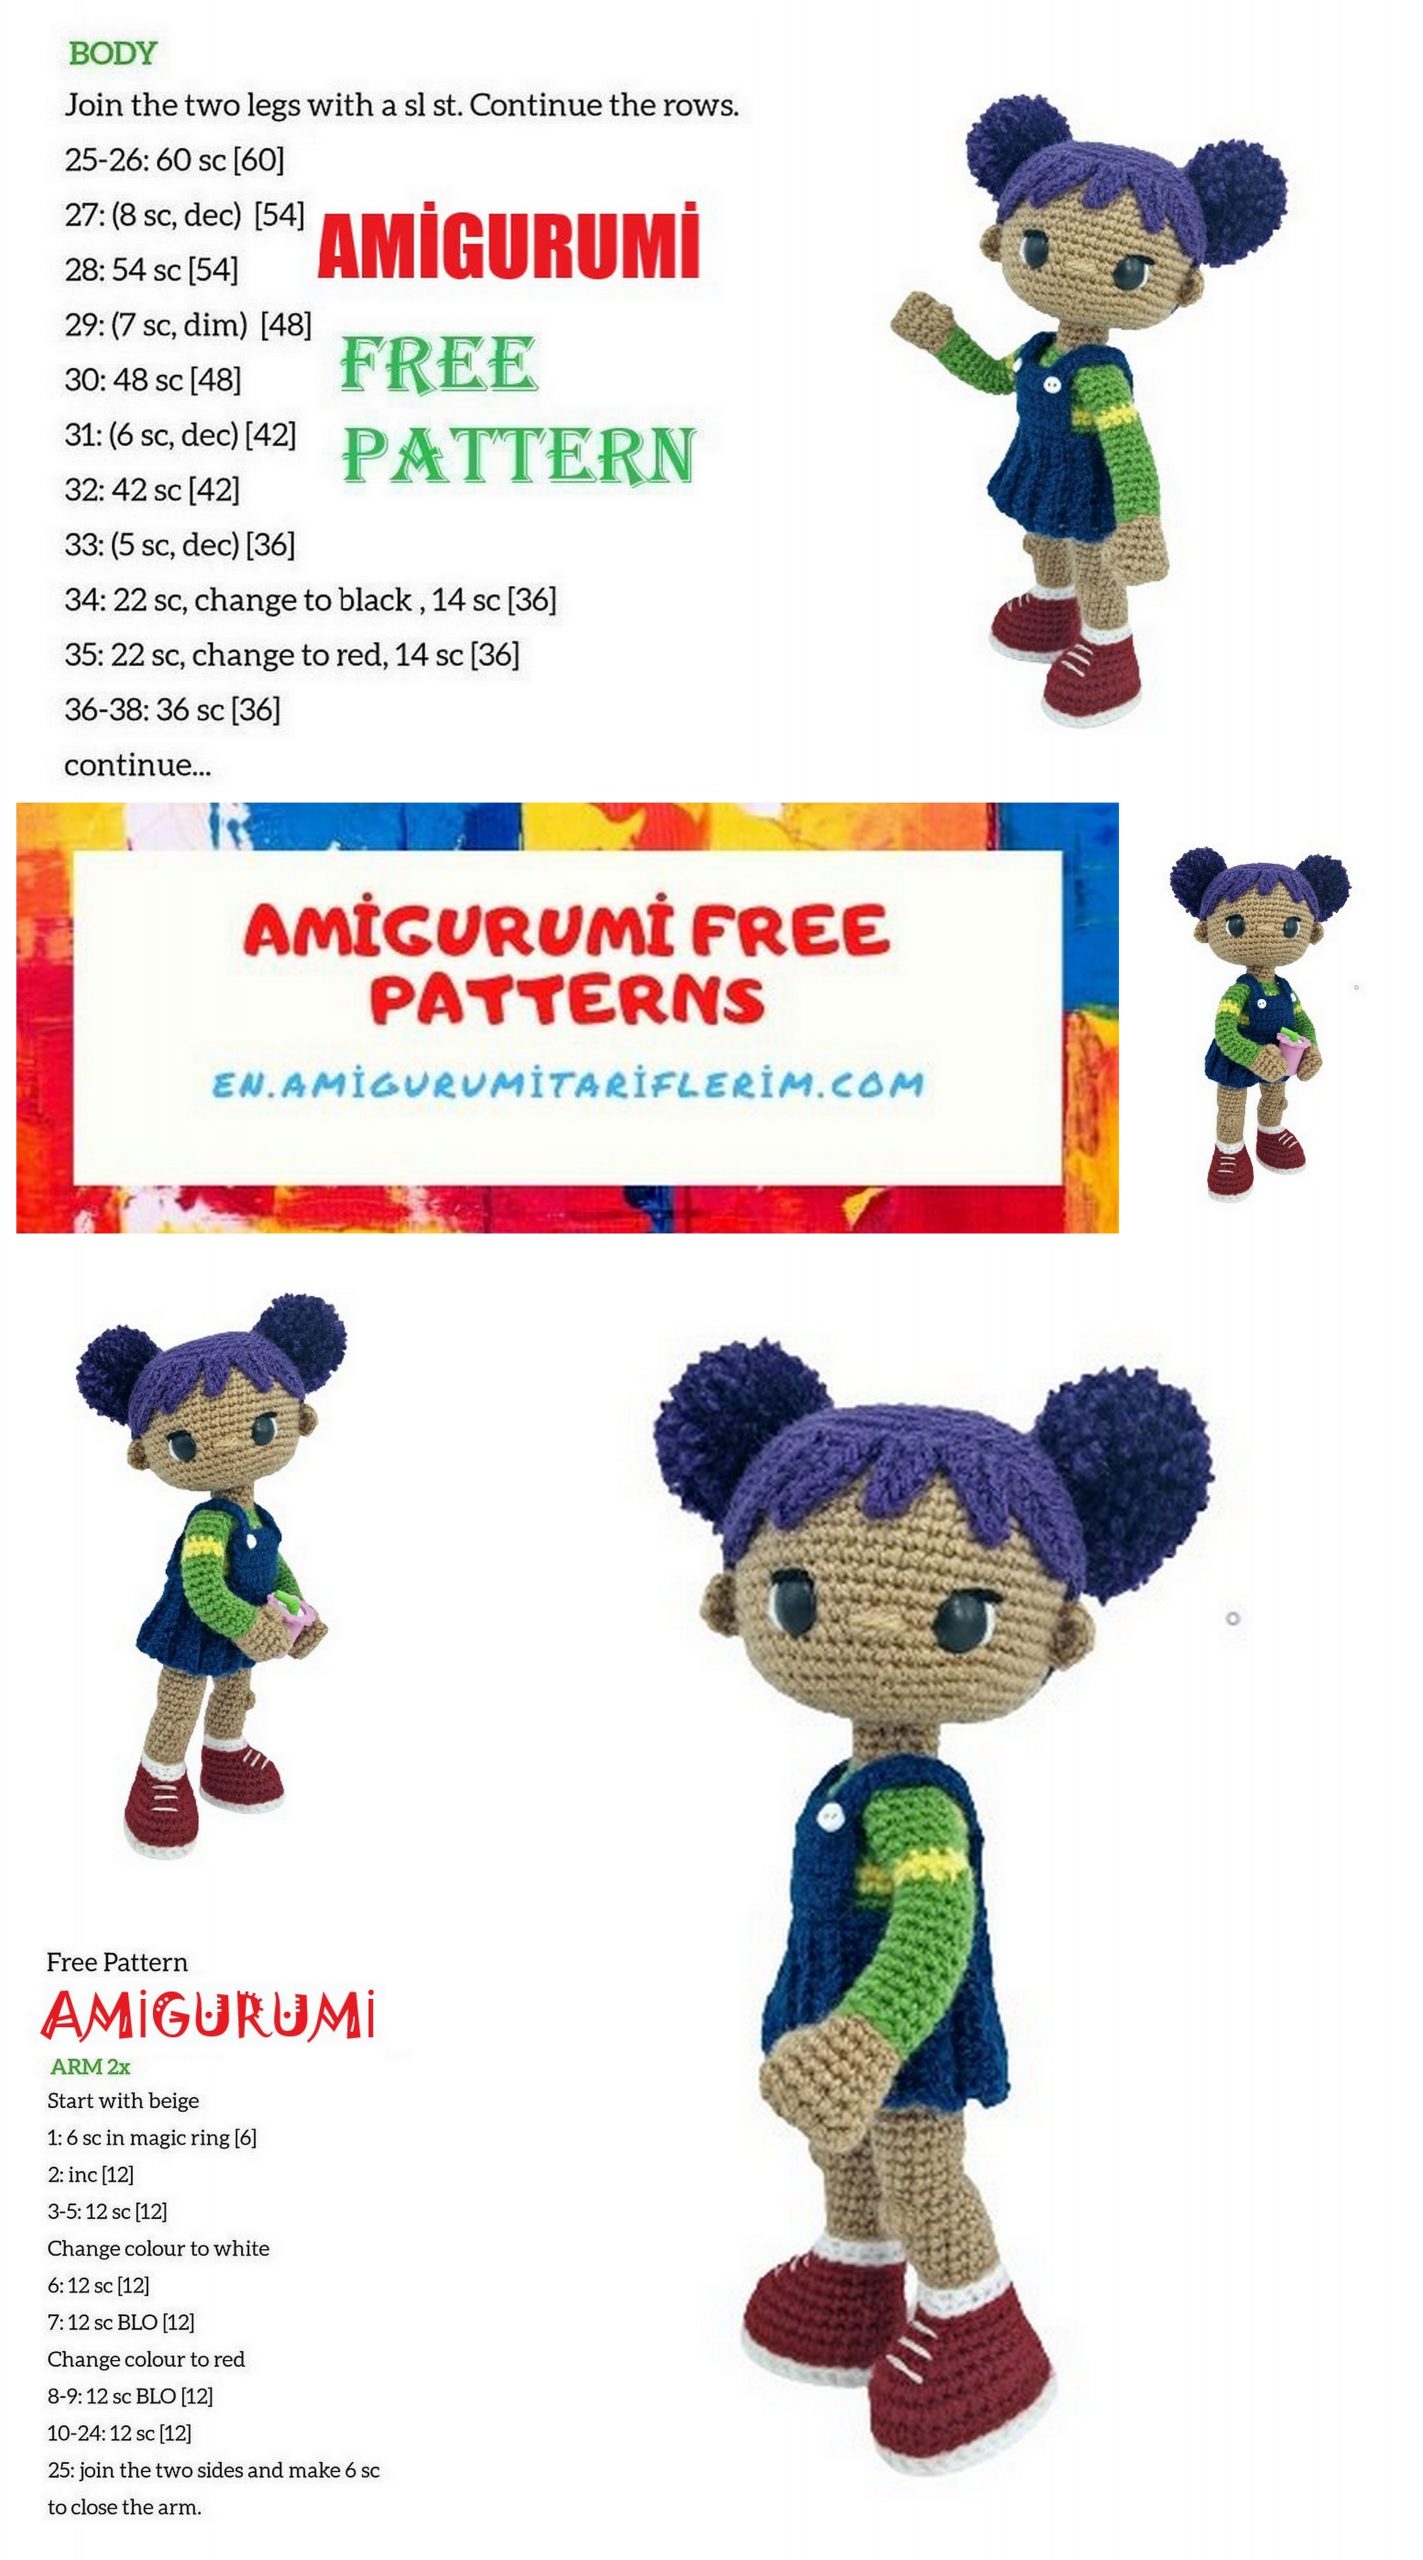
BODY
Keep working with green yarn.
Row 1: CH 3. Connect 2 legs of SL-ST, 15 sc [Fig. 4] on the right leg. Then, 3sc in the front
hinges (or loops facing you); 15 sc. [33]
Row 2: 3sc over chain loops, 33sc around both legs. [36]
Row 3-5: sc around. [36]
Row 6: (sc 4, dec) X 6. [30] Replace with yellow yarn.
7th row: BLO. [thirty]
Row 8: BLO sc around. [thirty]
Row 9: sc around. [30] Replace with green yarn.
Row 10-11: sc around. [30] Replace with yellow yarn.
Row 12-13: sc around. [30] Replace with green yarn.
Row 14-15: sc around. [30] Replace with yellow yarn.
Row 16-17: sc around. [30] Replace with green yarn.
Row 18: (sc 3, dec) X 6. [24] Fill the body.
Row 19: dec X 12. [12]
Replace with a light brown yarn.
Row 20: BLO SL-ST around. [12]
Row 21: BLO sc around. [12]
Row 22-29: sc around. [12]
At this stage, it is very important to fill the neck as tightly as possible so that it can support the weight
heads.
Row 30: dec X 6. [6]
Fasten by leaving a long thread. Using a yarn needle, thread the yarn through
the remaining loops of each column and tighten it tightly, covering the neck. Hide the thread.

Hand [2pcs]
With a light brown, we knit a chain of 7CH.
Row 1: Starting from the second loop from the hook, 5 sc, inc in the last loop. Keep working
on the opposite side of the circuit 5sc. [12]
Row 2-3: sc around. [12]
Row 4: [Left hand] sc, 4sc in 1 loop, sc 10. [12]
Row 4: [Right hand] sc 11, 4sc in 1 loop. [12]
Row 5: sc around. [12]
Row 6: [Left hand] sc, dec, sc 2, dec, sc 5. [10]
Row 6: [Right hand] sc 6, dec, sc 2, dec. [10] Replace with green yarn.
7th row: BLO 10 SL-ST. [10]
Row 8: BLO 10sc around. [10]
Row 9-17: sc around. [10] Replace with yellow yarn.
Row 18-19: sc around. [10] Replace with green yarn.
Row 20-24: sc around. [10]
Fasten by leaving a long thread for sewing.
Fill your hand lightly. Join the upper arm in half and close it with 5SL-ST. Sew on
hands to the 18th row of the body.
DRESS
Skirt
Dial a 10CH chain with blue yarn. We knit in rotary rows, each row begins with CH.
Row 1: Starting from the second loop from the hook, 3sc, 3inc DC, 3DC, turn. [9]
We knit the next row only on the back wall of the loop.
Line 2: 2CH [considered first HDC], 2HDC, 3DC, 3SC, rotation. [9]
Line 3: CH 1, sc 3, HDC 3, DC 3, turn. [9]
Line 4-29: repeat lines 2 and 3. [9] Try on a doll! If necessary, add rows to
a full turn of the skirt around the waist.
Line 30: CH 2 [considered first HDC], 2HDC, 3DC, 3SC. Do not turn around.
CH 1 and sc across the end of the shorter row, making one stitch per row to align the edges
[Figure 5]. [30] This will be the waistline.
Fasten by leaving a long thread for sewing.
Skirt top
Row 1: We knit with blue yarn from the 10th row along the short side, continue to knit the following:
8 sc, CH, turn. [9]
Line 2-6: 9 DC, CH, turn. [9]
Row 7: 9 DC. [9]
Fasten and hide the thread.
Connect the last row and the first row together 30SL-ST [see Fig. 5 for reference] to get
skirt. Cut and hide the thread.
Thread the sewing needle with white sewing thread and sew 6 mm white buttons in
upper corners of the bib. Put the skirt on your upper body, connecting
the waist line of the skirt with the 6th row of the body
Strap [2 pcs]
From blue yarn dial, 23CH. Starting from the 4th loop from the hook, 20 sc.
Fasten by leaving a long thread for sewing.
Attach the straps on the waist line at the back about the 8th row from the bib and sew them on [Fig.
6]. Cross the straps on the back, fasten.
HEAD
Row 1: with light brown yarn, 8 sc into magic ring. [8]
Row 2: inc X 8. [16]
Row 3: (sc 1, inc) X 8. [24]
Row 4: (sc 2, inc) X 8. [32]
Row 5: (sc 3, inc) X 8. [40]
Row 6: (sc 4, inc) X 8. [48]
Row 7: (sc 5, inc) X 8. [56]
Row 8-20: sc in a spiral. [56]
Row 21: (sc 5, dec) X 8. [48]
Row 22: (sc 4, dec) X 8. [40]
Row 23: (sc 3, dec) X 8. [32]
Row 24: (sc 2, dec) X 8. [24]
Insert 12 mm eyelets between Rows 16 and 17, leaving 9 stitches between
them.
Row 25: dec X 12. [12]
Fasten, hide the end of the thread. Fill the head, leaving a space in the center to insert the neck.
EYES
Eye contraction.
Thread the needle with a light brown yarn. Insert the needle into the hole in the base
of the head, remove it from point A near the eye [Fig. 7]. Push the needle back to point B
withdraw at point C next to the next eye [Fig. 8]. Insert the needle at point D, pull out again
the needle from point A [Fig. 9].
Gently squeeze your eyes with your fingers and gently pull the yarn to bring your eyes closer.
Holding this shape, return the needle back to point B and withdraw from point C [Fig. 10]. Insert
point D and remove it from the hole at the base of the head [Fig. eleven]. Gently pull both ends
yarn and tie them together to maintain their shape [Fig. 12]. Cut off excess yarn and
hide the ends of the yarn in the head.
Eye Details: Take a thread of white yarn and sew a crescent shape around the outer eye
[Fig. thirteen]. Sew a horizontal line over the eye with black yarn, starting with
the inner corner of the eye that extends beyond the white crescent [see fig. 13 for reference].
NOSE
To make a nose, sew 3 short horizontal lines with a light brown yarn between
eyes [between rows 17 and 18 of the head] [See Fig. 14 for reference].
Join the body
Note: this head / body connection technique ensures that your doll’s head will
movable. Thread the needle with light brown yarn and insert the needle into the top
heads [center of the spacecraft] and bring out into the openings of the neck. Now insert your needle into the base of the neck with
side [between the 23rd and 24th rows of the body], and withdraw back through the opening of the neck on the head, again
pulling it out at the top of the head. Slide the head down over the two threads of yarn until it
fits perfectly on the neck. Fasten the thread so that it does not untie. Cut the thread and carefully
push the remaining yarn back into the head [See Fig. 15 for reference].
Wig
Row 1: Knit with purple yarn, 8 sc into magic ring. [8]
Row 2: STD inc X 8. [16]
Row 3: STD (sc 1, inc) X 8. [24]
Row 4: STD (sc 2, inc) X 8. [32]
Row 5: STD (sc 3, inc) X 8. [40]
Row 6: STD (sc 4, inc) X 8. [48]
Row 7: STD (sc 5, inc) X 8. [56]
Row 8-16: STD sc around. [56]
Do not cut the thread. Next, we will continue to work on the front of the wig.
Bang
Fringe 1: dial the 11CH chain, starting from the second loop from the hook, 6sc, 4HDC, SL-ST
skipping 1 loop in the wig. [10]
Fringe 2: we collect the chain 8 CH, starting from the second loop from the hook, 3sc, 4HDC, SL-ST
skipping 1 loop in the wig. [7]
Fringes 3 and 4: we draw a chain of 6 CH, starting from the second loop from the hook, 2sc, 3HDC, SL-ST
skipping 1 loop in the wig. [5]
Fringe 5: we collect the chain 8 CH, starting from the second loop from the hook, 3sc, 4HDC, SL-ST
skipping 1 loop in the wig. [7]
Fasten by leaving a long thread for sewing.
Put a wig on your head; place the edges on the forehead and secure them with pins. Sew a wig on
the head.
Make two pompons with 3.5 cm purple yarn. Sew them on the 10th row of the wig, on both
to the parties.
Ears [2 pcs]
Row 1: with a light brown yarn, 3 sc into magic ring, do not combine, CH, turn. [3]
Row 2: inc X3. [6]
Fasten by leaving a long thread for sewing. Fasten the ears to the head, aligning them with the eyes
[cm. Fig. 16 for example], and sew them.