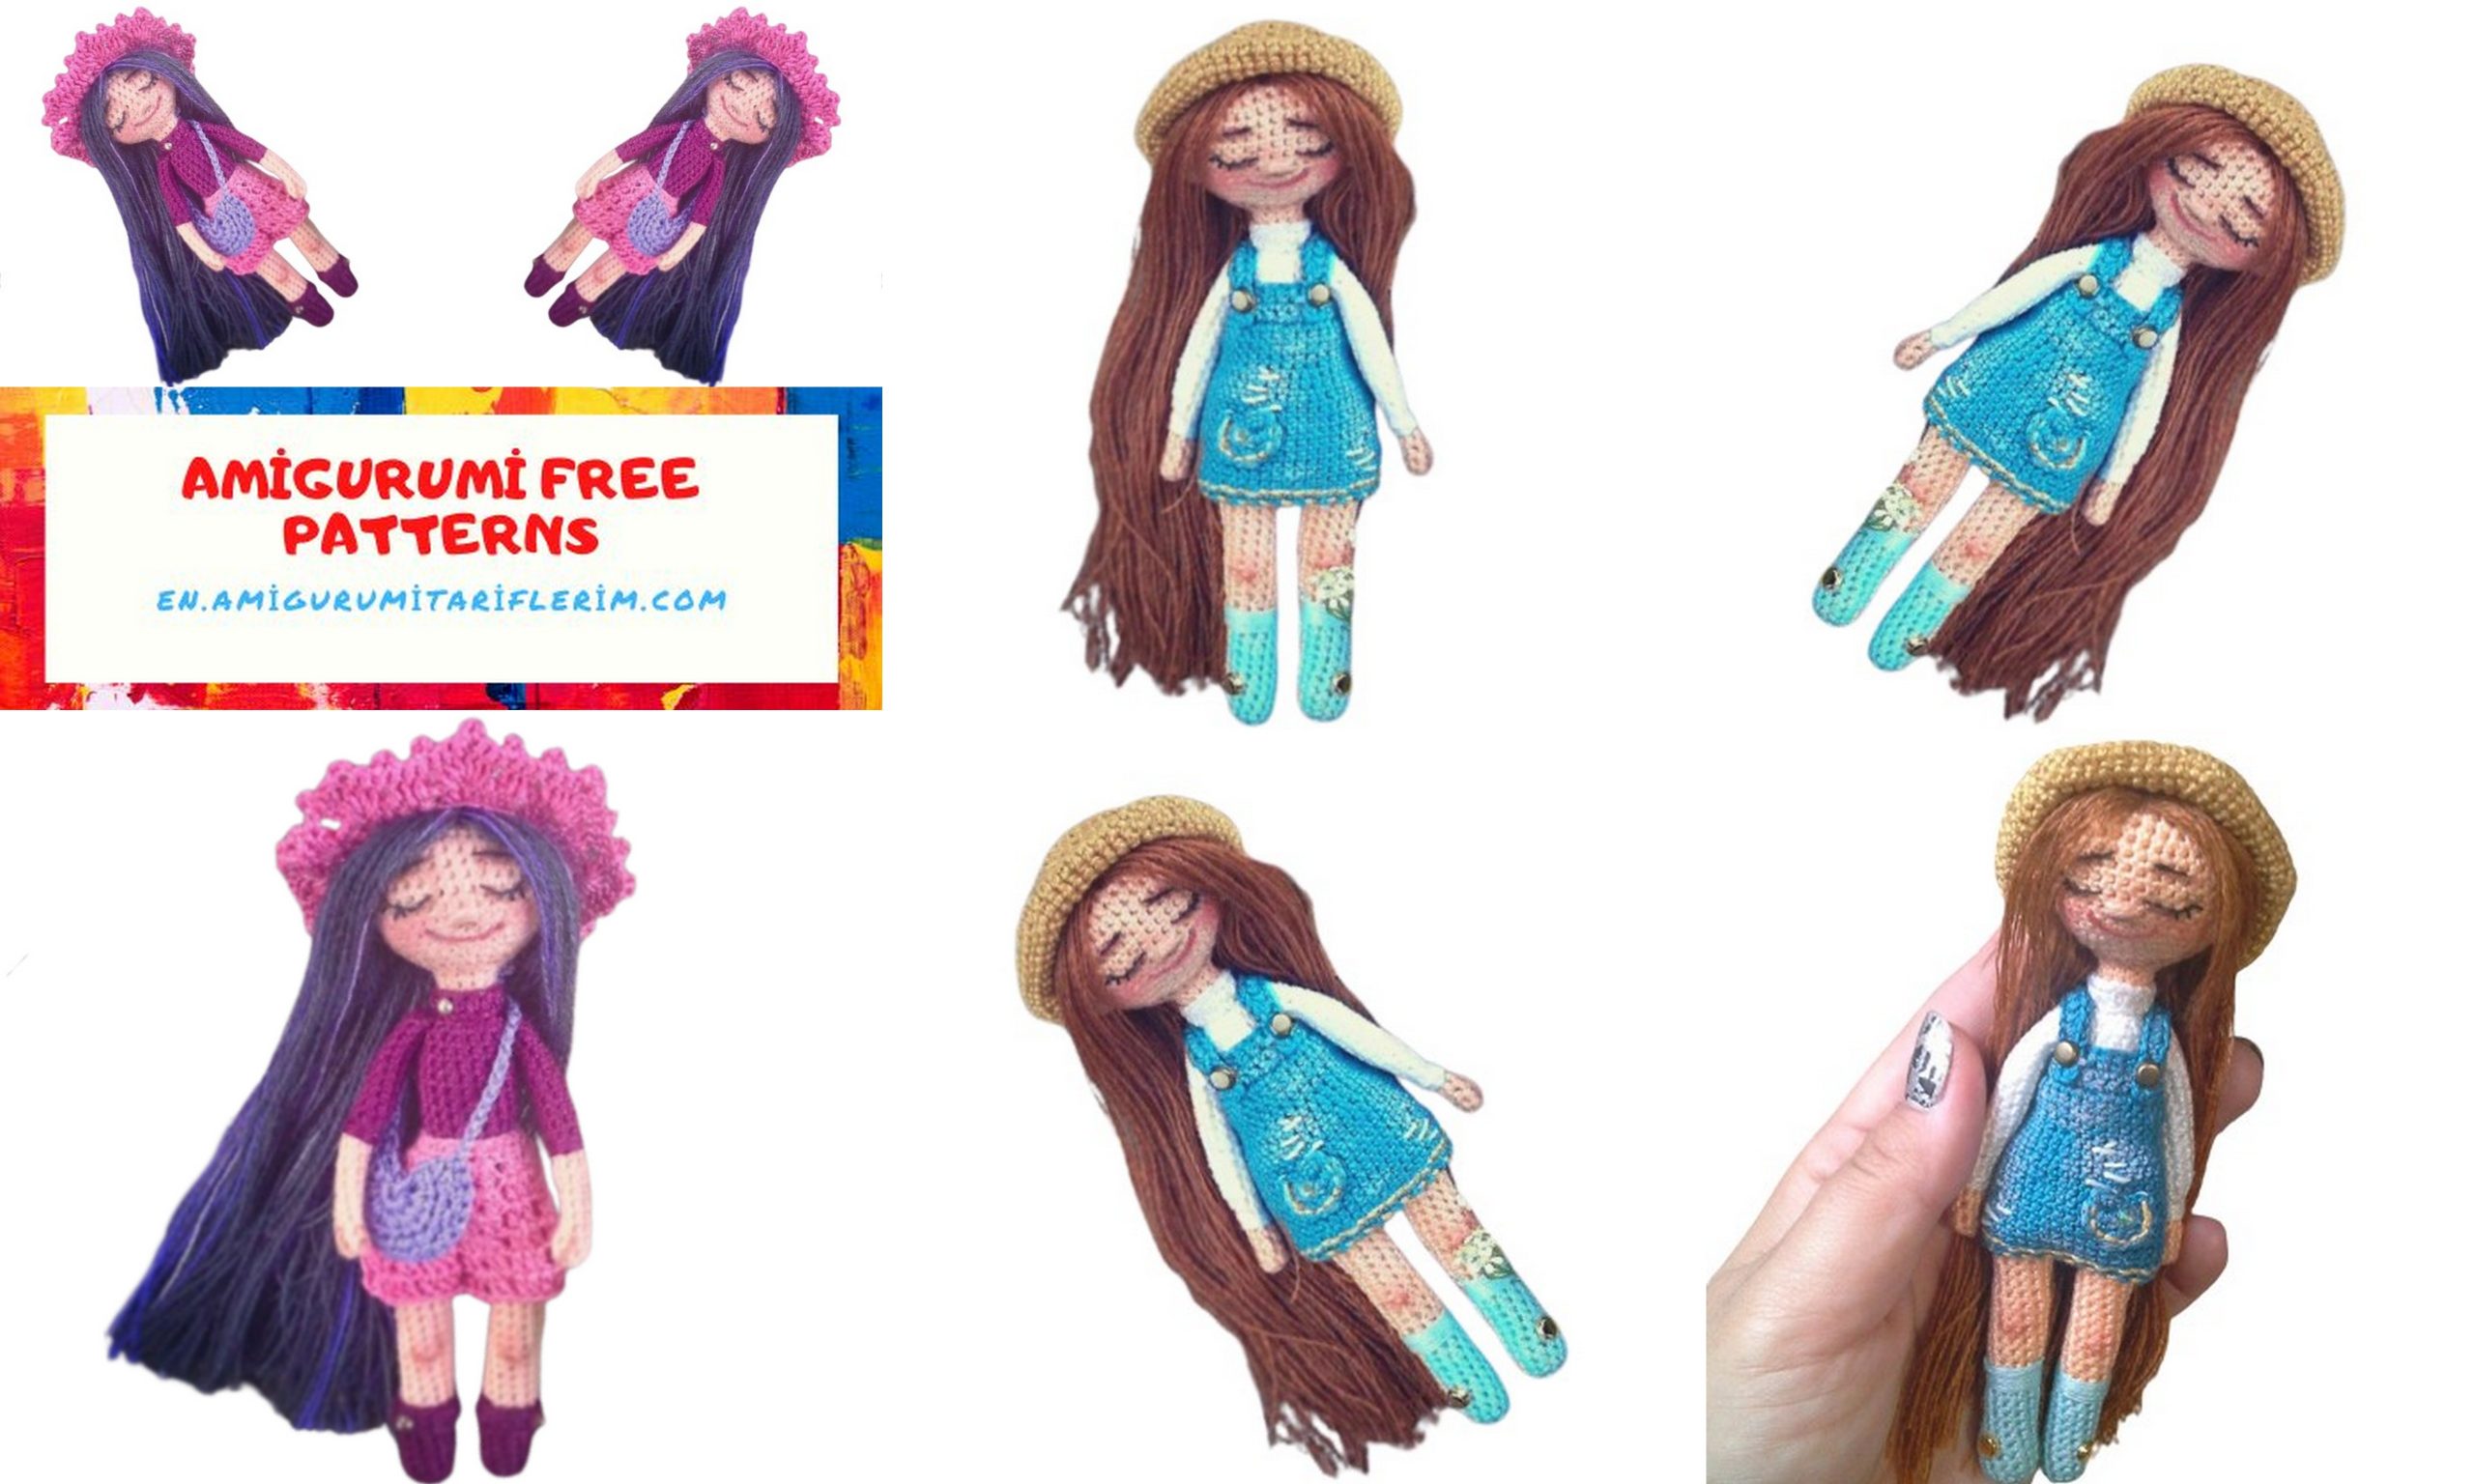
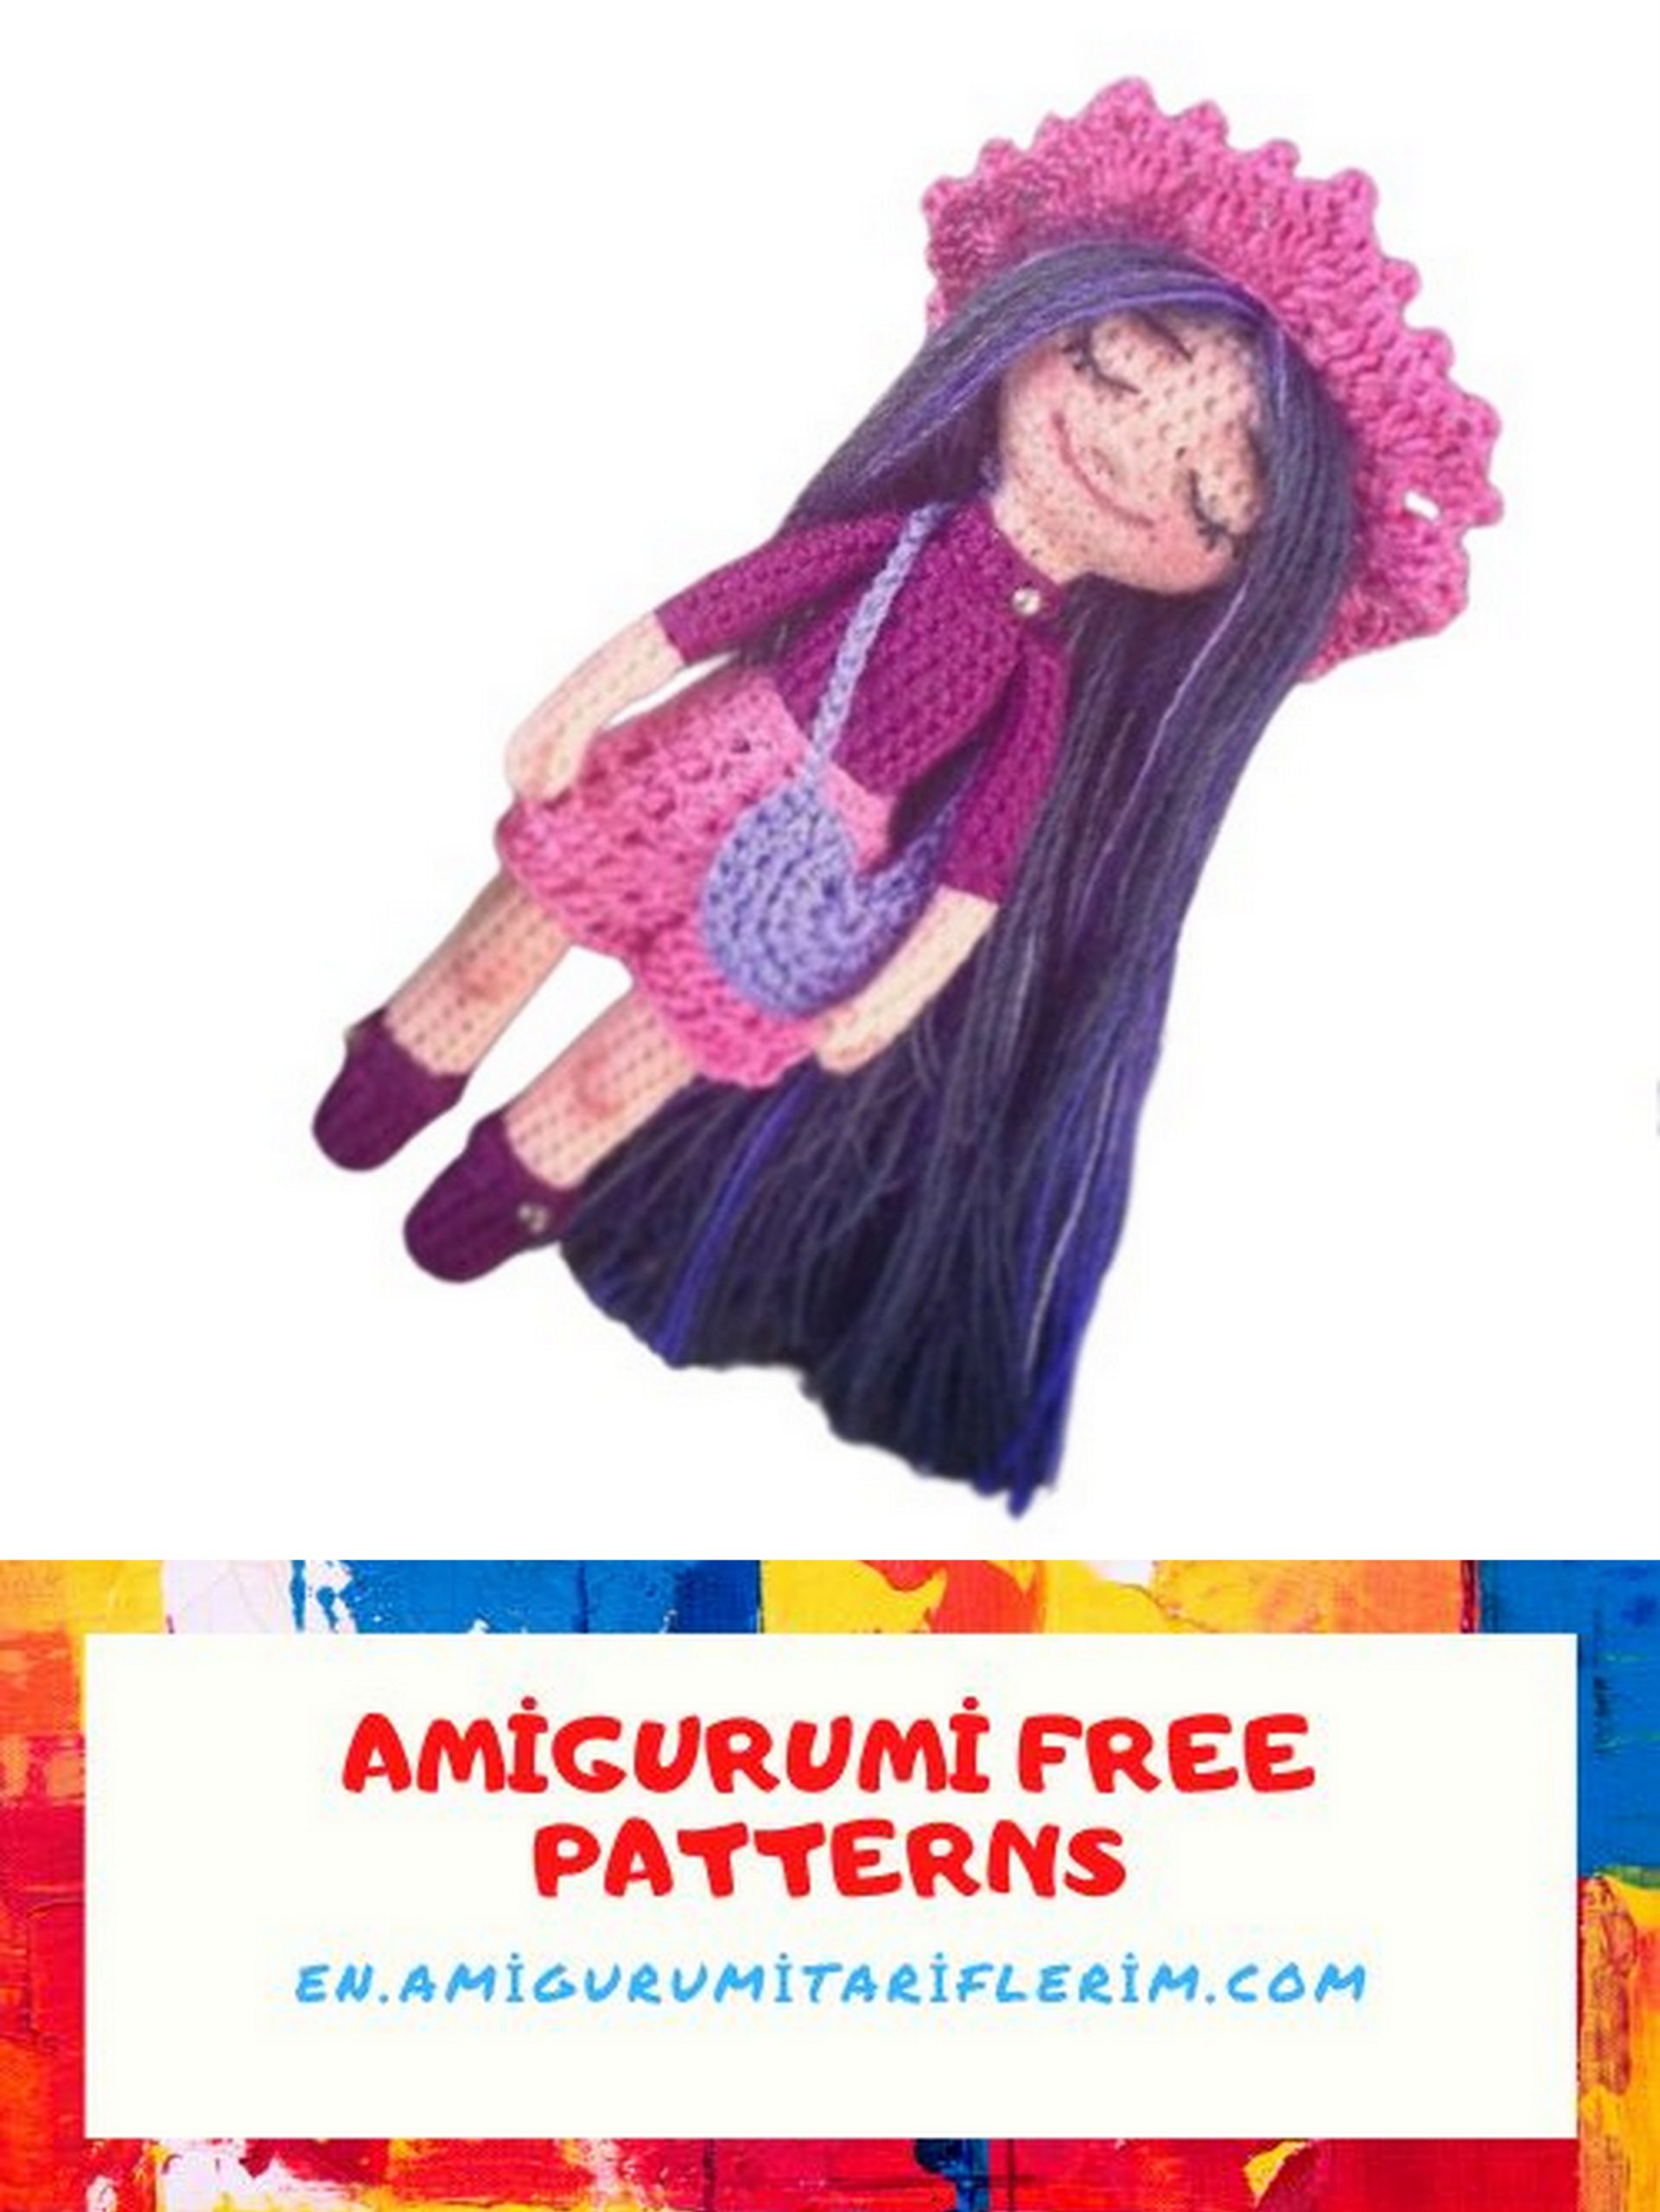
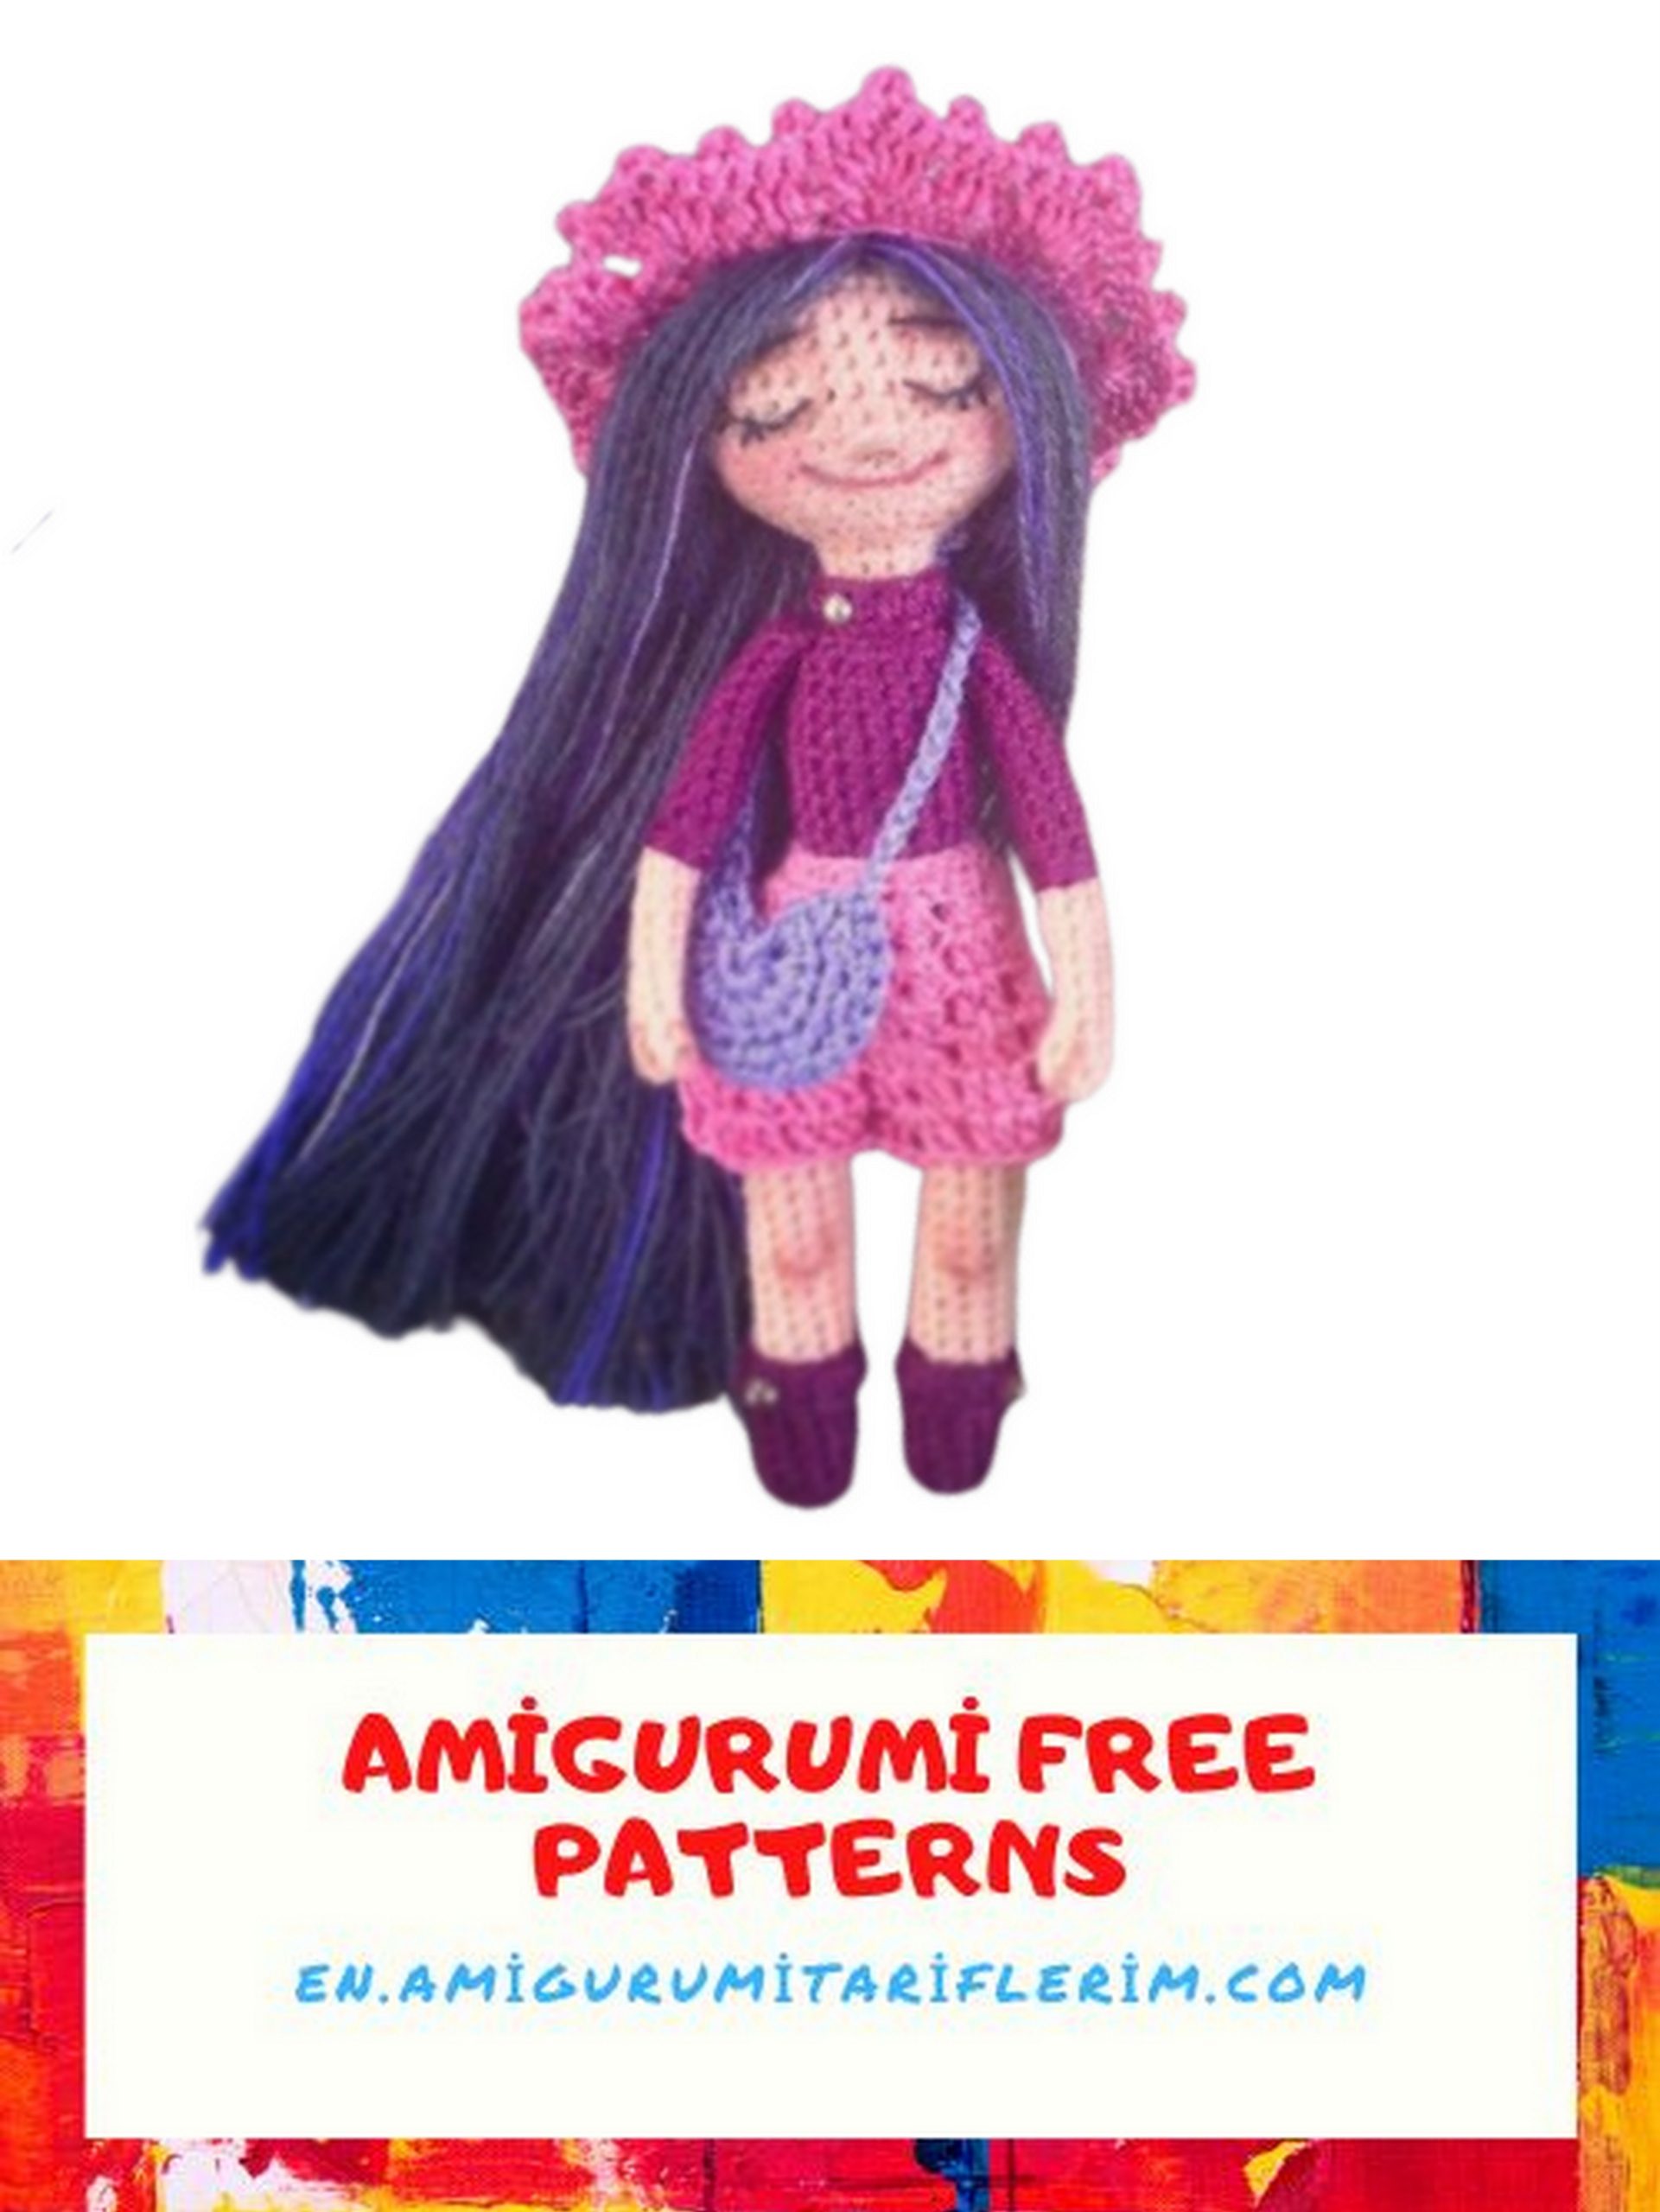
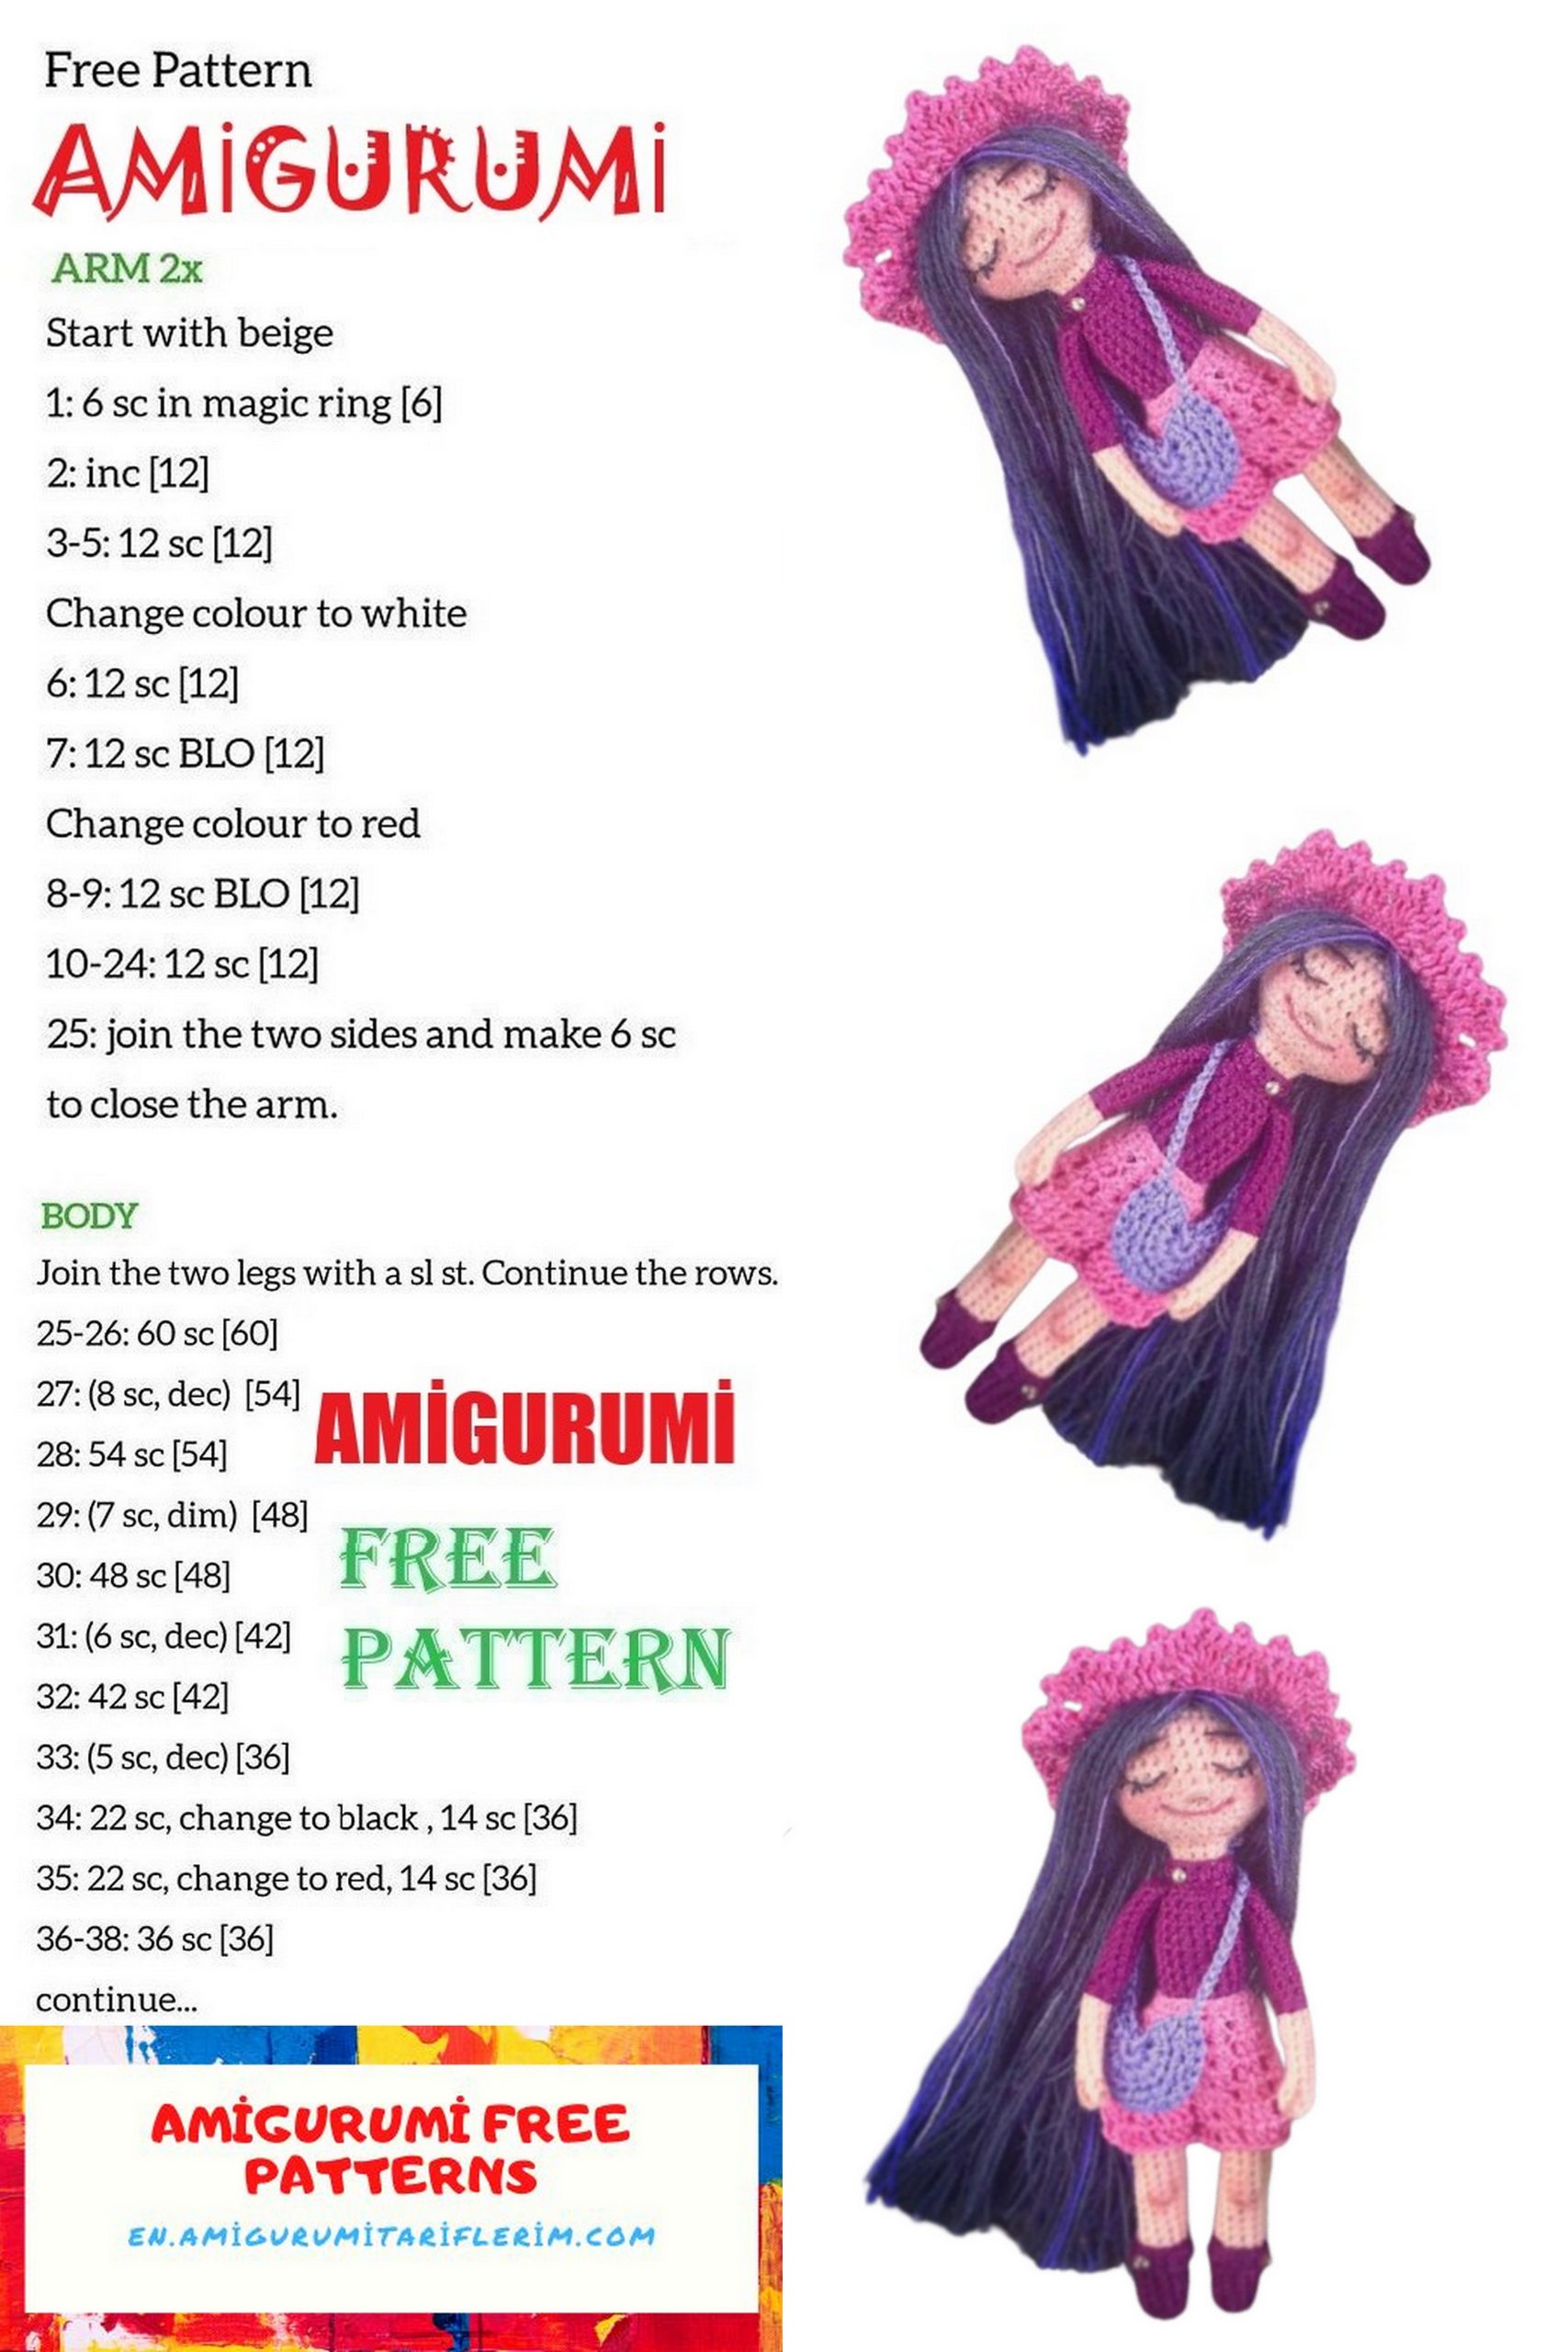
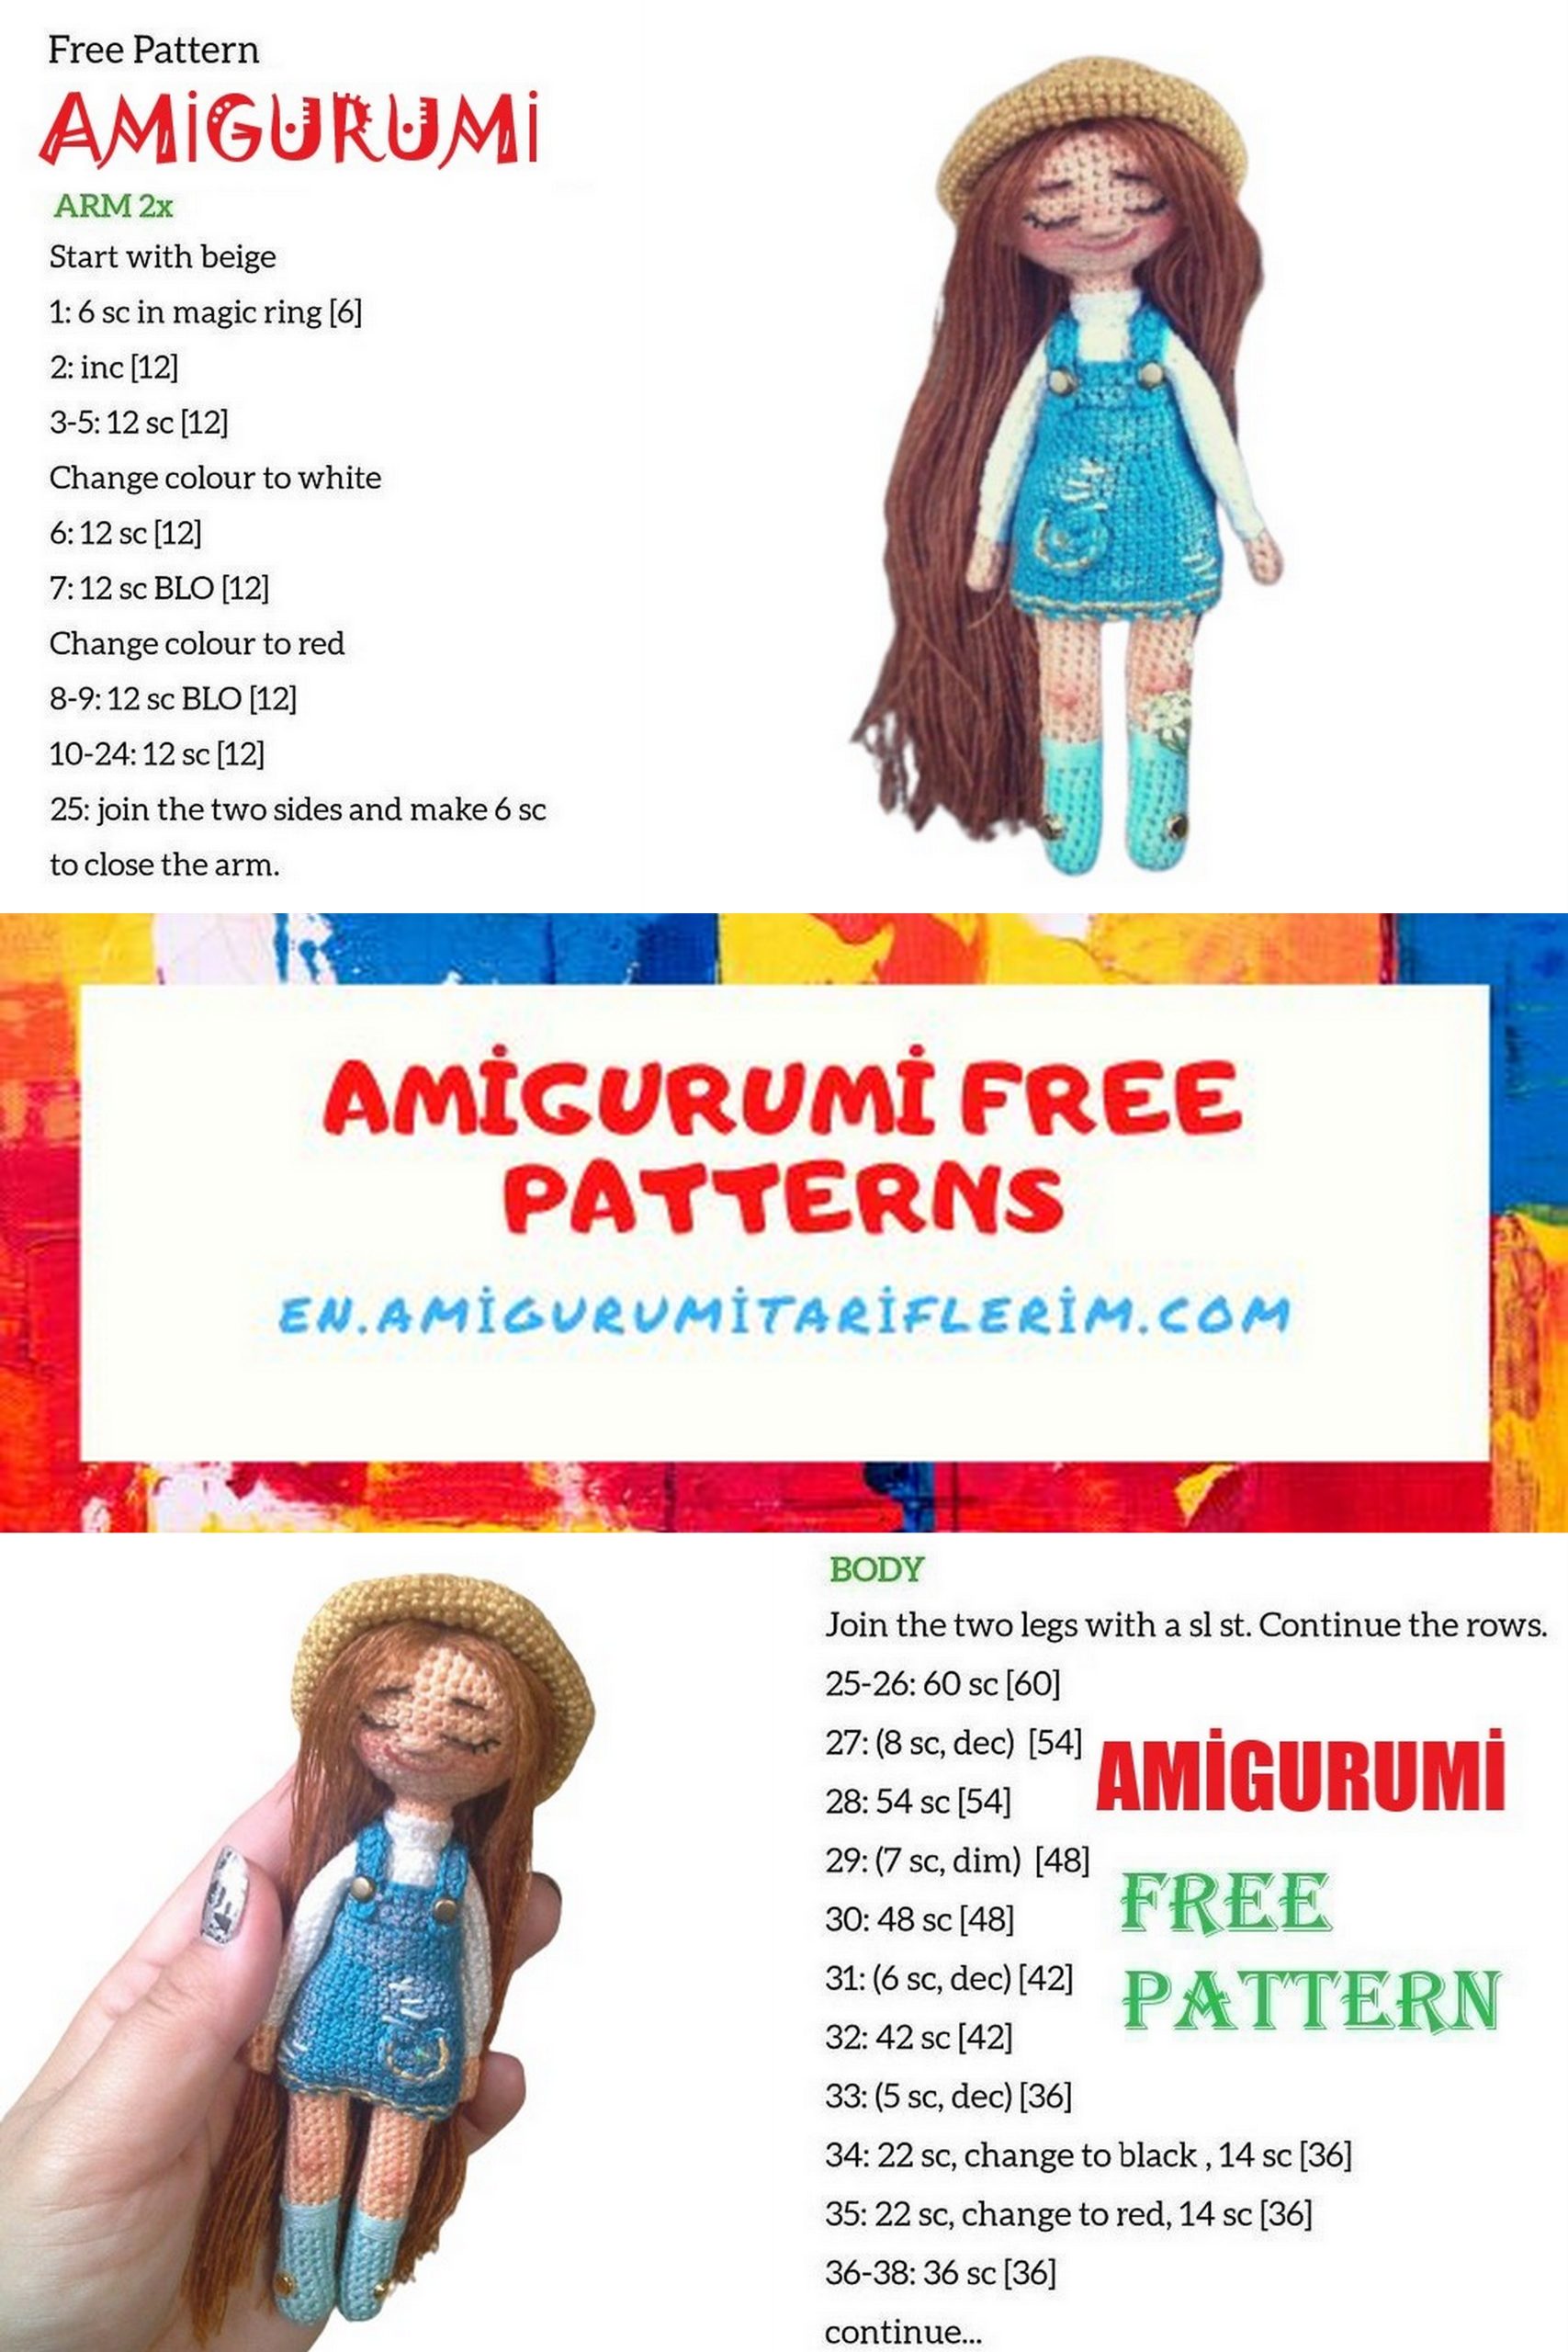
Free Little Doll Sonia Amigurumi Pattern – Crochet Your Own Miniature Toy
Welcome to our Little Doll Sonia Amigurumi Free Pattern! If you’re a crochet enthusiast looking for a delightful project, you’ve come to the right place. Our step-by-step guide will walk you through the process of crafting a charming miniature toy, Amigurumi Little Doll Sonia, entirely through amigurumi crochet techniques.
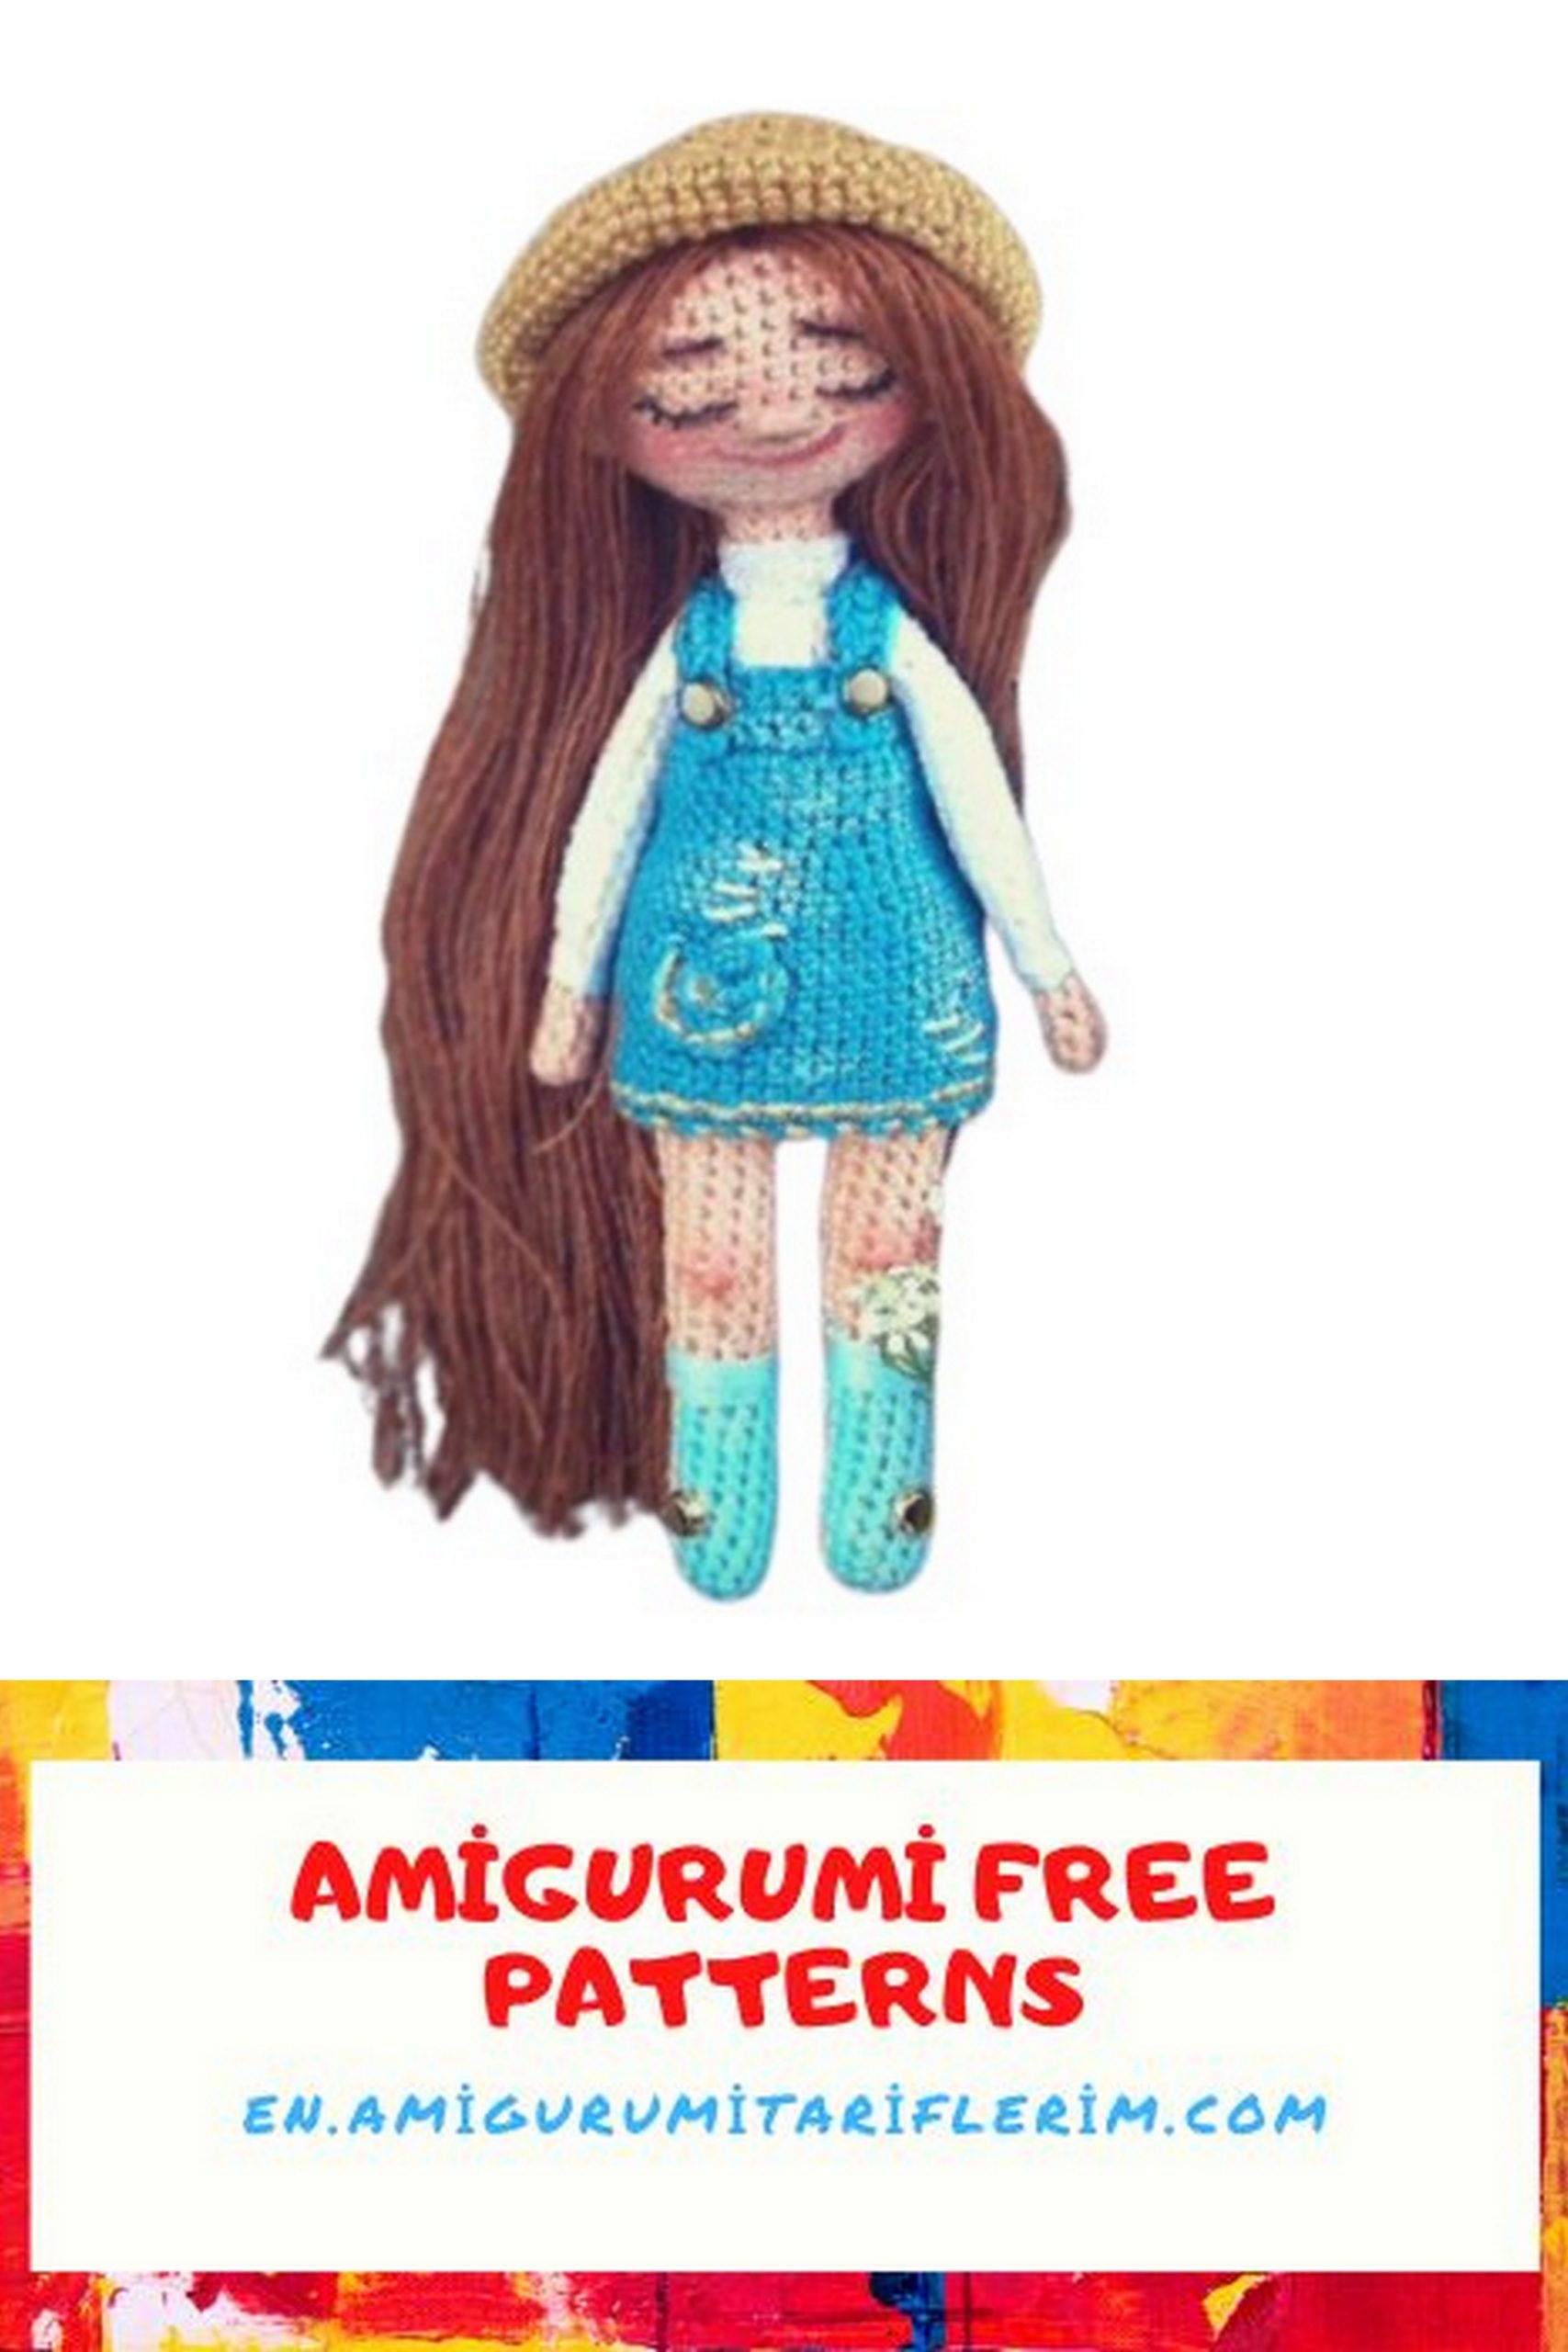
Whether you’re a beginner or an experienced crafter, this pattern is designed to be user-friendly, allowing you to create a wonderful keepsake or gift. The end result will be a precious doll with intricate details, including a cute dress, hat, and even pockets!
So, grab your crochet hook, select your favorite yarn, and follow our instructions to bring Little Doll Sonia to life. With your creative touch, you’ll soon have a beautiful amigurumi doll to cherish or share with someone special. Let’s get started on this fun and rewarding crochet adventure!
What you will need:
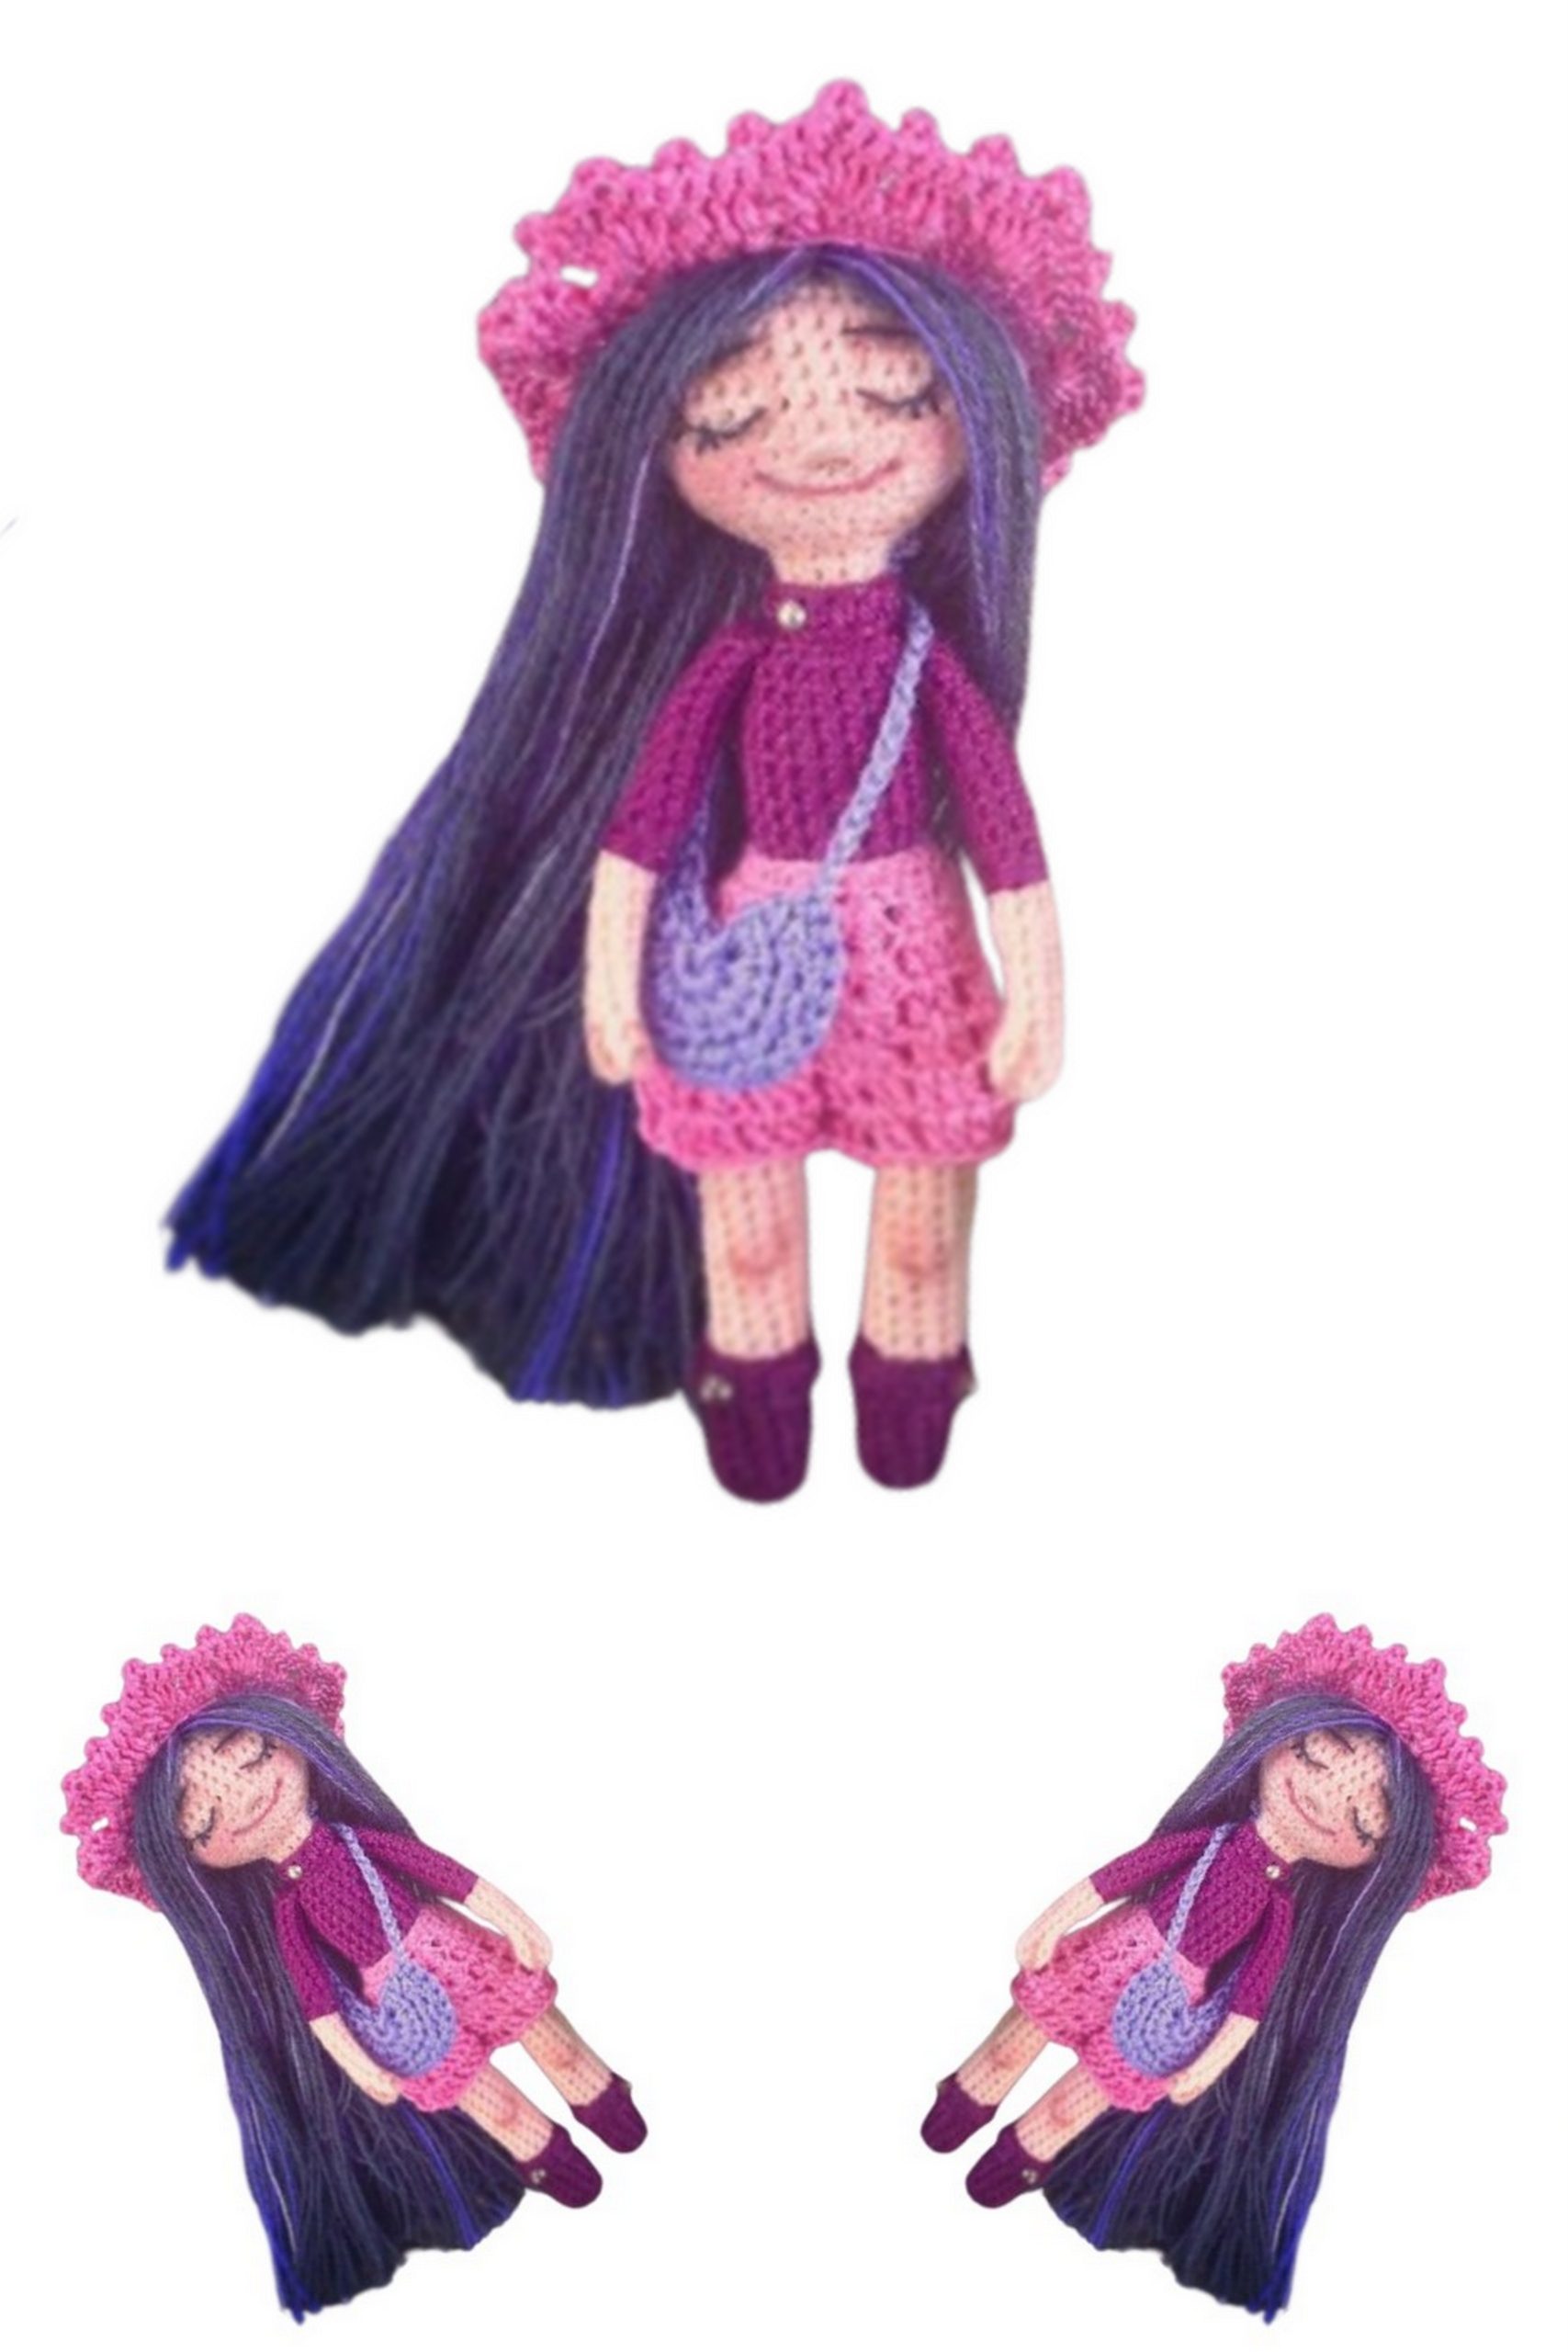
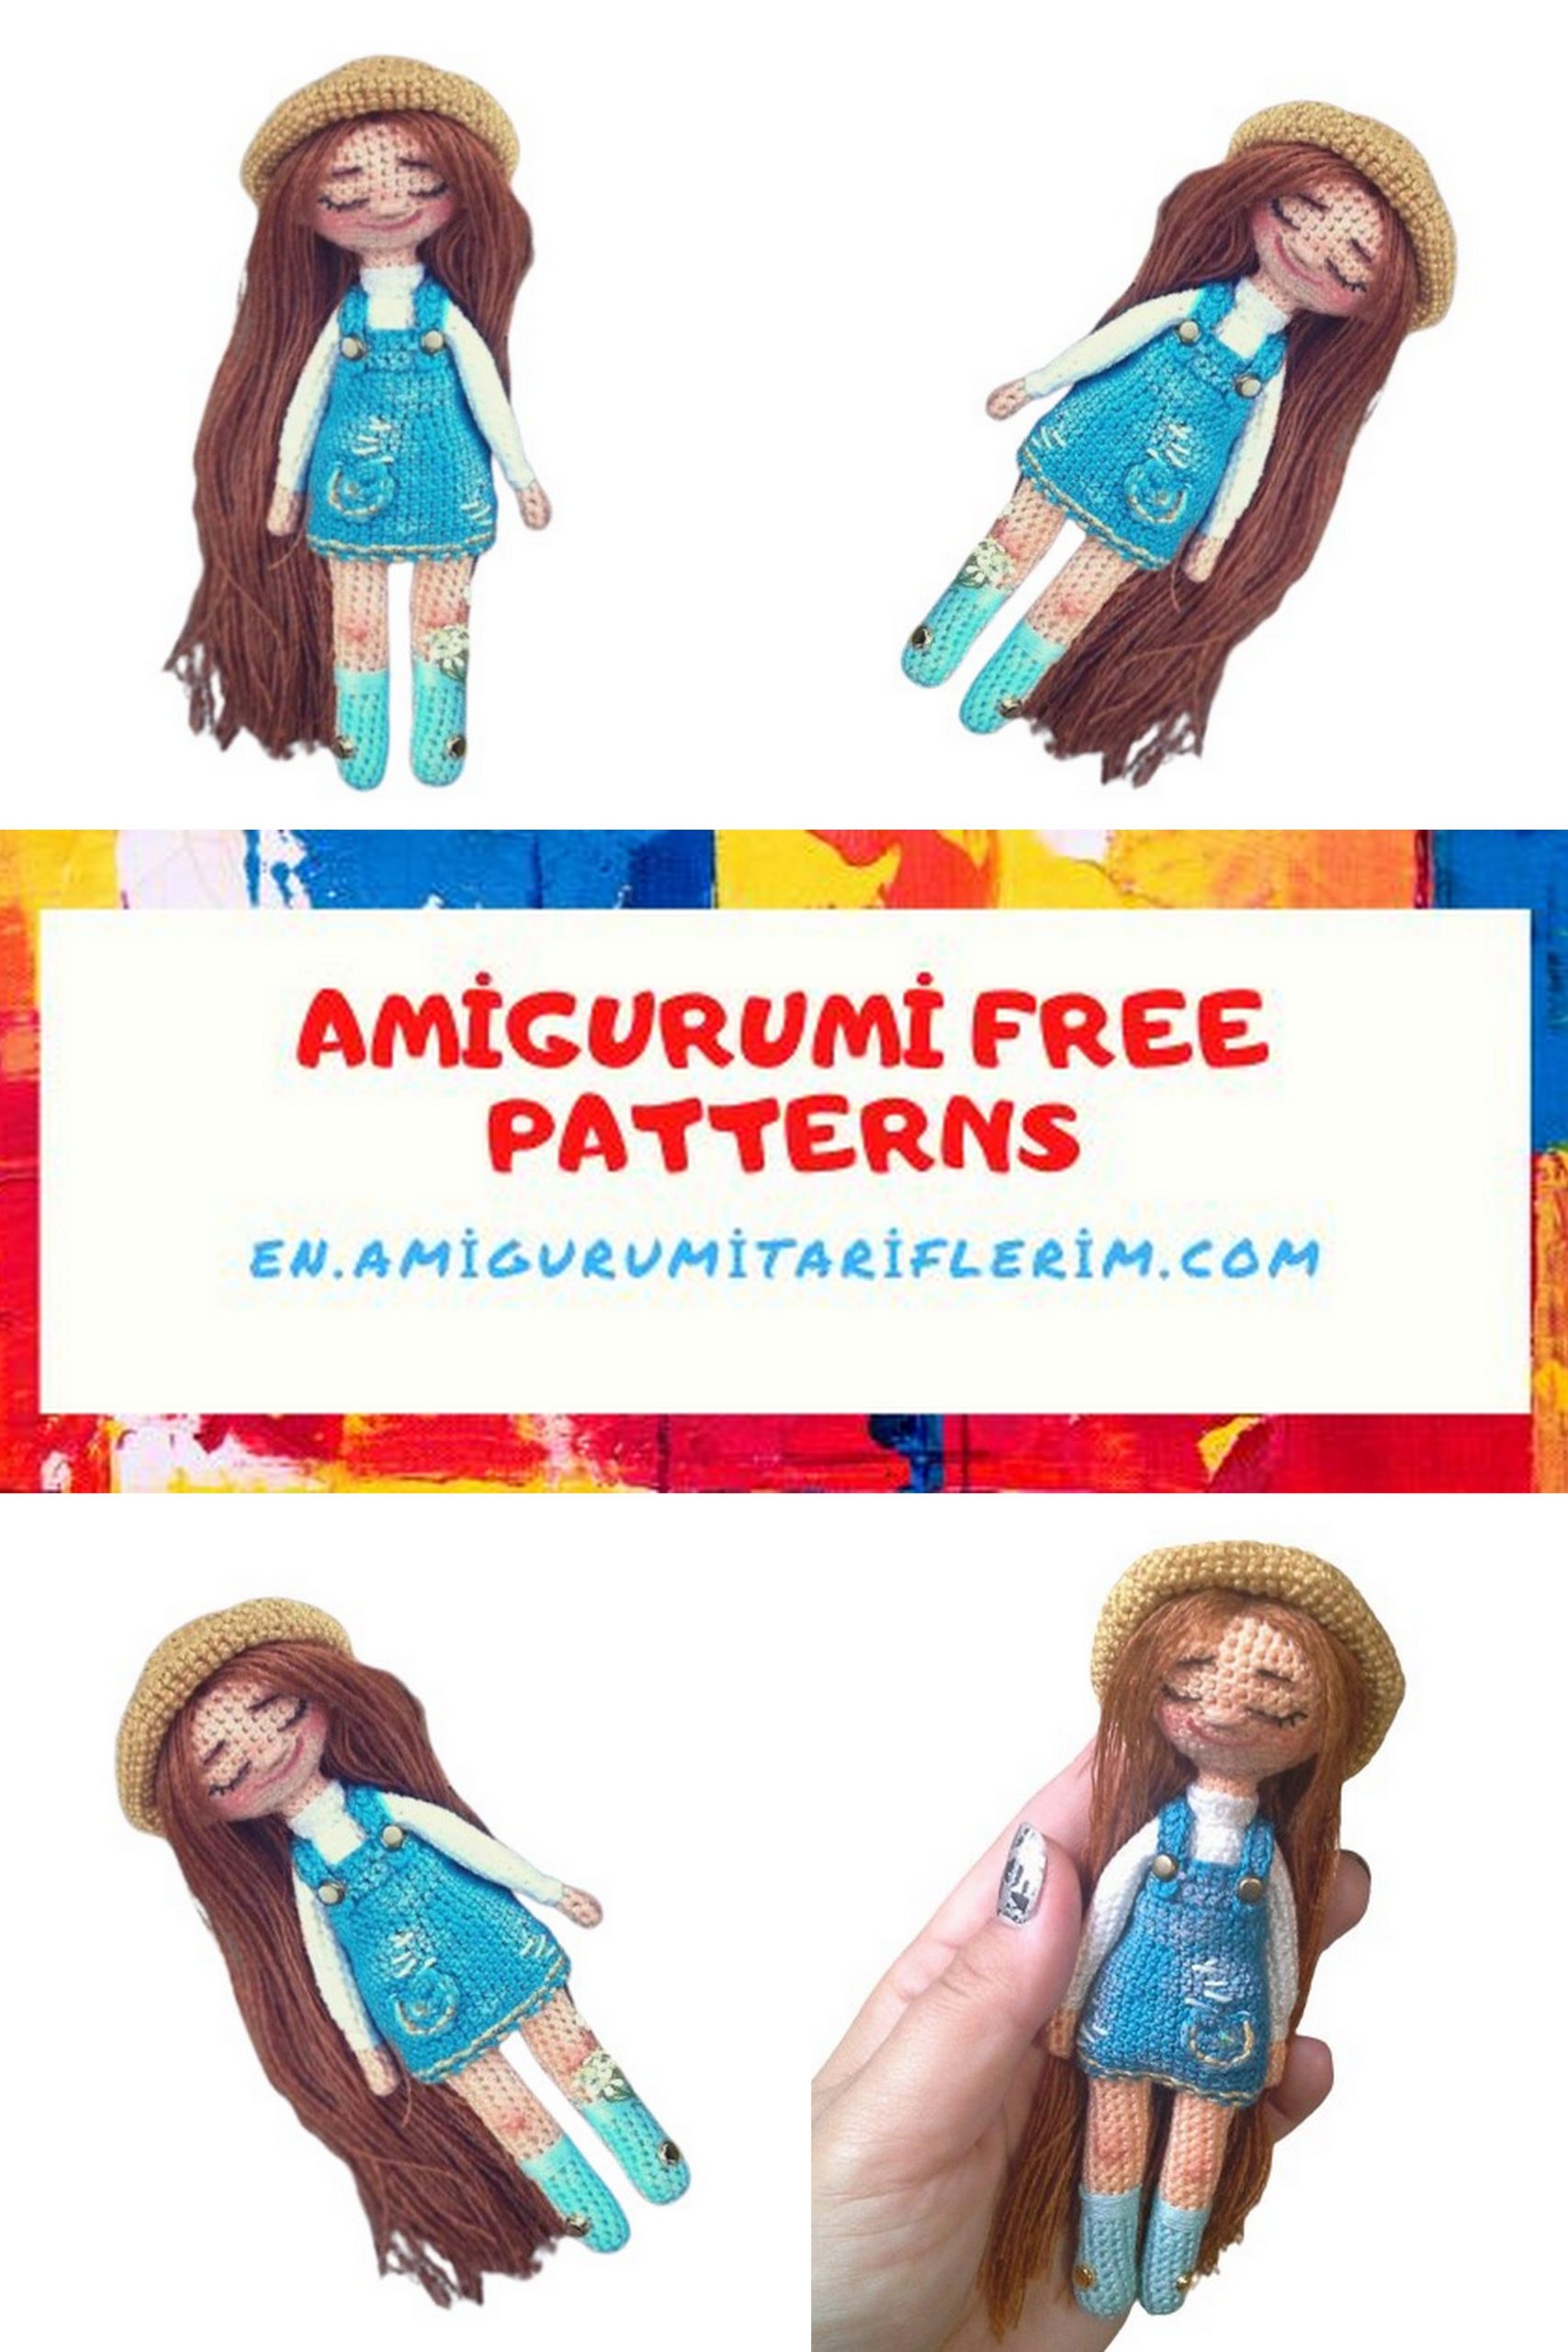
Yarn “Iris” (when using this yarn, the doll will be 14 cm tall), but you can use any similar yarn, thicker or thinner – this will change the size of the toy. The main condition is that all yarn should be of the same thickness, preferably cotton, as other threads will look different. Colors are as shown in the photo, but you can choose your color palette.
A crochet hook suitable for your yarn (I used a Tulip 1.1 mm hook), for a tighter stitch, you can use a smaller hook.
A bit of embroidery floss or regular sewing threads in black and red for facial embroidery.
Yarn for hair – any you like. I used acrylic embroidery thread from the Riolis company, which is also called woolen floss. You can use special doll hair – it depends on your preference and what you have.
Stuffing material (polyfill, hollowfiber).
Colored pencils in pink and brown – the softer the pencil, the better, watercolor pencils work well. You can also use dry pastels or blush if needed.
A needle with a wide eye for sewing the parts together and a finer needle with a sharp tip (I usually use a beading needle).
Decorative elements – half beads, rhinestones, small buttons, brads (as in my case) – whatever you have. You can also decorate with embroidery.
I also tinted the dress with white acrylic paint, but this is optional; I just wanted a “worn jeans” effect.
Abbreviations:
Sc – single crochet
Inc – increase
Dec – decrease
Hdc – half double crochet
Ch – chain stitch
PATTERN
Legs (2 pieces):
Begin with blue yarn (shoes):
1st row: 6 sc in magic ring.
2nd row: 6 inc (12 sc).
3rd-13th rows: 11 rows of 12 sc each.
Switch to flesh-colored yarn.
14th-25th rows: 12 sc in each row.
Cut the yarn, secure it, and stuff the piece with polyfill.
Crochet the second leg in the same way, but in the 25th row, before finishing, switch back to blue (you can skip this and continue with flesh-colored yarn, but I do this to distinguish the underwear).
Join the two legs: Chain 3, join with a sc to the first leg, and crochet in the round:
26th row: 12 sc (1st leg), 3 sc (in the chain), 12 sc (2nd leg), 3 sc (in the chain) (30 sc).
27th-31st rows: 30 sc.
Switch to white yarn (sweater):
32nd row: 30 sc.
33rd row: (3 sc, dec) x 6 (24 sc).
34th row: 24 sc.
35th row: (2 sc, dec) x 6 (18 sc).
36th-45th rows: 18 sc.
Stuff the piece with polyfill evenly.
46th row: (1 sc, dec) x 6 (12 sc).
Stuff more firmly, cinch the stitches, secure the yarn, and cut it.

Head:
1st row: 6 sc in magic ring.
2nd row: 6 inc (12 sc).
3rd row: (1 sc, inc) x 6 (18 sc).
4th row: (2 sc, inc) x 6 (24 sc).
5th row: (3 sc, inc) x 6 (30 sc).
6th row: (4 sc, inc) x 6 (36 sc).
7th row: (5 sc, inc) x 6 (42 sc).
8th-14th rows: 42 sc.
15th row: (5 sc, dec) x 6 (36 sc).
16th row: (4 sc, dec) x 6 (30 sc).
17th row: (3 sc, dec) x 6 (24 sc).
18th row: (2 sc, dec) x 6 (18 sc).
19th row: (1 sc, dec) x 6 (12 sc).
Fill the piece tightly and evenly with polyfill, then crochet the neck:
20th-24th rows: 12 sc.
Secure the yarn, cut it, leaving a long end for sewing.
Attach the head to the body using the outermost loops, as shown in the photo.
Sweater collar: Chain 14 + 2 turning chains, sc in the 3rd chain from the hook and in each chain to the end, a total of 14 sc. Sew it as shown in the photo.
P.S. I’ll clarify – I always crochet dolls with the wrong side facing out, as you may have noticed. I like it that way because the fabric becomes denser and more uniform, smooth. You can crochet as you find convenient and to your liking! 😊
It’s a detailed set of instructions for creating an amigurumi doll. Enjoy your crocheting!
Arms (2 pieces):
Flesh-colored yarn.
1st row: 7 sc in magic ring.
2nd row: 6 sc, inc (8 sc).
3rd-6th rows: 8 sc.
Switch to white or a color that matches the sweater.
7th-8th rows: 8 sc.
9th row: 7 sc, inc (9 sc).
10th-23rd rows: 9 sc.
Cut the yarn, pull the loops tight, and secure it. You can add stuffing if you prefer. In the photo of my doll, the arms are without stuffing as they hold their shape well. You can add a bit of polyfill, but it’s better to leave the upper part free so that the arms don’t stick out to the sides.
Another detail to note is to compare the arm length with the body, especially if you don’t plan to stuff them. Without stuffing, the piece will look shorter, and you may need to crochet a few extra rows.
If you plan to have removable clothing, you can sew the arms in place. If you are making a non-removable dress like mine, move on to making the dress before attaching the arms.
Ears (optional, not visible under the hair): 2 pieces
6 sc in a magic ring, pull tight but do not close the ring. It forms a semi-circle. Ready to sew in the appropriate place.
Dress:
Chain 24 + 2 turning chains. If you’re using a different yarn, adjust the chain length around the doll’s chest; you may need more or fewer stitches.
Crochet in back loops only for the following rows:
1st-2nd rows: 24 hdc.
3rd row: (inc, 3 hdc) x 6 (30 hdc).
4th row: 30 hdc.
Close the circle and continue crocheting in the round. Make sure it fits around the doll.
5th-7th rows: 30 hdc.
8th row: (4 hdc, inc) x 6 (36 hdc).
9th row: 36 hdc.
10th row: (5 hdc, inc) x 6 (42 hdc).
11th-20th rows: 42 hdc.
Finish crocheting where the back will be closed with a slip stitch. You can crochet 2-3 slip stitches one after the other to make the edge even. Cut the yarn, secure it.
If the dress is intended to be removable, create buttons or snaps in the back and attach straps. If it’s not meant to be removable, dress the doll, sew up the opening on the back, and then attach the arms and straps.
Straps (2 pieces):
Chain 16 + 2 turning chains.
16 hdc.
Pocket (1 piece, but you can make 2 if you want):
1st row: 6 sc in a magic ring, pull tight but do not close the ring. Turn the work.
2nd row: 6 inc (12 sc).
Sew the pockets with sand-colored threads and make a decorative row along the bottom of the dress. You can also embroider lighter-colored stripes on the dress, as shown in the photo of my doll.
I tinted the dress with white acrylic paint – a drop of paint on a dry brush and apply it where you want a slight whitening effect. This gives the appearance of worn jeans if you’re using matching yarn colors.
Before embroidering the face, it’s better to outline it with a pencil to ensure symmetric eyes. Embroider with embroidery floss or regular threads in a single strand. Then, shade the eyes with a brown pencil and add pink or red for the cheeks.
For the hair, sew it through the holes on the head, usually making two passes for strength. Then, make small stitches around the head, securing the hair, leaving the front strands free. For small dolls, I like this method of hair attachment, especially for creating a hairstyle. You can secure each strand individually, but it can result in a bulky “mane,” especially with thick yarn for the hair.
Hat:
Use straw-colored yarn or any color you prefer.
1st row: 6 sc in a magic ring.
2nd row: 6 inc (12 sc).
For all the following rows, crochet in the back loops only:
3rd row: (1 sc, inc) x 6 (18 sc).
4th row: (2 sc, inc) x 6 (24 sc).
5th row: (3 sc, inc) x 6 (30 sc).
6th row: (4 sc, inc) x 6 (36 sc).
7th row: (5 sc, inc) x 6 (42 sc).
Check if the diameter fits considering the volume of your future hair. If it’s not enough, you may need to add one or two more rows with increases.
8th-12th rows: 42 sc.
13th row: Crochet in the FRONT loops only following the pattern. Start with 3 turning chains.
14th row: Follow the pattern, starting with 3 turning chains.
15th row: Edge the hat with 2 slip stitches and picot stitches, alternating to the end of the row.
Based on the pattern and the number of stitches in the hat base, you’ll have one extra single crochet in the 13th row. I circled it with a pencil; do not crochet it at the very end of the row. In the 14th row, make 2 slip stitches instead of 3. Decorate as you like.
Bonus: Hat with Lace Edging:
1st row: 6 sc in a magic ring.
2nd row: 6 inc (12 sc).
3rd row: (1 sc, inc) x 6 (18 sc).
4th row: (2 sc, inc) x 6 (24 sc).
5th row: (3 sc, inc) x 6 (30 sc).
6th row: (4 sc, inc) x 6 (36 sc).
7th row: (5 sc, inc) x 6 (42 sc).
For all subsequent rows, crochet in the BACK loops only.
8th-12th rows: 42 sc.
13th row: Follow the pattern, starting with 3 turning chains.
14th row: Follow the pattern, starting with 3 turning chains.
15th row: Edge the hat with 2 slip stitches and picot stitches, alternating to the end of the row.
According to the pattern and the number of stitches in the hat base, there will be one extra single crochet in the 13th row. I circled it with a pencil; do not crochet it at the very end of the row. In the 14th row, make 2 slip stitches instead of 3. Decorate as you like.
This concludes the translation of the instructions. Enjoy crafting your little Sonia!